FULL RANGE DEPTH STOP
1. | You can use the depth stop (A) Fig. 15 to set the |
|
|
|
|
|
| cutterhead to a |
| A |
| ||
| can be set at any depth from 1/8" (3.2 mm) to |
|
|
|
|
|
| (165 mm) for repetitive planing. |
|
|
|
|
|
2. | To set the depth stop, lower the cutterhead to the |
|
|
|
|
|
| desired depth. |
|
|
|
|
|
3. | Rotate the depth stop knob (A) Fig. 15 clockwise, |
|
|
|
|
|
| while applying light downward pressure, until it |
|
|
|
|
|
| stops. |
|
|
|
|
|
NOTE: If you rotate the depth stop knob past the |
|
|
|
|
| |
stopping point, the cutterhead adjusting handle will |
|
|
|
|
| |
|
|
| Fig. 15 |
| ||
start to move. |
|
|
|
| ||
|
|
|
|
| ||
4.Push down on the depth stop knob and turn the
knob approximately 1/4 turn clockwise until the depth stop engages.
5.Raise the cutterhead to allow for the workpiece. As it is planed down, the cutterhead will stop at the height at which the depth stop was engaged.
6.To disengage the depth stop, raise the cutterhead 1/2 turn, and turn the depth stop knob counterclockwise. ![]() Disengage the depth stop when it is not being used.
Disengage the depth stop when it is not being used.
ADJUSTABLE INDEXING RING
The cutterhead adjusting handle has an adjustment ring (A) Fig. 16. To use the adjustment ring to make fine adjustments:
1.Measure the thickness of a planed board.
2.Set the zero position of the ring to align with the arrow.
3.Rotate the handle to the desired depth of cut, as indicated on the ring. Each indicator on the ring is
equivalent to 1/128" (.2 mm) for making minute cuts.
4. Plane the workpiece. | A |
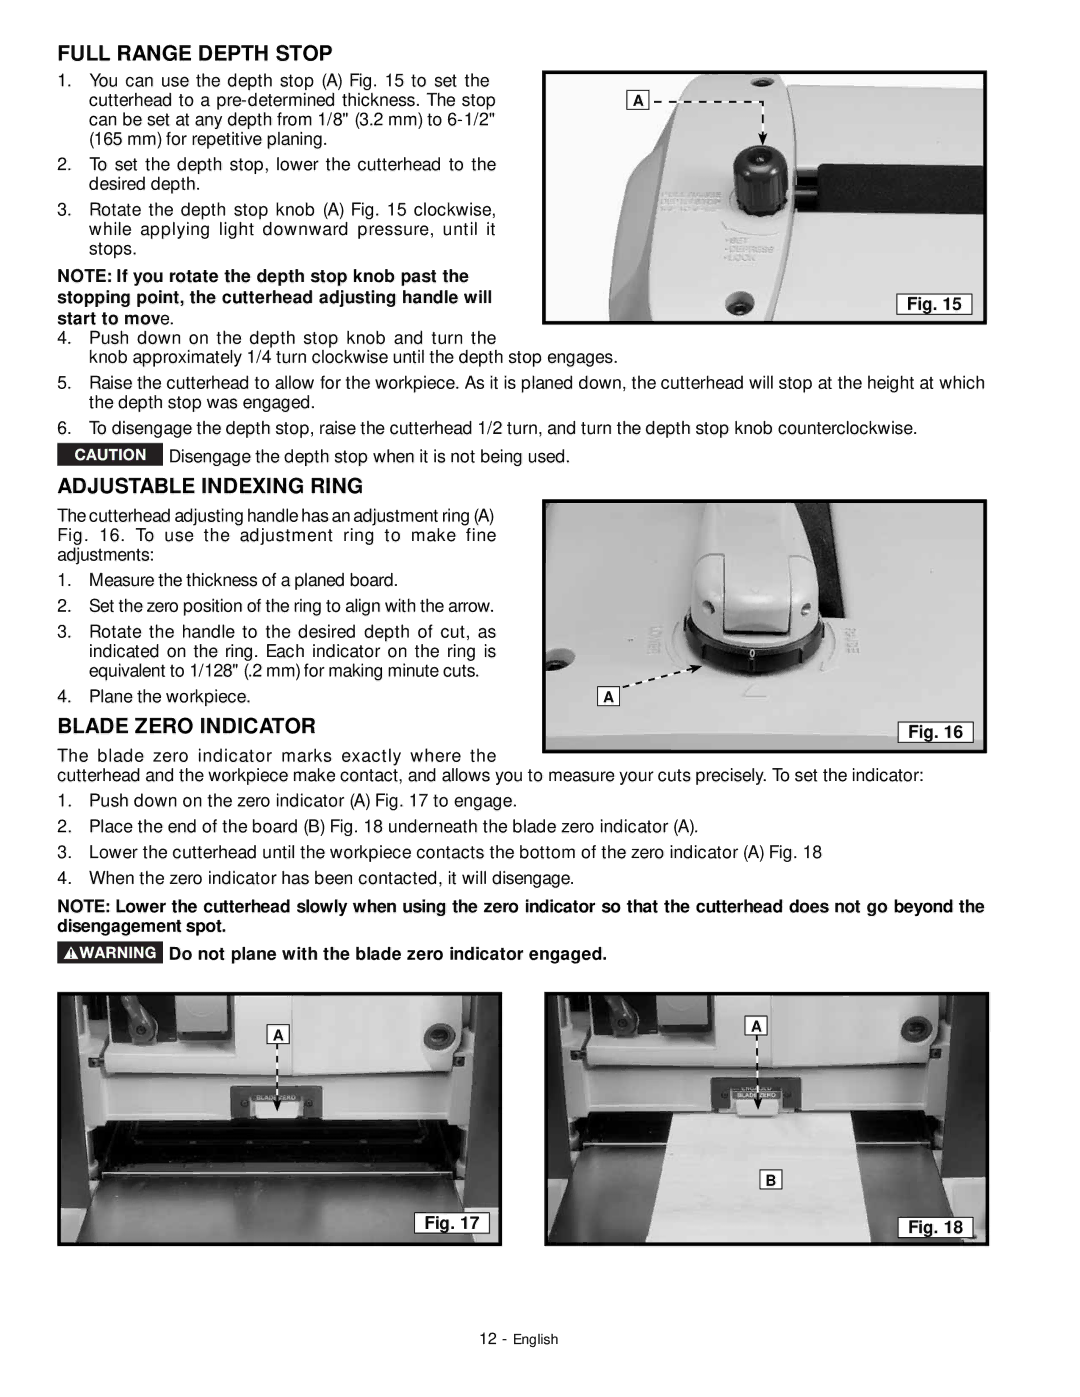
BLADE ZERO INDICATOR |
|
|
|
| Fig. 16 |
| |
The blade zero indicator marks exactly where the |
|
|
|
|
|
|
cutterhead and the workpiece make contact, and allows you to measure your cuts precisely. To set the indicator:
1.Push down on the zero indicator (A) Fig. 17 to engage.
2.Place the end of the board (B) Fig. 18 underneath the blade zero indicator (A).
3.Lower the cutterhead until the workpiece contacts the bottom of the zero indicator (A) Fig. 18
4.When the zero indicator has been contacted, it will disengage.
NOTE: Lower the cutterhead slowly when using the zero indicator so that the cutterhead does not go beyond the disengagement spot.
 Do not plane with the blade zero indicator engaged.
A
A
Fig. 17
B
Fig. 18
12 - English