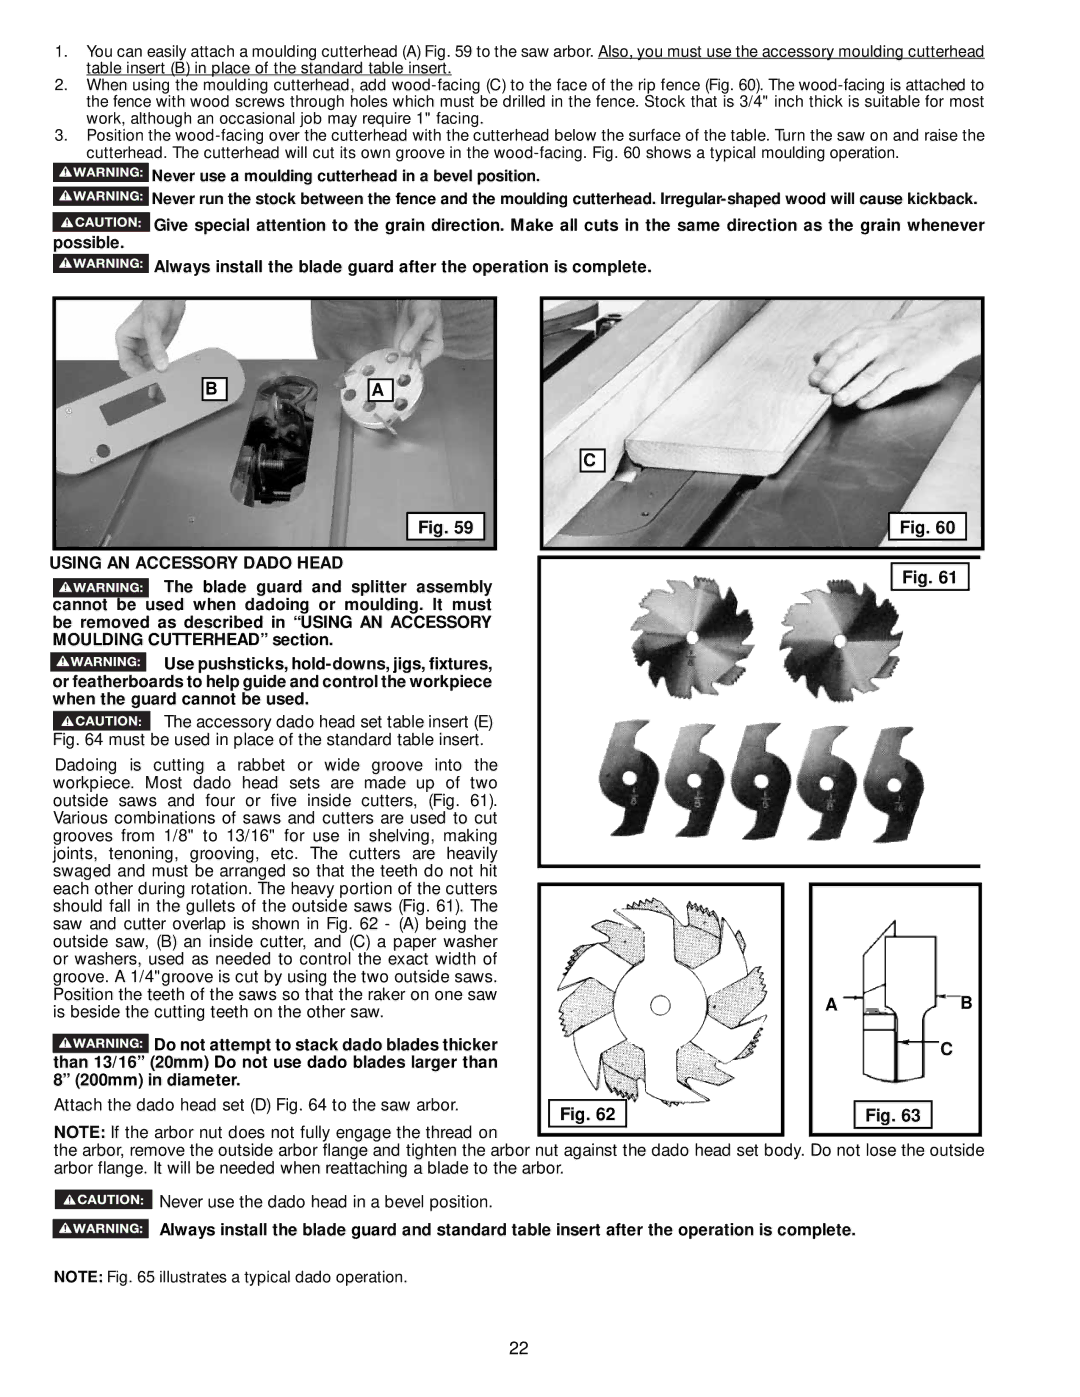
1.You can easily attach a moulding cutterhead (A) Fig. 59 to the saw arbor. Also, you must use the accessory moulding cutterhead table insert (B) in place of the standard table insert.
2.When using the moulding cutterhead, add
3.Position the
![]() Never use a moulding cutterhead in a bevel position.
Never use a moulding cutterhead in a bevel position.
![]() Never run the stock between the fence and the moulding cutterhead.
Never run the stock between the fence and the moulding cutterhead.
![]() Give special attention to the grain direction. Make all cuts in the same direction as the grain whenever possible.
Give special attention to the grain direction. Make all cuts in the same direction as the grain whenever possible.
Always install the blade guard after the operation is complete.
B |
| A |
C
|
|
|
|
|
| Fig. 59 |
|
|
|
|
|
|
| Fig. 60 |
| |||
|
|
|
|
|
|
|
|
|
|
|
|
|
|
|
|
|
|
|
USING AN ACCESSORY DADO HEAD |
|
|
|
|
|
|
|
|
|
| ||||||||
|
|
|
|
|
| Fig. 61 |
|
| ||||||||||
|
|
|
|
| The blade guard and splitter assembly |
|
|
|
|
|
|
| ||||||
|
|
|
|
|
|
|
|
|
|
|
|
| ||||||
|
|
|
|
|
|
|
|
|
|
|
|
|
|
| ||||
|
|
|
|
|
|
|
|
|
|
|
|
|
|
| ||||
| cannot be | used when dadoing or moulding. It must |
|
|
|
|
|
|
|
|
|
| ||||||
| be removed as described in “USING AN ACCESSORY |
|
|
|
|
|
|
|
|
|
| |||||||
| MOULDING CUTTERHEAD” section. |
|
|
|
|
|
|
|
|
|
| |||||||
|
|
|
|
| Use pushsticks, |
|
|
|
|
|
|
|
|
|
| |||
|
|
|
|
|
|
|
|
|
|
|
|
|
|
| ||||
|
|
|
|
|
|
|
|
|
|
|
|
|
|
| ||||
| or featherboards to help guide and control the workpiece |
|
|
|
|
|
|
|
|
|
| |||||||
| when the guard cannot be used. |
|
|
|
|
|
|
|
|
|
| |||||||
|
|
|
|
| The accessory dado head set table insert (E) |
|
|
|
|
|
|
|
|
|
| |||
| Fig. 64 must | be used in place of the standard table insert. |
|
|
|
|
|
|
|
|
|
| ||||||
| Dadoing is cutting a rabbet or wide groove into the |
|
|
|
|
|
|
|
|
|
| |||||||
| workpiece. Most dado head sets are made up of two |
|
|
|
|
|
|
|
|
|
| |||||||
| outside saws and four or five inside cutters, (Fig. 61). |
|
|
|
|
|
|
|
|
|
| |||||||
| Various combinations of saws and cutters are used to cut |
|
|
|
|
|
|
|
|
|
| |||||||
| grooves from 1/8" to 13/16" for use in shelving, making |
|
|
|
|
|
|
|
|
|
| |||||||
| joints, tenoning, grooving, etc. The cutters are heavily |
|
|
|
|
|
|
|
|
|
| |||||||
| swaged and must be arranged so that the teeth do not hit |
|
|
|
|
|
|
|
|
|
| |||||||
|
|
|
|
|
|
|
|
|
|
| ||||||||
| each other during rotation. The heavy portion of the cutters |
|
|
|
|
|
|
|
|
|
| |||||||
|
|
|
|
|
|
|
|
|
|
| ||||||||
| should fall in the gullets of the outside saws (Fig. 61). The |
|
|
|
|
|
|
|
|
|
| |||||||
| saw and cutter overlap is shown in Fig. 62 - (A) being the |
|
|
|
|
|
|
|
|
|
| |||||||
| outside saw, (B) an inside cutter, and (C) a paper washer |
|
|
|
|
|
|
|
|
|
| |||||||
| or washers, used as needed to control the exact width of |
|
|
|
|
|
|
|
|
|
| |||||||
| groove. A 1/4"groove is cut by using the two outside saws. |
|
|
|
|
|
|
|
|
|
| |||||||
| Position the teeth of the saws so that the raker on one saw |
|
|
|
| A |
|
| B |
| ||||||||
| is beside the cutting teeth on the other saw. |
|
|
|
|
|
|
| ||||||||||
|
|
|
|
|
|
|
|
|
|
| ||||||||
|
|
|
|
| Do not attempt to stack dado blades thicker |
|
|
|
|
|
|
| C |
| ||||
|
|
|
|
|
|
|
|
|
|
|
|
| ||||||
|
|
|
|
|
|
|
|
|
| |||||||||
|
|
|
|
|
|
|
|
|
| |||||||||
| than 13/16” (20mm) Do not use dado blades larger than |
|
|
|
|
|
|
|
|
|
| |||||||
| 8” (200mm) in diameter. |
|
|
|
|
|
|
|
|
|
| |||||||
| Attach the dado head set (D) Fig. 64 to the saw arbor. |
|
|
|
|
|
|
|
|
|
| |||||||
|
| Fig. 62 |
|
|
| Fig. 63 |
|
|
| |||||||||
| NOTE: If the arbor nut does not fully engage the thread on |
|
|
|
|
|
| |||||||||||
|
|
|
|
|
|
|
|
|
|
| ||||||||
|
|
|
|
|
|
|
|
|
|
| ||||||||
the arbor, remove the outside arbor flange and tighten the arbor nut against the dado head set body. Do not lose the outside arbor flange. It will be needed when reattaching a blade to the arbor.
![]() Never use the dado head in a bevel position.
Never use the dado head in a bevel position.
Always install the blade guard and standard table insert after the operation is complete.
NOTE: Fig. 65 illustrates a typical dado operation.
22