English
TO RESET THE LASER UNIT FOR CONTINUED USE
•Turn the unit off and back on again using the power button on the laser unit control panel.
OR
•Put the unit in sleep mode and then wake it back up using the power button on the remote control.
NOTE: Always recheck the laser setup after the Height of Instrument Alert has triggered.
Laser Troubleshooting
LASER AND REMOTE CONTROL ARE OUT OF SYNC
•On the remote control, press and hold speed/rotation button for 4 seconds to activate Public Mode.
•On the laser unit, press and hold speed/rotation button for 4 seconds to activate Public Mode.
Using the Laser on a Tripod
1.Position the tripod securely and set it to the desired height.
2.Make sure that the top of the tripod is roughly level. The laser will
3.Secure the laser to the tripod by screwing the threaded knob on the tripod into the female thread on the bottom of the laser. NOTE: Be sure that the tripod you are working with has a
4.Turn the laser on and adjust the rotation speed and controls as desired.
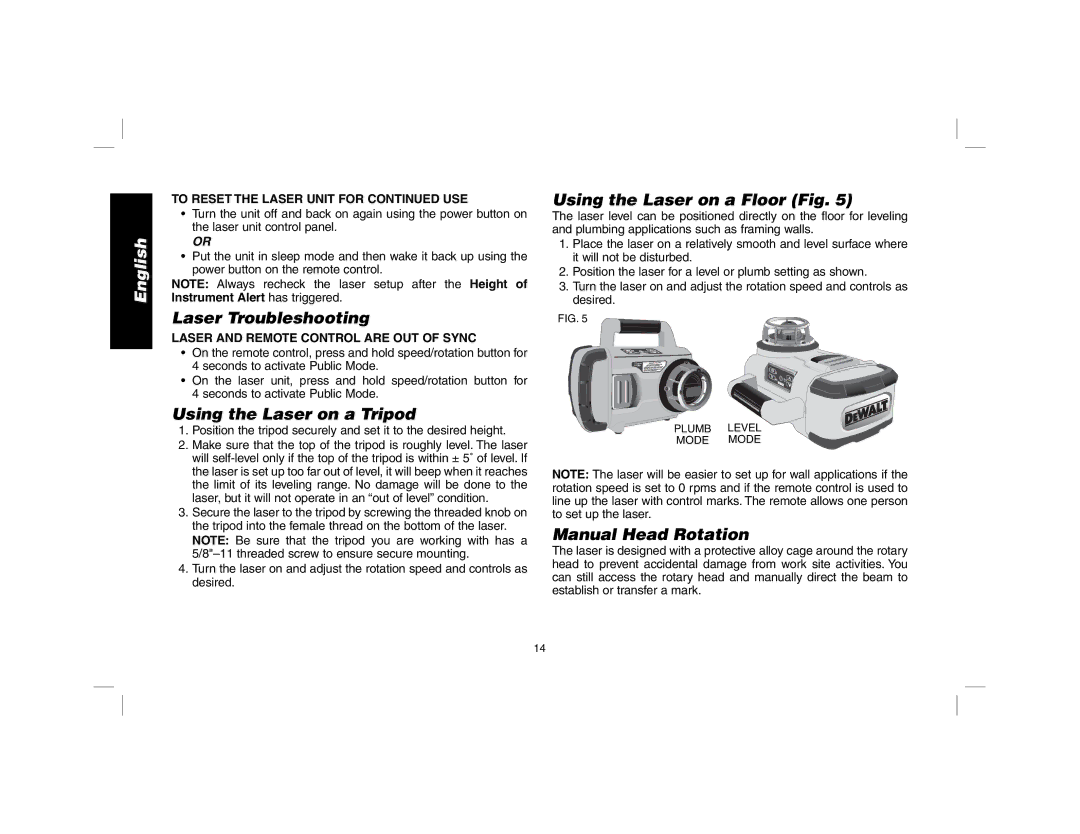
Using the Laser on a Floor (Fig. 5)
The laser level can be positioned directly on the floor for leveling and plumbing applications such as framing walls.
1.Place the laser on a relatively smooth and level surface where it will not be disturbed.
2.Position the laser for a level or plumb setting as shown.
3.Turn the laser on and adjust the rotation speed and controls as desired.
FIG. 5
PLUMB LEVEL
MODE MODE
NOTE: The laser will be easier to set up for wall applications if the rotation speed is set to 0 rpms and if the remote control is used to line up the laser with control marks. The remote allows one person to set up the laser.
Manual Head Rotation
The laser is designed with a protective alloy cage around the rotary head to prevent accidental damage from work site activities. You can still access the rotary head and manually direct the beam to establish or transfer a mark.
14
