Installing and Removing the
Battery Pack (Fig. 2)
NOTE: Make sure your battery pack is fully charged before you install it.
INSTALLING THE BATTERY PACK
1. Release latch (B) to open the hatch door (A). Insert the battery |
pack (C). |
level, the
NOTE: The head will begin or resume rotation once the laser is level.
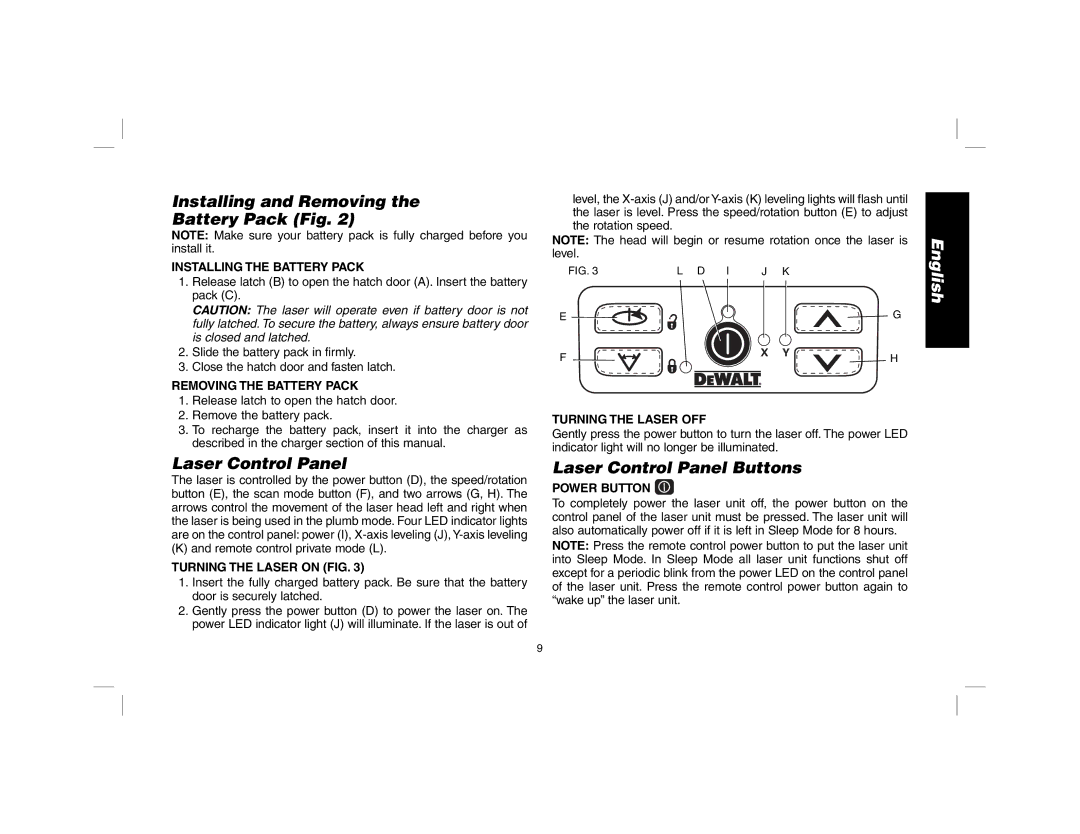
FIG. 3 | L | D | I | J |
| K |
English
| CAUTION: The laser will operate even if battery door is not |
| fully latched. To secure the battery, always ensure battery door |
| is closed and latched. |
2. | Slide the battery pack in firmly. |
3. | Close the hatch door and fasten latch. |
REMOVING THE BATTERY PACK
E ![]()
![]()
![]()
![]()
![]()
![]()
F
![]()
![]()
![]() G
G
![]()
![]()
![]() H
H
1.Release latch to open the hatch door.
2.Remove the battery pack.
3.To recharge the battery pack, insert it into the charger as described in the charger section of this manual.
Laser Control Panel
The laser is controlled by the power button (D), the speed/rotation button (E), the scan mode button (F), and two arrows (G, H). The arrows control the movement of the laser head left and right when the laser is being used in the plumb mode. Four LED indicator lights are on the control panel: power (I),
(K) and remote control private mode (L).
TURNING THE LASER ON (FIG. 3)
1.Insert the fully charged battery pack. Be sure that the battery door is securely latched.
2.Gently press the power button (D) to power the laser on. The power LED indicator light (J) will illuminate. If the laser is out of
9
TURNING THE LASER OFF
Gently press the power button to turn the laser off. The power LED indicator light will no longer be illuminated.
Laser Control Panel Buttons
POWER BUTTON 
To completely power the laser unit off, the power button on the control panel of the laser unit must be pressed. The laser unit will also automatically power off if it is left in Sleep Mode for 8 hours.
NOTE: Press the remote control power button to put the laser unit into Sleep Mode. In Sleep Mode all laser unit functions shut off except for a periodic blink from the power LED on the control panel of the laser unit. Press the remote control power button again to “wake up” the laser unit.