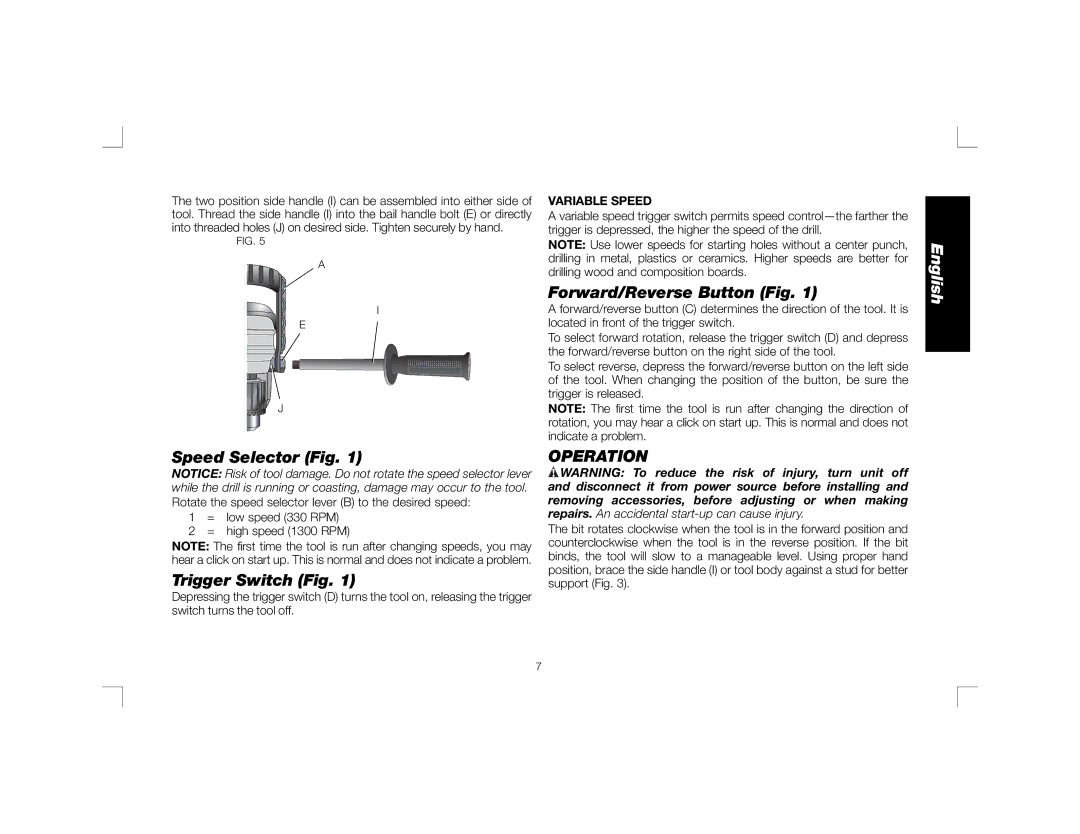
The two position side handle (I) can be assembled into either side of tool. Thread the side handle (I) into the bail handle bolt (E) or directly into threaded holes (J) on desired side. Tighten securely by hand.
FIG. 5
A
I
E
J
Speed Selector (Fig. 1)
NOTICE: Risk of tool damage. Do not rotate the speed selector lever while the drill is running or coasting, damage may occur to the tool. Rotate the speed selector lever (B) to the desired speed:
1= low speed (330 RPM)
2 = high speed (1300 RPM)
NOTE: The first time the tool is run after changing speeds, you may hear a click on start up. This is normal and does not indicate a problem.
Trigger Switch (Fig. 1)
Depressing the trigger switch (D) turns the tool on, releasing the trigger switch turns the tool off.
VARIABLE SPEED
A variable speed trigger switch permits speed
NOTE: Use lower speeds for starting holes without a center punch, drilling in metal, plastics or ceramics. Higher speeds are better for drilling wood and composition boards.
Forward/Reverse Button (Fig. 1)
A forward/reverse button (C) determines the direction of the tool. It is located in front of the trigger switch.
To select forward rotation, release the trigger switch (D) and depress the forward/reverse button on the right side of the tool.
To select reverse, depress the forward/reverse button on the left side of the tool. When changing the position of the button, be sure the trigger is released.
NOTE: The first time the tool is run after changing the direction of rotation, you may hear a click on start up. This is normal and does not indicate a problem.
OPERATION
![]() WARNING: To reduce the risk of injury, turn unit off and disconnect it from power source before installing and removing accessories, before adjusting or when making repairs. An accidental
WARNING: To reduce the risk of injury, turn unit off and disconnect it from power source before installing and removing accessories, before adjusting or when making repairs. An accidental
The bit rotates clockwise when the tool is in the forward position and counterclockwise when the tool is in the reverse position. If the bit binds, the tool will slow to a manageable level. Using proper hand position, brace the side handle (I) or tool body against a stud for better support (Fig. 3).
English
7
