english |
|
Table of contents |
|
Introduction | 1 |
Driver installation | 2 |
Making sure installation was successful | 5 |
Removing drivers | 5 |
Introduction
Thanks for choosing the Replicator 2.0. It offers a sim- ple, flexible and highly scalable connectivity solution between the Notebook and any USB 1.0/1.1/2.0 com- pliant devices. The Replicator 2.0 adds one
2.0LAN port, which supports 10/100 Mbps transfer rate.
Of course the Replicator 2.0 can connect the latest higher performance peripherals, such as
System requirements
•USB 2.0 host controller
•Windows 2000/XP
Package contents:
•1 x USB 2.0 Replicator 2.0
•1 x USB 2.0 A to B type cable (1800 mm)
•1 x AC Power Adapter (DC 5 V/3 A)
•1 x Driver CD
•1 x User’s manual
LED indicator description:
•Good link status
–When the USB Replicator 2.0 is connected to the PC or Notebook, all of the LED indicators will turn on. (Note: The Ethernet Linked to the Network or Internet)
•Power LED indicator
–When just the power adapter is plugged into the Replicator 2.0, the POWER LED indicator and PS/2 LED will turn on.
•Ethernet LED indicator
–When the Ethernet works correctly, the LED indi- cator will turn on the red LED.
–When the Ethernet work under 100 Mbps Net- work, the LED indicator will turn on the red and green LED at the same time.
Notes
•For the Replicator 2.0 working under stable environ- ment, please be sure to use the power adaptor.
•When the USB 2.0 HUB ports become overloaded, please refresh or
Driver installation
• Windows 2000/XP
Step 1:
•Insert the Driver CD into the
•Double click the “USBPR2.0_4.00.exe” program of Driver CD to install.
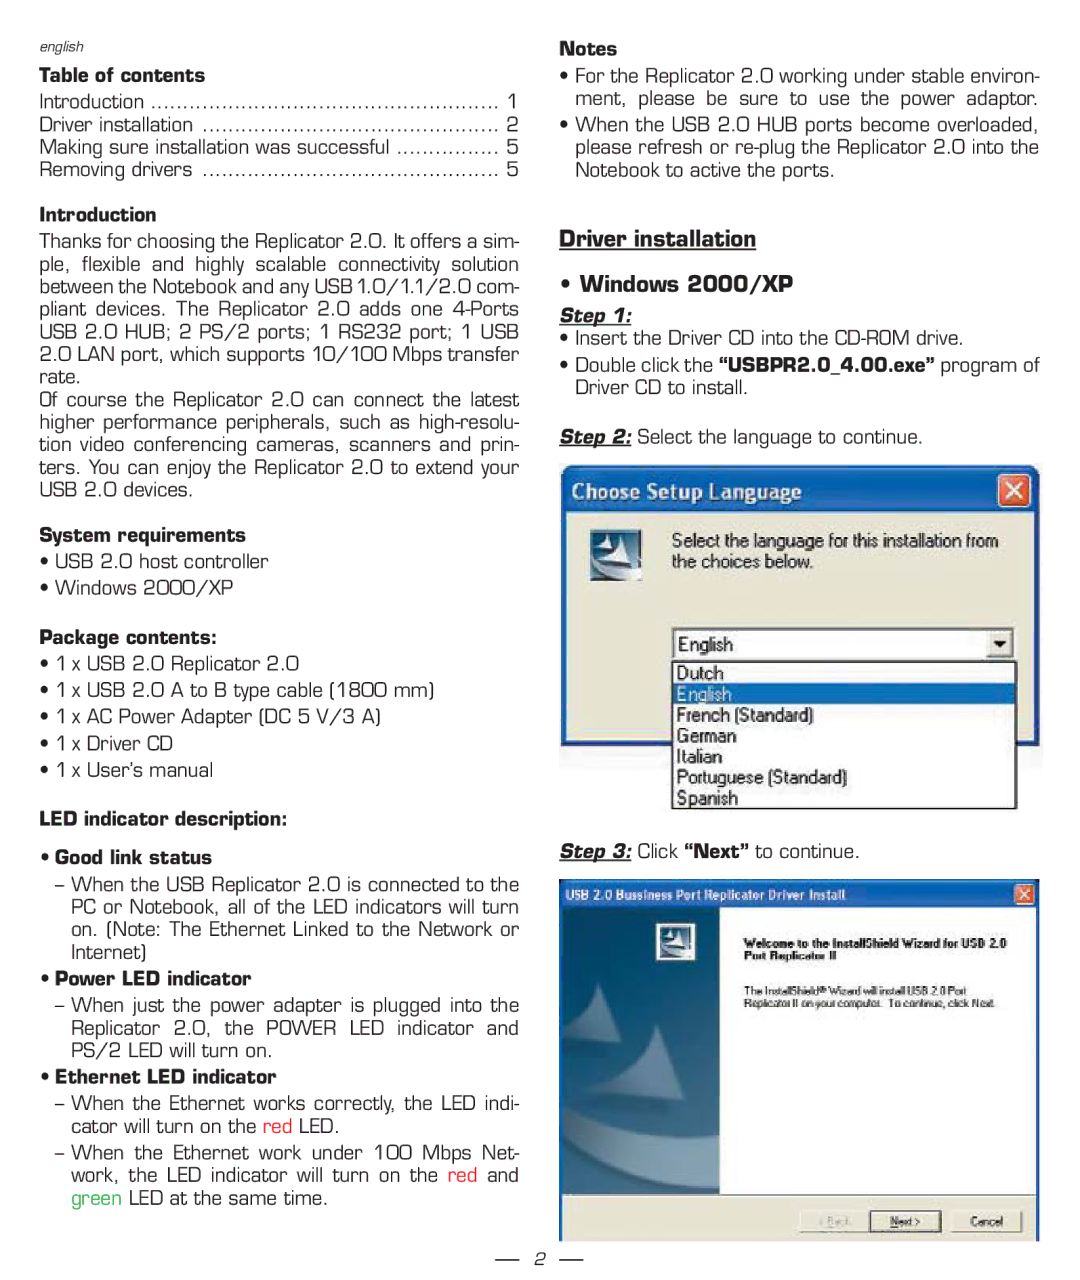
Step 2: Select the language to continue.
Step 3: Click “Next” to continue.
2