
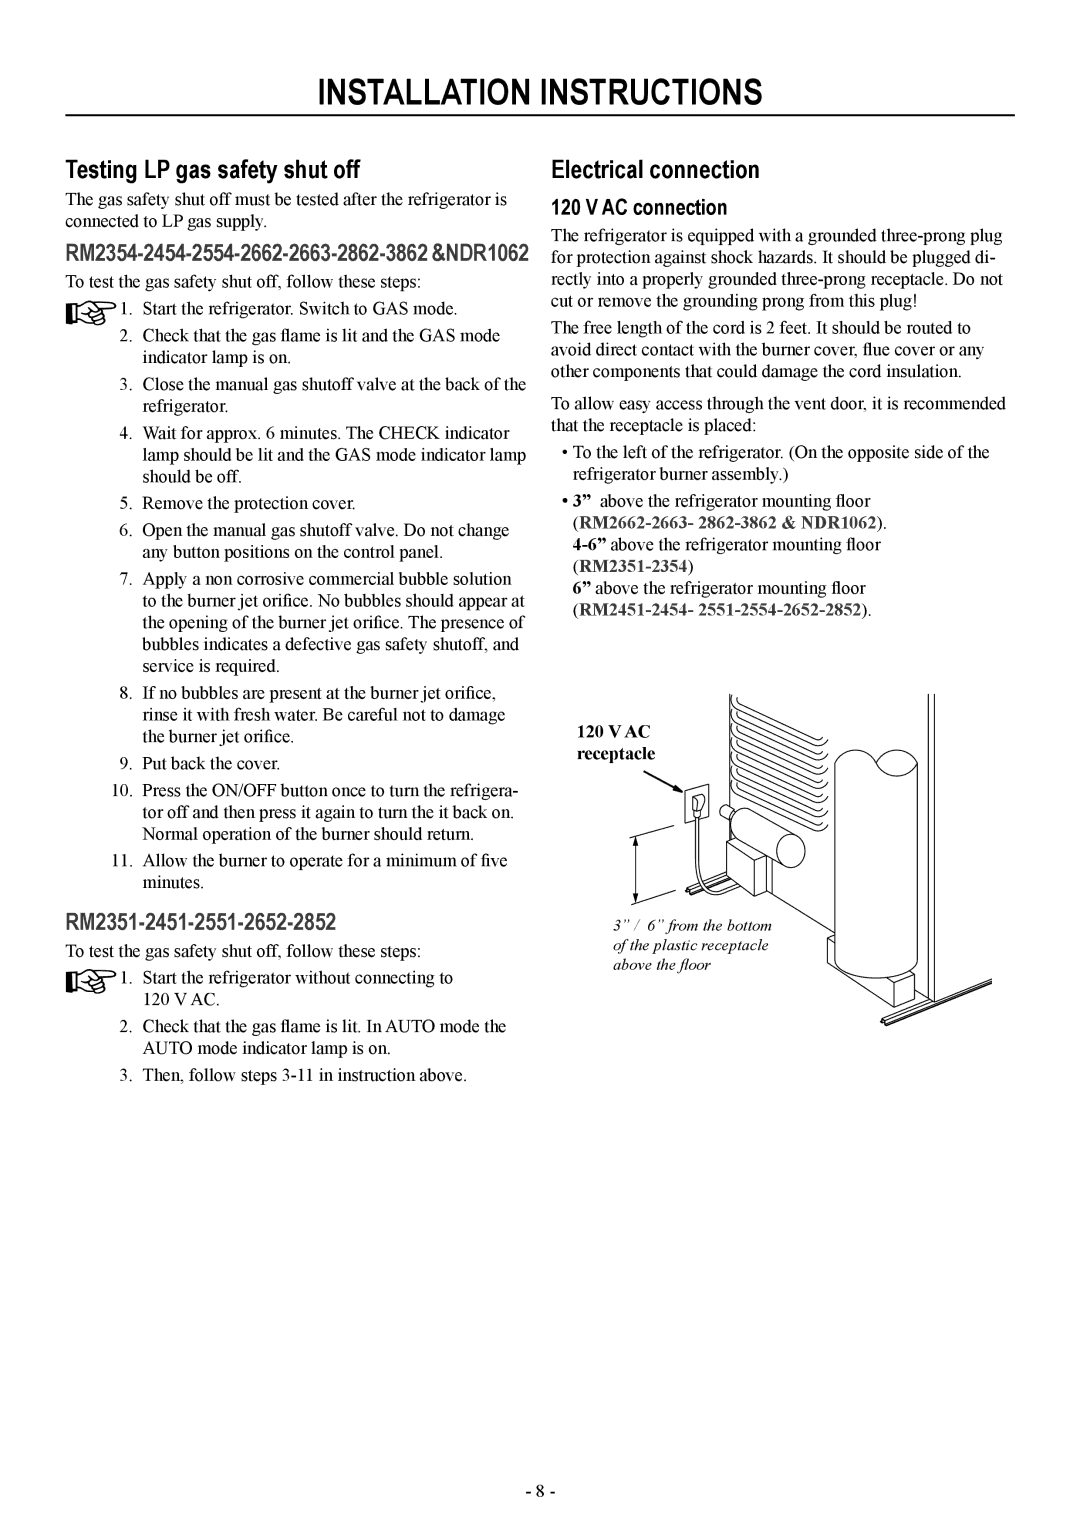
RM2351, RM2451, RM2551 specifications
Dometic RM2551, RM2451, and RM2351 are popular absorption refrigerators renowned for their reliability and efficiency. Designed primarily for use in recreational vehicles (RVs), caravans, and boats, these units have become essential for outdoor enthusiasts and travelers who need a dependable cooling solution while on the move.One of the main features shared across these models is their versatile absorption cooling technology. Utilizing a combination of ammonia, hydrogen, and water, the refrigerators operate silently and without the need for electrical compressors. This makes them especially appealing for use in environments where noise is a concern. Moreover, the absorption technology allows these refrigerators to function on multiple power sources, including 12V DC, 230V AC, and LPG gas. This versatility ensures that users can choose the most convenient power source available, making them ideal for off-grid adventures.
The Dometic RM2551 stands out with a capacity of 80 liters, providing ample storage for food and beverages. Its adjustable shelves and door compartments enhance organization, ensuring that users can make the most of the available space. The model also features a sleek design with a modern finish, making it an attractive addition to any RV or boat.
The RM2451 offers a slightly smaller capacity of 68 liters while maintaining similar features and functionalities. It is particularly favored for its energy efficiency, which translates to longer battery life in RVs. The model incorporates a reliable temperature control system that allows users to set their desired cooling level, ensuring optimal preservation of food and beverages.
On the other hand, the RM2351 is the most compact model with a capacity of 57 liters. This makes it a preferred choice for smaller vehicles or spaces where every inch counts. Despite its size, it does not compromise on performance, offering the same absorption cooling technology and flexibility in power sources as its larger counterparts.
All three models feature an intuitive control panel, allowing for easy operation, and they boast robust insulation that helps maintain temperature even in warm environments. The durable construction ensures longevity, making them worthy investments for those who love adventure.
In summary, the Dometic RM2551, RM2451, and RM2351 offer a range of sizes and capacities to cater to different needs while providing reliable cooling performance, energy efficiency, and versatility in power sources. Whether for long road trips, weekend getaways, or extended stays in nature, these absorption refrigerators are built to keep perishables fresh and drinks cool.