DM 2610935540
Operating Speeds - (Cont.)
The point to remember is this: You can do the great majority of work with the single speed at its regular speed of 35,000 RPM. But for certain materials and types of work, you need slower speeds — which is the reason the variable speed models and the speed control units are available.
To aid you in determining the optimum operational speed for different materials and different accessories, we have constructed a series of tables that appear on page 24, 25 and 26. By referring to these tables, you can discover the recommended speeds for each type of accessory. Look these tables over and become familiar with them.
Ultimately, the best way to determine the correct speed for work on any material is to practice for a few minutes on a piece of scrap, even after referring to the chart. You can quickly learn that a slower or faster speed is more effective just by observing what happens as you make a pass or two at different speeds. When working with plastic, for example, start at a slow rate of speed and increase the speed until you observe that the plastic is melting at the point of contact. Then reduce the speed slightly to get the optimum working speed.
Some rules of thumb in regard to speed:
1.Plastic and other materials that melt at low temperatures should be cut at low speeds.
2.Polishing, buffing and cleaning with a wire brush must be done at speeds not greater than 15,000 RPM to prevent damage to the brush.
3.Wood should be cut at high speed.
4.Iron or steel should be cut at high speed. If a high speed steel cutter starts to chatter — this normally means it is running too slow.
5.Aluminum, copper alloys, lead alloys, zinc alloys and tin may be cut at various speeds, depending on the type of cutting being done. Use paraffin or other suitable lubricant on the cutter to prevent the cut material from adhering to the cutter teeth.
Increasing the pressure on the tool is not the answer when it is not performing as you think it should. Perhaps you should be using a different accessory, and perhaps an adjustment in speed would solve the problem. Leaning on the tool does not help.
Let speed do the work!
Assembly & Operation of Attachments
Flex-Shaft 225
! WARNING | Not for use with router bits. Use | |
with router bits will cause | ||
kickback. | ||
|
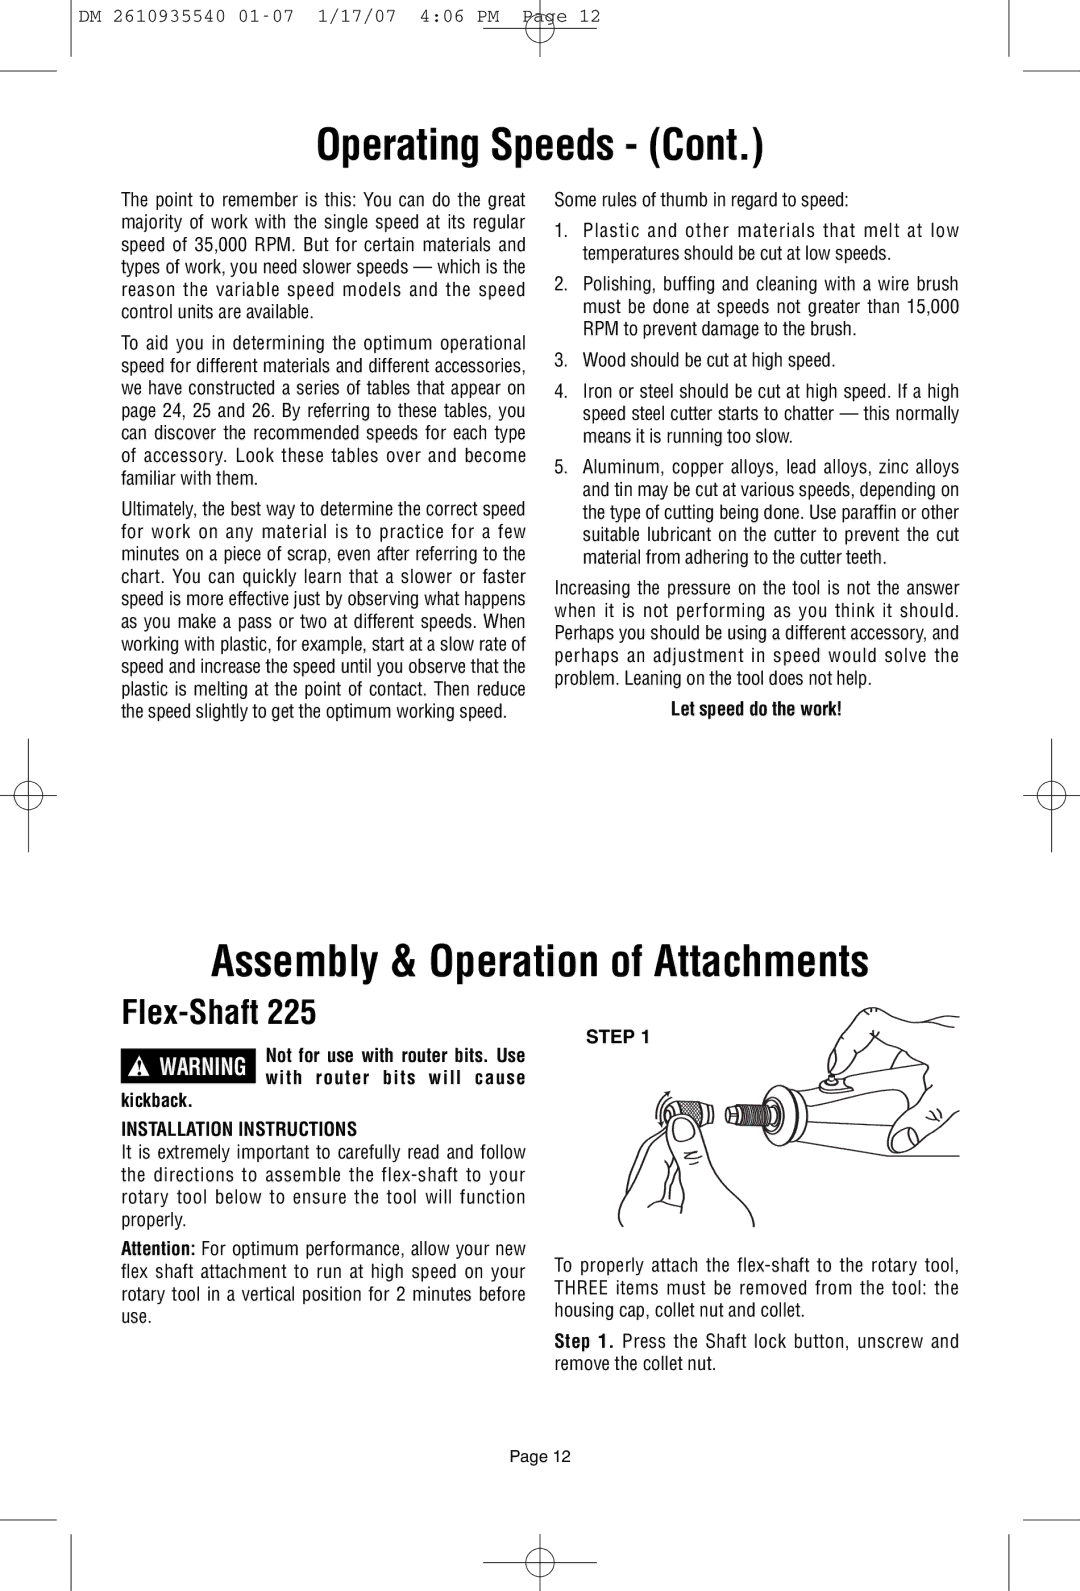
INSTALLATION INSTRUCTIONS
It is extremely important to carefully read and follow the directions to assemble the
Attention: For optimum performance, allow your new flex shaft attachment to run at high speed on your rotary tool in a vertical position for 2 minutes before use.
STEP 1
To properly attach the
Step 1. Press the Shaft lock button, unscrew and remove the collet nut.
Page 12