USING THE PROJECTOR
This section describes how to use and make adjustments to the projector. It also provides a reference to the keypad and remote buttons and the options available from the
Basic Image Adjustment
1Make sure you have powered up your equipment in the right order (page 13).
2If the image doesn’t display completely, zoom the image (page 15), adjust the height of the projector (page 16) or center the image by adjusting its horizontal or vertical position (page 24). Be sure the projector lens is at a 90 degree angle to the screen.
3If the image is out of focus, rotate the focus ring (page 15).
4If the colors don’t look right, adjust the brightness, contrast, tint, or color (page 22).
Adjusting the Projector
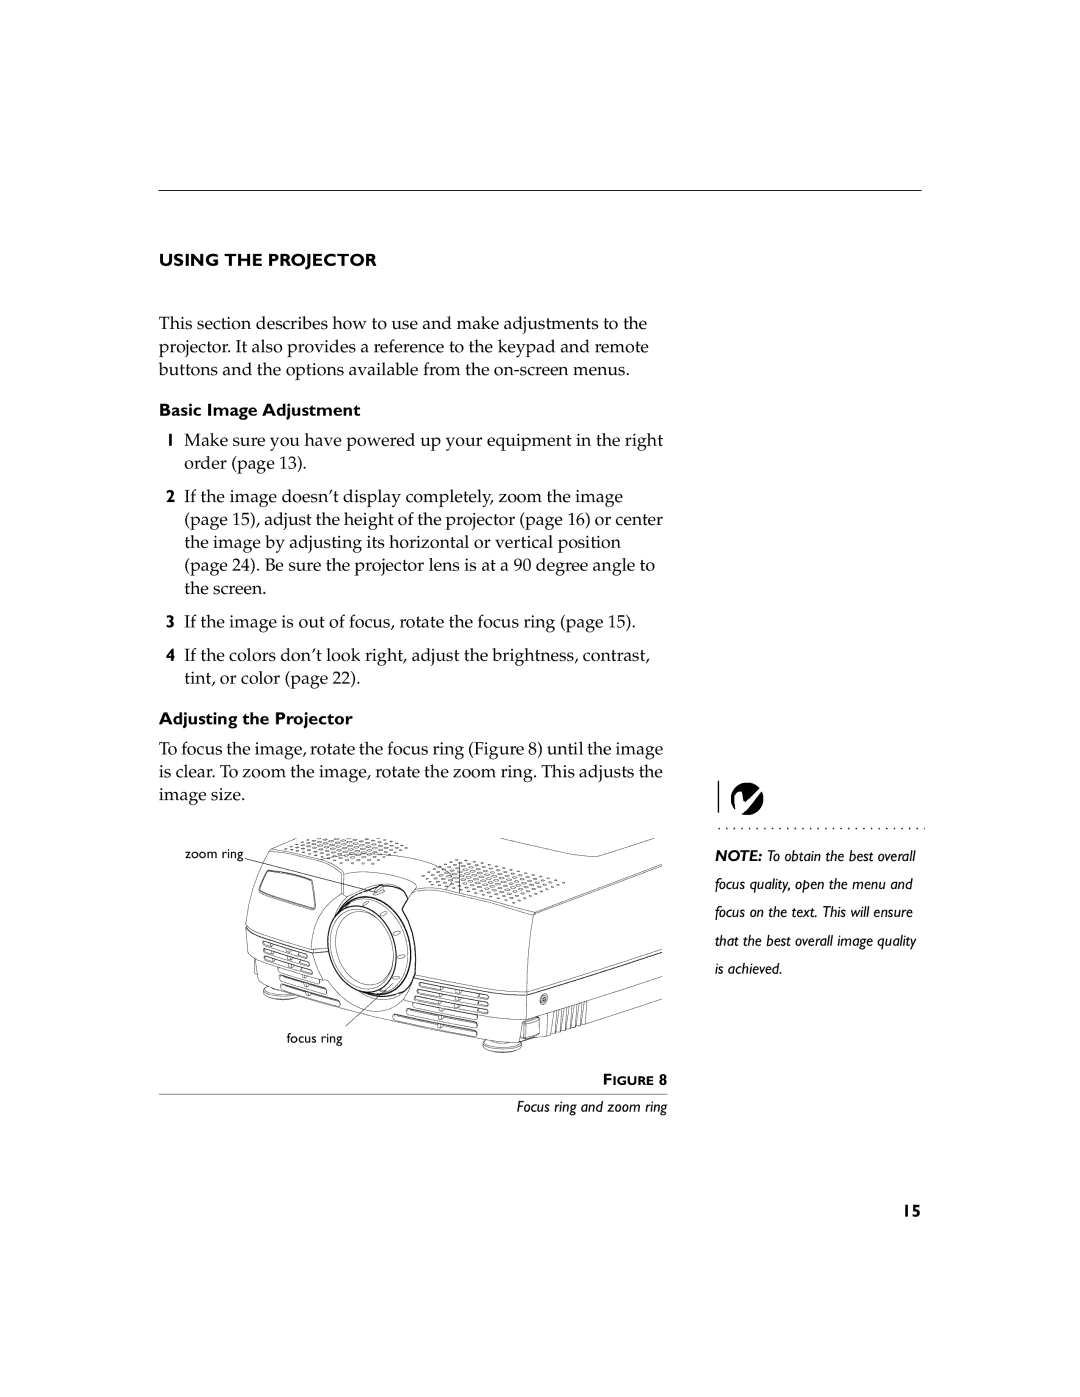
To focus the image, rotate the focus ring (Figure 8) until the image is clear. To zoom the image, rotate the zoom ring. This adjusts the image size.
zoom ring
focus ring
FIGURE 8
Focus ring and zoom ring
NOTE: To obtain the best overall focus quality, open the menu and focus on the text. This will ensure that the best overall image quality is achieved.
15
