
640c, 640C, 640cDF specifications
Eagle Electronics has made a significant mark in the world of marine electronics with its innovative and reliable products, notably the Eagle Electronics 640C, 640cDF, and the 640c models. These devices are designed for anglers and navigators who seek advanced functionality combined with user-friendly operation.The Eagle Electronics 640C is a high-performance fish finder that is primarily admired for its vibrant display and precise mapping capabilities. Equipped with a 640x480 pixel, full-color LCD screen, it provides crystal-clear visibility even in bright sunlight. This device uses advanced sonar technology to offer detailed underwater images, allowing users to locate fish with remarkable accuracy. The high-resolution graphics enhance the experience while providing an intuitive interface for easy navigation through its various features.
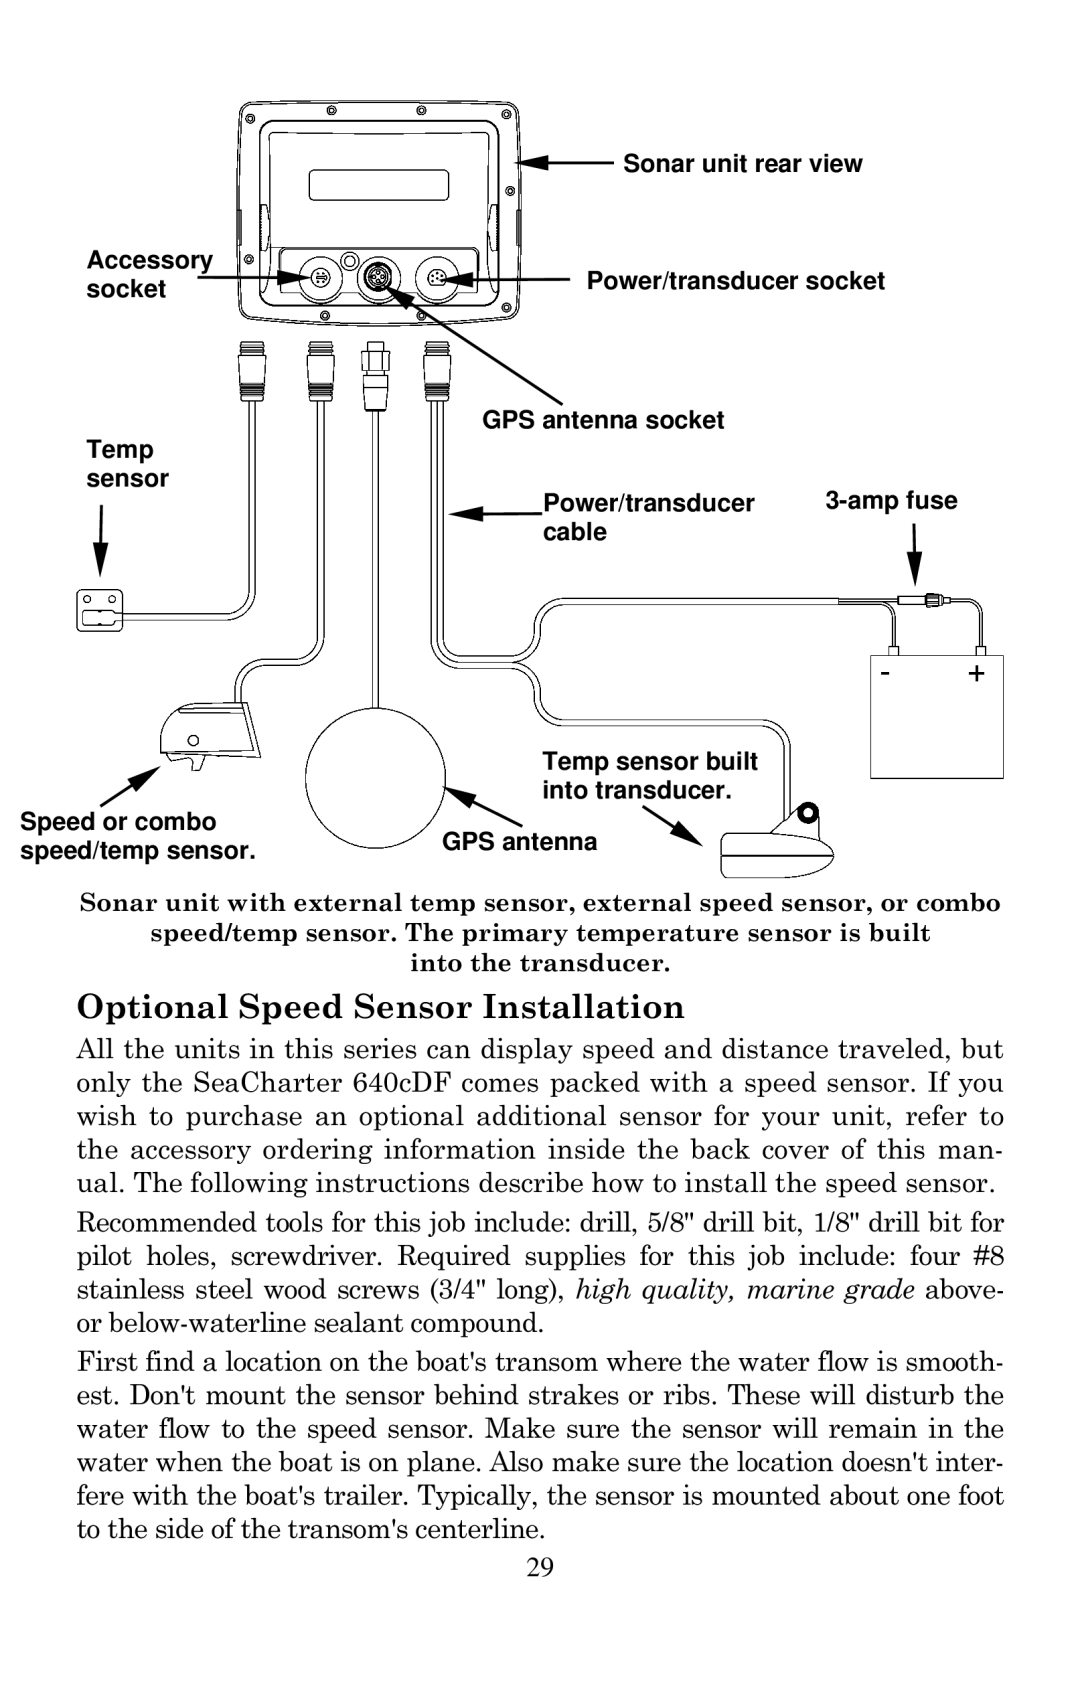
The 640cDF, a variant of the 640C, elevates the standard fish finder experience by incorporating dual-frequency sonar capabilities. This model operates on both 200 kHz and 83 kHz frequencies, allowing users to switch between narrow and wide beams based on their fishing needs. The dual-frequency technology provides a more comprehensive view of the underwater environment, making it easier to identify different types of fish and underwater structures. Additionally, the 640cDF boasts temperature sensing capabilities, giving anglers valuable data regarding water conditions that can influence fish behavior.
All models in the Eagle 640 series feature built-in GPS navigation. The integrated GPS provides a reliable mapping system that allows users to mark waypoints and create routes, significantly improving navigation efficiency. This technology is vital for those who engage in long-distance fishing trips or travel in unfamiliar waters. The GPS functionality, combined with the sonar capabilities, makes these devices essential tools for successful fishing excursions.
Furthermore, the Eagle 640 series devices come equipped with customizable display options, allowing users to tailor the information presented based on their preferences. The intuitive menu system simplifies the navigation of the device's various features, empowering users to quickly access critical data without unnecessary complications.
In summary, the Eagle Electronics 640C, 640cDF, and the 640c represent a blend of cutting-edge technology and user-centric design in the marine electronics space. With features such as high-resolution displays, dual-frequency sonar, built-in GPS navigation, and customizable settings, these devices enhance the fishing experience, making them invaluable assets for anglers and navigators alike.