2 Setting Up
You will need a 3.5 inch SATA Hard Drive. Carefully follow these procedures to install the hard drive into the enclosure.
Note: For
chapter and proceed to Chapter 3: Connecting the Drive.
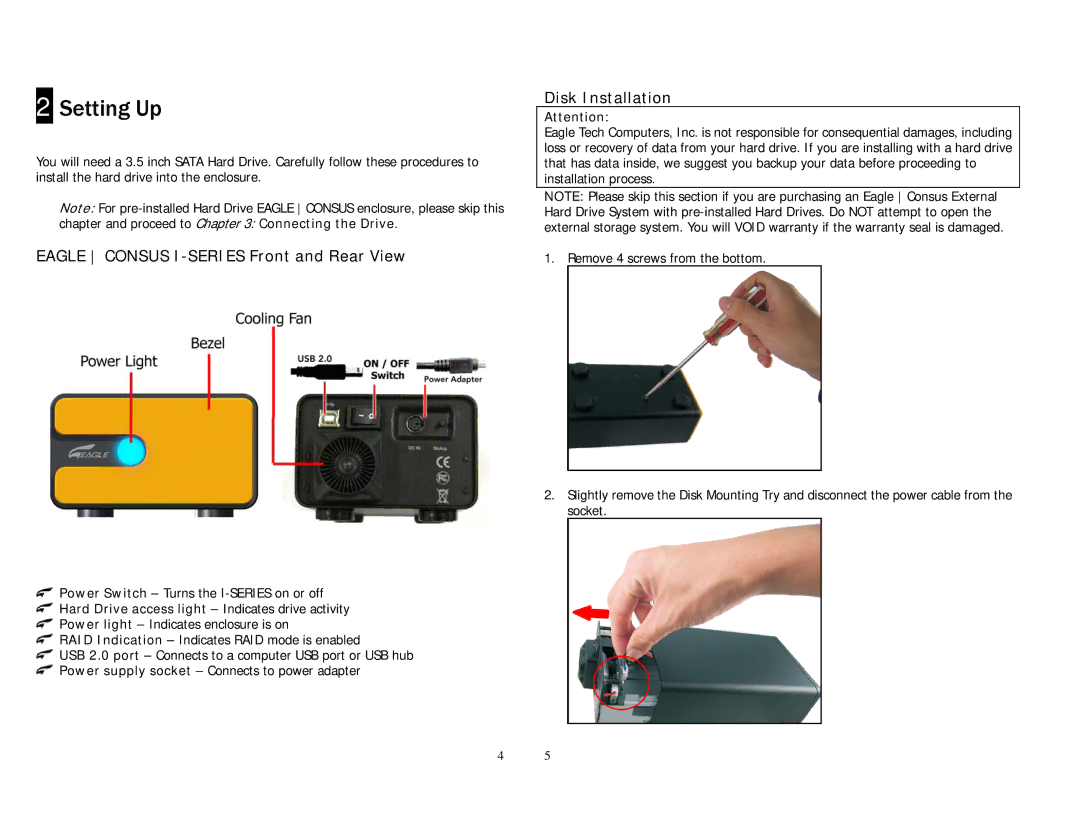
EAGLE CONSUS I-SERIES Front and Rear View
Disk Installation
Attention:
Eagle Tech Computers, Inc. is not responsible for consequential damages, including loss or recovery of data from your hard drive. If you are installing with a hard drive that has data inside, we suggest you backup your data before proceeding to installation process.
NOTE: Please skip this section if you are purchasing an Eagle Consus External Hard Drive System with
1. Remove 4 screws from the bottom.
2.Slightly remove the Disk Mounting Try and disconnect the power cable from the socket.
![]() Power Switch – Turns the
Power Switch – Turns the
 Hard Drive access light – Indicates drive activity
![]() Power light – Indicates enclosure is on
Power light – Indicates enclosure is on
![]() RAID Indication – Indicates RAID mode is enabled
RAID Indication – Indicates RAID mode is enabled
![]() USB 2.0 port – Connects to a computer USB port or USB hub
USB 2.0 port – Connects to a computer USB port or USB hub
![]() Power supply socket – Connects to power adapter
Power supply socket – Connects to power adapter
4 5