Intelligent Technologies (IT.) D77A I/O Module Products
Installing the Module
The module is now ready for installation on the DIN rail.
CAUTION | PRÉCAUTION | PRECAUCIÓN |
|
|
|
Do no “rock” the module onto the DIN rail. | Ne « basculez » pas le module sur le rail DIN. | No “meza” el módulo sobre el riel DIN. El |
The rocking action could damage the | L’action de basculement pourrait | mecerlo podrá dañar el módulo. |
module. | endommager le module. |
|
|
|
|
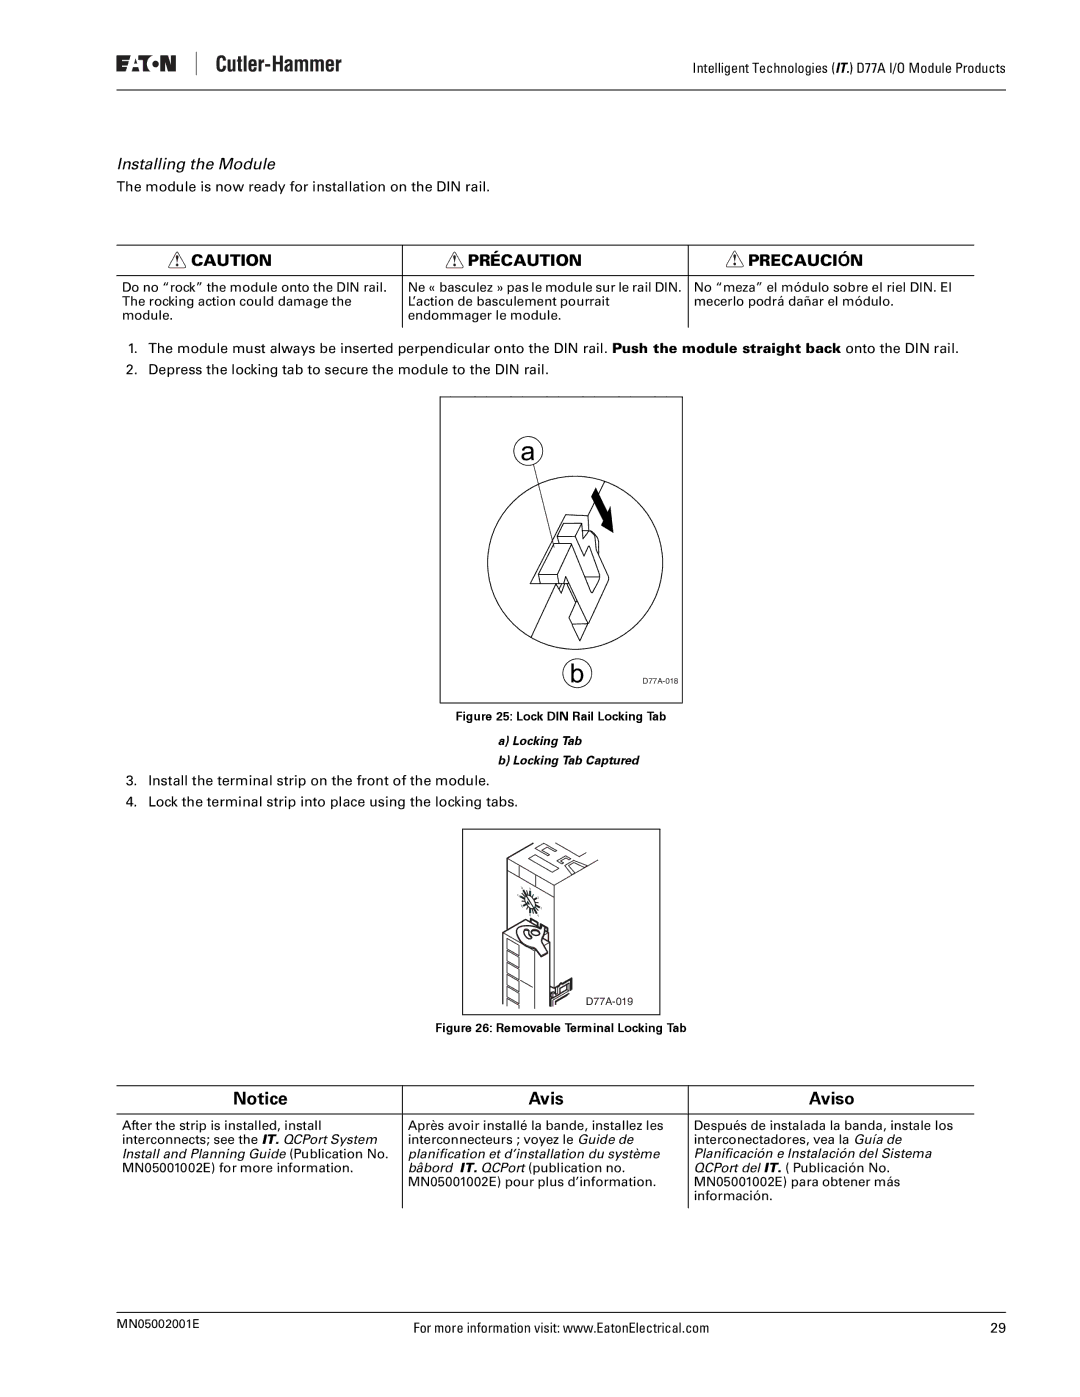
1.The module must always be inserted perpendicular onto the DIN rail. Push the module straight back onto the DIN rail.
2.Depress the locking tab to secure the module to the DIN rail.
a
b
Figure 25: Lock DIN Rail Locking Tab
a)Locking Tab
b)Locking Tab Captured
3.Install the terminal strip on the front of the module.
4.Lock the terminal strip into place using the locking tabs.
14 | 0 |
12 | 2 |
104
8 6
Figure 26: Removable Terminal Locking Tab
Notice | Avis | Aviso |
|
|
|
After the strip is installed, install | Après avoir installé la bande, installez les | Después de instalada la banda, instale los |
interconnects; see the IT. QCPort System | interconnecteurs ; voyez le Guide de | interconectadores, vea la Guía de |
Install and Planning Guide (Publication No. | planification et d’installation du système | Planificación e Instalación del Sistema |
MN05001002E) for more information. | bâbord IT. QCPort (publication no. | QCPort del IT. ( Publicación No. |
| MN05001002E) pour plus d’information. | MN05001002E) para obtener más |
|
| información. |
|
|
|
MN05002001E | For more information visit: www.EatonElectrical.com | 29 |