Electro-Voice X-Line Very Compact (XLVC) manual b, Rigging XS212 Systems Together

Models: X-Line Very Compact (XLVC)

1 56
Download 56 pages 25.5 Kb
Page 22
Image 22
Rigging XS212 Enclosures Together

Rigging XS212 Enclosures Together

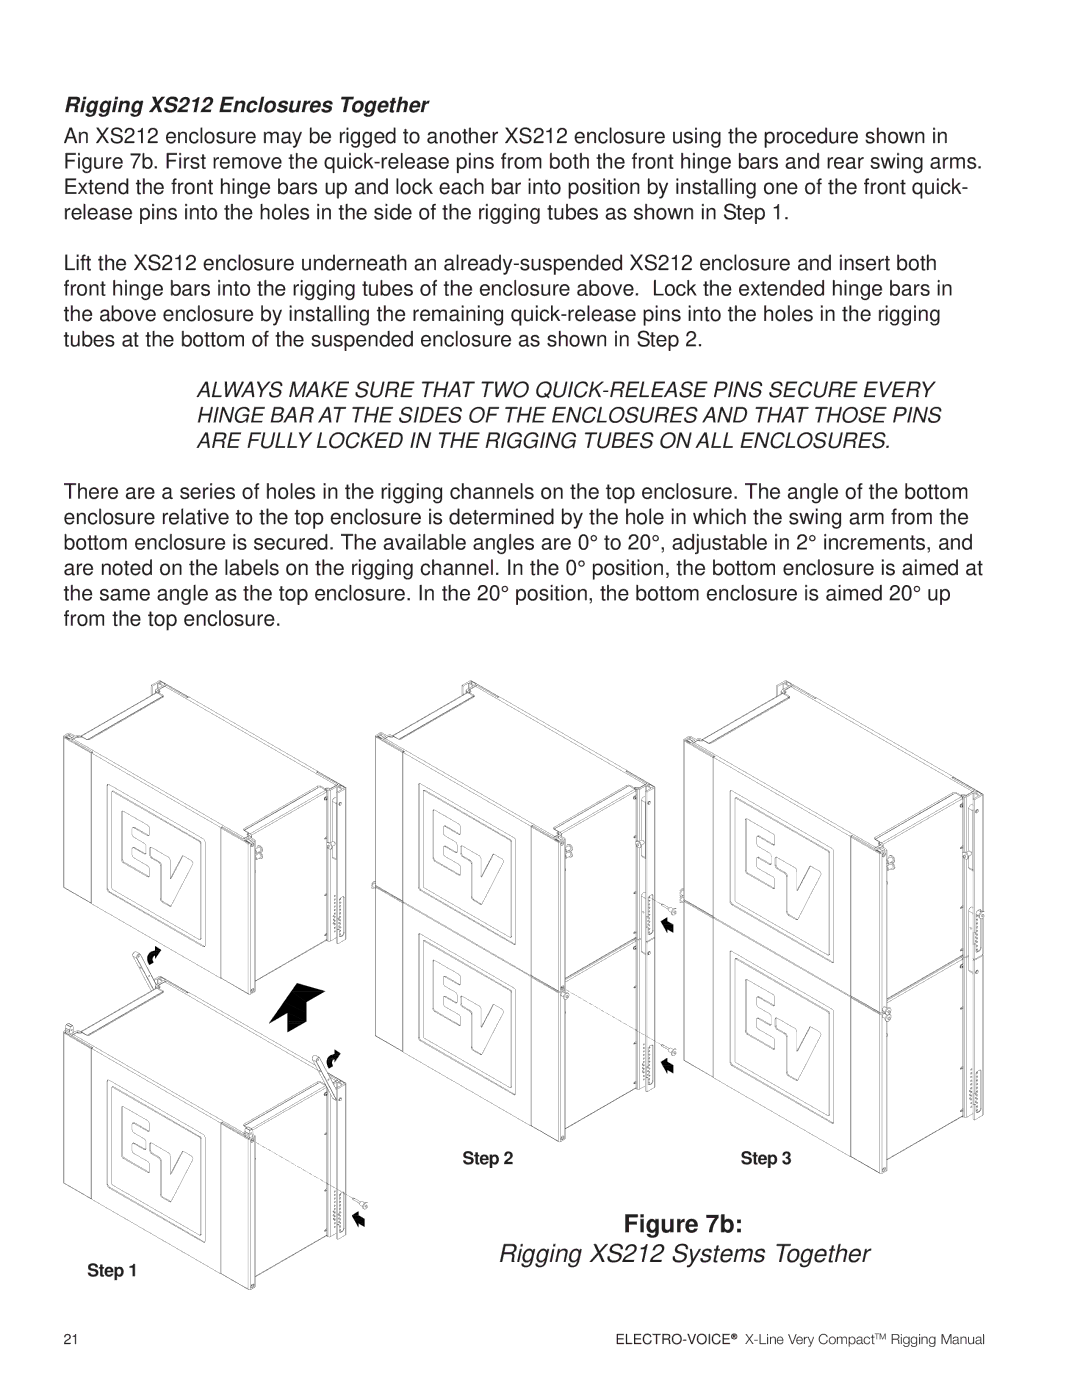
An XS212 enclosure may be rigged to another XS212 enclosure using the procedure shown in Figure 7b. First remove the quick-release pins from both the front hinge bars and rear swing arms. Extend the front hinge bars up and lock each bar into position by installing one of the front quick- release pins into the holes in the side of the rigging tubes as shown in Step 1.

Lift the XS212 enclosure underneath an already-suspended XS212 enclosure and insert both front hinge bars into the rigging tubes of the enclosure above. Lock the extended hinge bars in the above enclosure by installing the remaining quick-release pins into the holes in the rigging tubes at the bottom of the suspended enclosure as shown in Step 2.

ALWAYS MAKE SURE THAT TWO QUICK-RELEASE PINS SECURE EVERY HINGE BAR AT THE SIDES OF THE ENCLOSURES AND THAT THOSE PINS ARE FULLY LOCKED IN THE RIGGING TUBES ON ALL ENCLOSURES.

There are a series of holes in the rigging channels on the top enclosure. The angle of the bottom enclosure relative to the top enclosure is determined by the hole in which the swing arm from the bottom enclosure is secured. The available angles are 0° to 20°, adjustable in 2° increments, and are noted on the labels on the rigging channel. In the 0° position, the bottom enclosure is aimed at the same angle as the top enclosure. In the 20° position, the bottom enclosure is aimed 20° up from the top enclosure.

Step 2

Step 3

Figure 7b:

Rigging XS212 Systems Together

Step 1

21

ELECTRO-VOICE®X-Line Very CompactTM Rigging Manual

Page 22
Image 22
Electro-Voice X-Line Very Compact (XLVC) manual b, Rigging XS212 Systems Together, Rigging XS212 Enclosures Together