
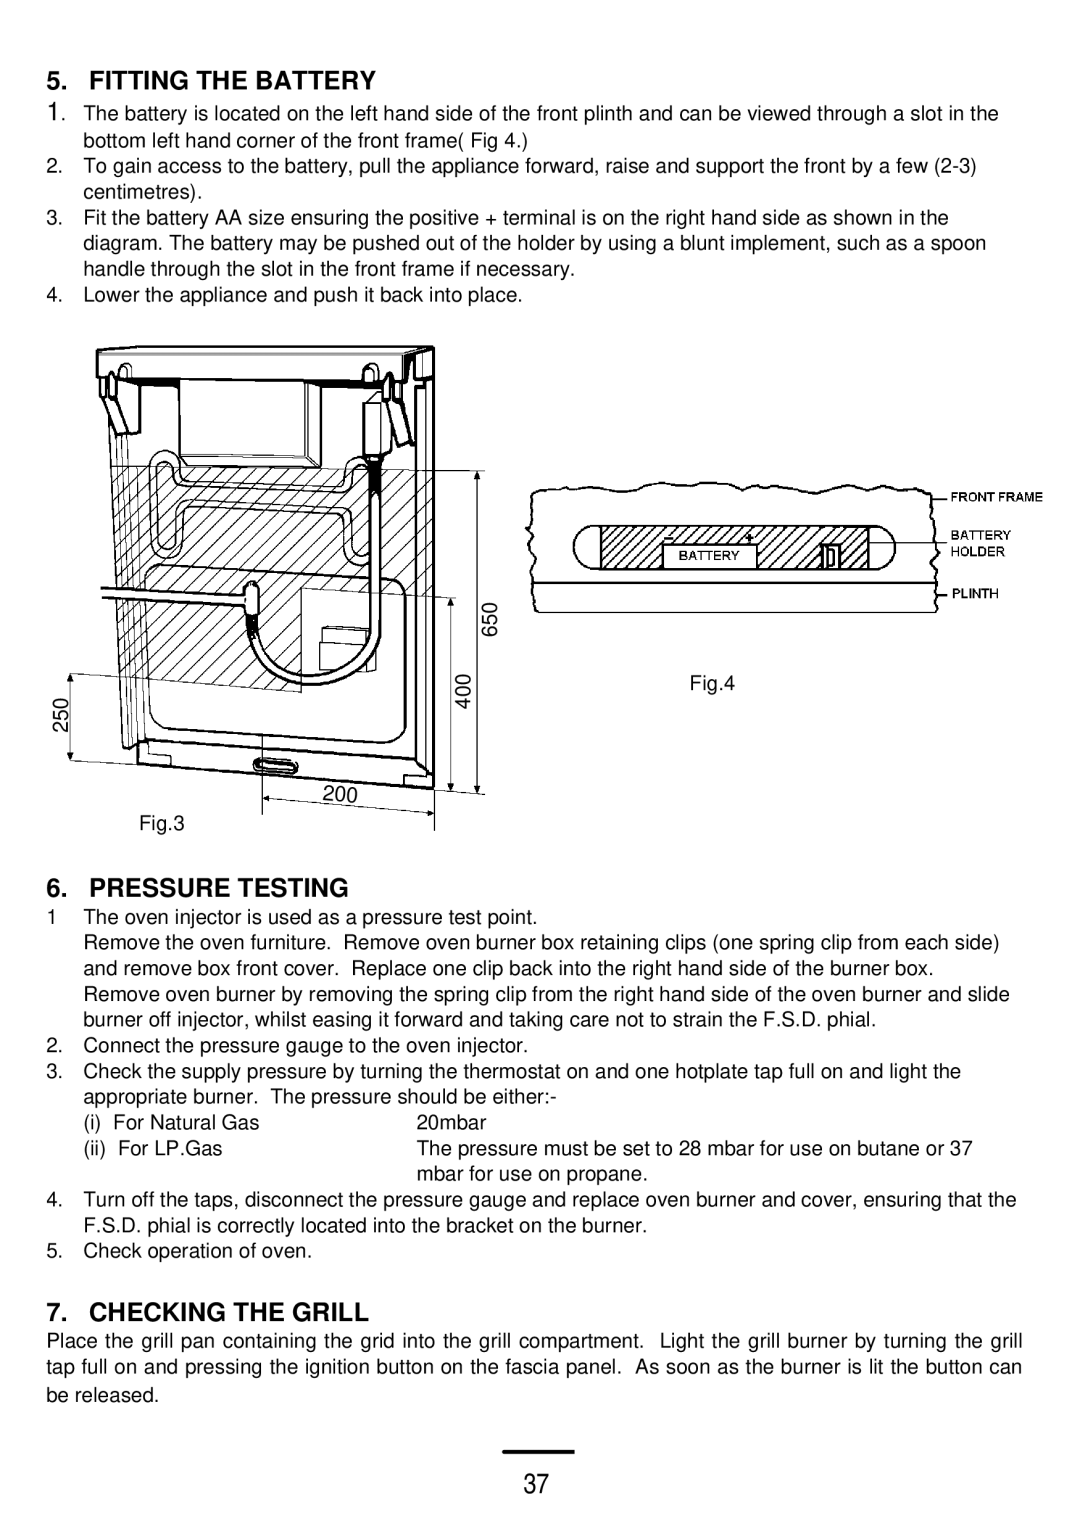
5 0 G L specifications
Electrolux 5.0 GL is a state-of-the-art appliance designed to enhance your cooking experience while ensuring high performance and energy efficiency. With its sleek and modern design, this product stands out in any kitchen, combining aesthetics with functionality.One of the main features of the Electrolux 5.0 GL is its advanced cooking technology. Equipped with innovative induction cooking capabilities, it allows for precise temperature control, ensuring that your dishes are cooked to perfection. Induction cooking is known for its quick heat-up times, allowing you to save on cooking time and energy. This technology also offers safety features, as the cooktop remains cool to the touch, significantly reducing the risk of burns.
Another standout feature is the spacious 5.0 cubic foot capacity, which provides ample room for meal preparation. Whether you are cooking large family meals or entertaining guests, this appliance can accommodate various cookware sizes, giving you the flexibility to create multiple dishes simultaneously.
The Electrolux 5.0 GL also incorporates smart technology, enabling users to connect the appliance to their smartphones or tablets. This connectivity allows for remote monitoring and control, offering the convenience of managing cooking settings from a distance. With this feature, you can preheat the oven, adjust timers, or receive notifications once your dish is ready, making meal preparation more efficient.
Impressive energy efficiency is another characteristic of the Electrolux 5.0 GL. The appliance meets high energy standards, helping reduce energy consumption and lower utility bills. This not only benefits your wallet but also contributes to a more sustainable environment.
Additionally, the appliance boasts easy-to-clean surfaces and a self-cleaning option, making maintenance a breeze. The interior is designed with premium materials that resist stains and odors, ensuring that your cooking space remains fresh and hygienic.
In summary, Electrolux 5.0 GL combines cutting-edge technology, generous capacity, smart features, and energy efficiency. Its induction cooking capabilities, connectivity options, and easy maintenance make it a leading choice for modern kitchens. Whether you’re a seasoned chef or a home cook, this appliance is designed to elevate your culinary experience to new heights.