ELECTRONIC TIMER
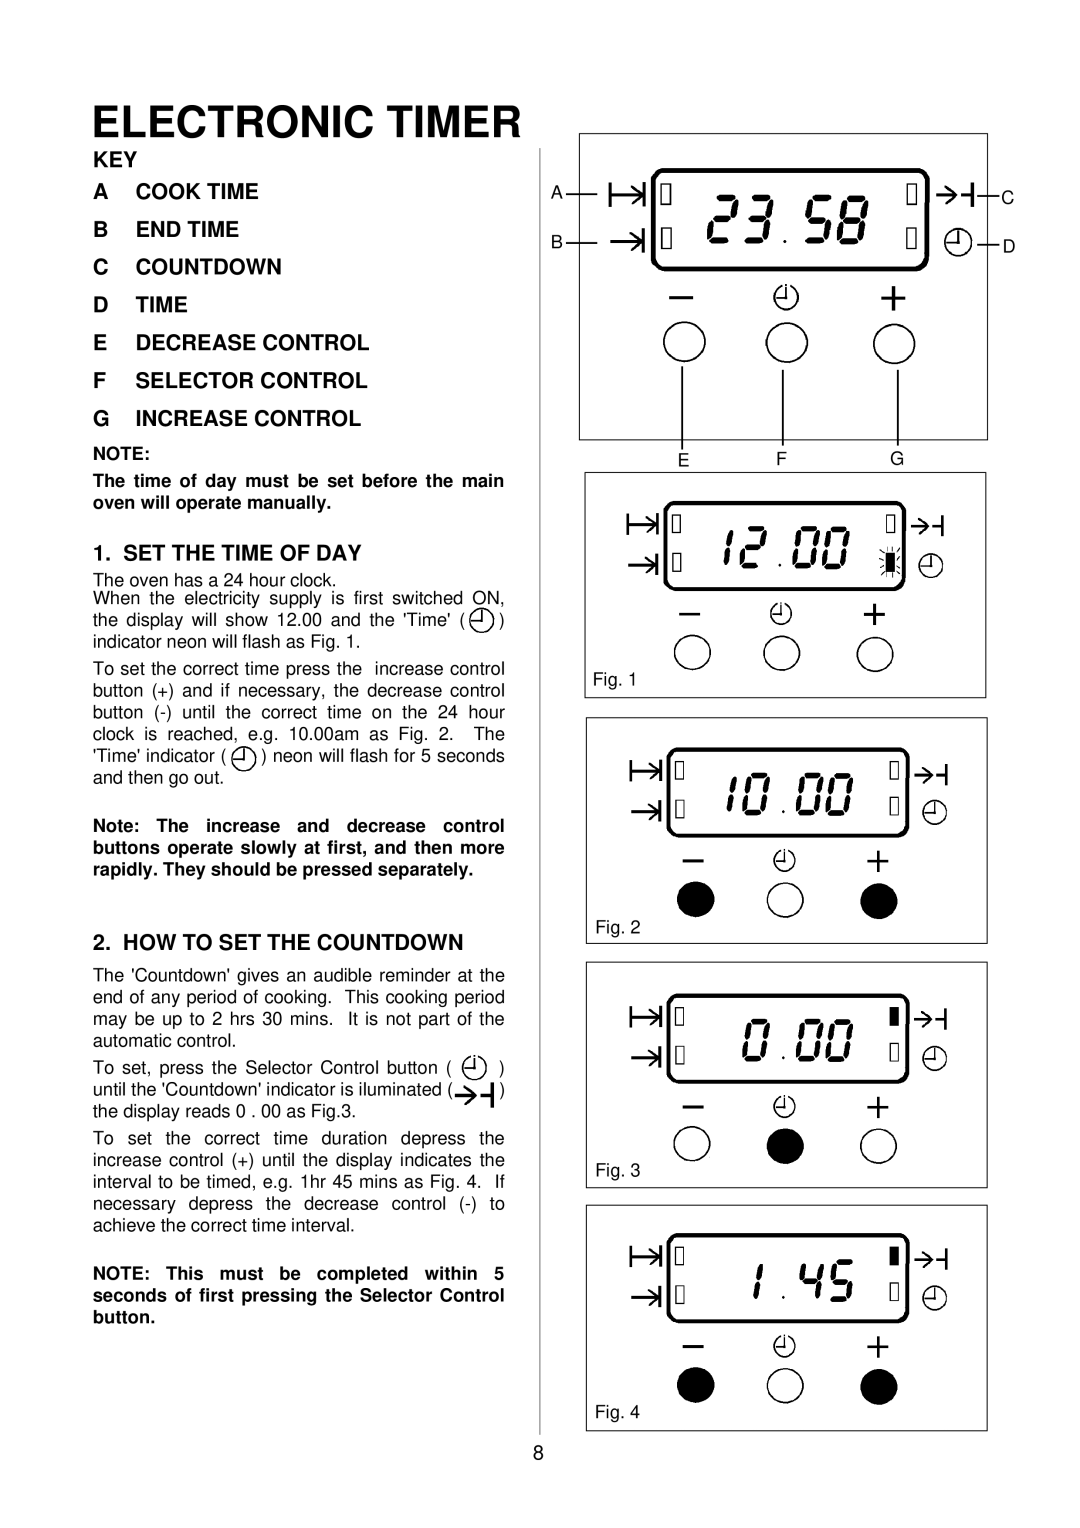
KEY |
| |
A | COOK TIME | A |
B | END TIME | B |
|
| |
CCOUNTDOWN
DTIME
EDECREASE CONTROL
FSELECTOR CONTROL
GINCREASE CONTROL
NOTE:
The time of day must be set before the main oven will operate manually.
1. SET THE TIME OF DAY
The oven has a 24 hour clock.
When the electricity supply is first switched ON, the display will show 12.00 and the 'Time' ( ![]() ) indicator neon will flash as Fig. 1.
) indicator neon will flash as Fig. 1.
To set the correct time press the increase control button (+) and if necessary, the decrease control button ![]() ) neon will flash for 5 seconds and then go out.
) neon will flash for 5 seconds and then go out.
Note: The increase and decrease control buttons operate slowly at first, and then more rapidly. They should be pressed separately.
2. HOW TO SET THE COUNTDOWN
The 'Countdown' gives an audible reminder at the end of any period of cooking. This cooking period may be up to 2 hrs 30 mins. It is not part of the automatic control.
To set, press the Selector Control button ( ![]() )
)
until the 'Countdown' indicator is iluminated ( ) the display reads 0 . 00 as Fig.3.
To set the correct time duration depress the increase control (+) until the display indicates the interval to be timed, e.g. 1hr 45 mins as Fig. 4. If necessary depress the decrease control
NOTE: This must be completed within 5 seconds of first pressing the Selector Control button.
8
E FG
Fig. 1
Fig. 2
Fig. 3
Fig. 4
C
D