General Cleaning

The door is heavy. For

safe, temporary storage, lay the door flat with the inside of the door facing

down.

To Remove and Replace Oven Door

To Remove Oven Door:

1.Open the door.

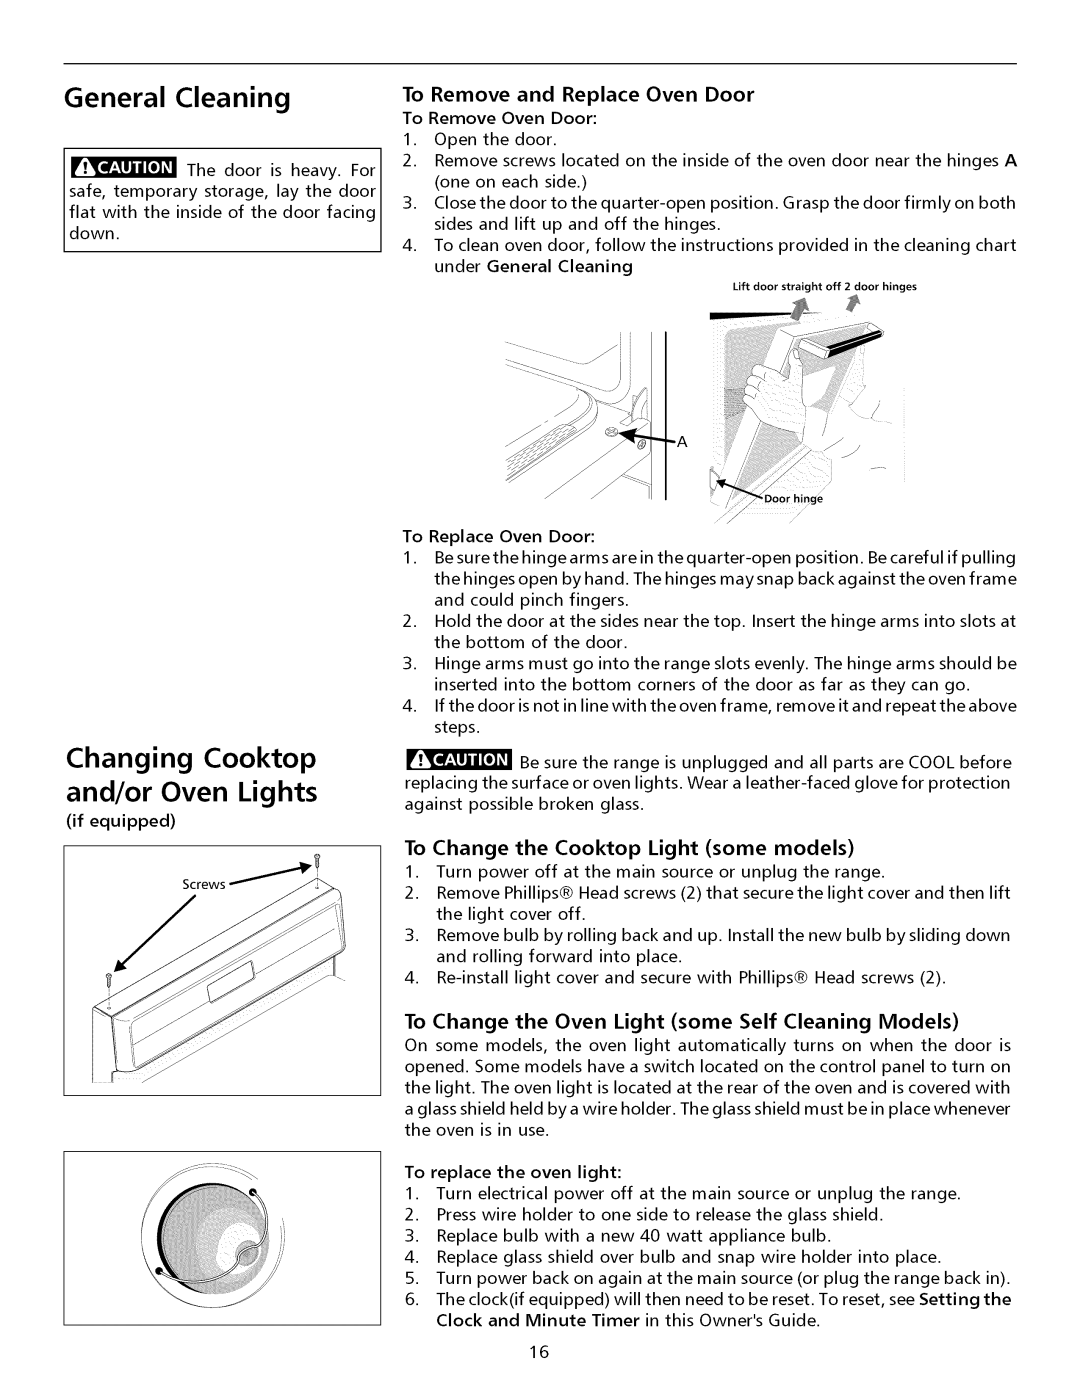
2.Remove screws located on the inside of the oven door near the hinges A (one on each side.)

3.Close the door to the quarter-open position. Grasp the door firmly on both sides and lift up and off the hinges.

4.To clean oven door, follow the instructions provided in the cleaning chart under General Cleaning

Lift door straight off 2 door hinges

)oor hinge

Changing Cooktop and/or Oven Lights

(if equipped)

To Replace Oven Door:

1. 13esurethehingearmsarein thequarter-open position. 13ecareful if pulling the hinges open by hand. The hinges maysnap back against the oven frame and could pinch fingers.

2.Hold the door at the sides near the top. Insert the hinge arms into slots at the bottom of the door.

3.Hinge arms must go into the range slots evenly. The hinge arms should be inserted into the bottom corners of the door as far as they can go.

4.If the door is not in line with the oven frame, remove it and repeat the above steps.

Be sure the range is unplugged and all parts are COOL before replacing the surface or oven lights. Wear a leather-faced glove for protection against possible broken glass.

To Change the Cooktop Light (some models)

1.Turn power off at the main source or unplug the range.

2.Remove Phillips® Head screws (2) that secure the light cover and then lift the light cover off.

3.Remove bulb by rolling back and up. Install the new bulb by sliding down and rolling forward into place.

4.Re-install light cover and secure with Phillips® Head screws (2).

To Change the Oven Light (some Self Cleaning Models)

On some models, the oven light automatically turns on when the door is opened. Some models have a switch located on the control panel to turn on the light. The oven light is located at the rear of the oven and is covered with a glass shield held by a wire holder. The glass shield must be in place whenever the oven is in use.

To replace the oven light:

1.Turn electrical power off at the main source or unplug the range.

2.Press wire holder to one side to release the glass shield.

3.Replace bulb with a new 40 watt appliance bulb.

4.Replace glass shield over bulb and snap wire holder into place.

5.Turn power back on again at the main source (or plug the range back in).

6.The clock(if equipped) will then need to be reset. To reset, see Setting the Clock and Minute Timer in this Owner's Guide.

16

Page 16
Image 16
Electrolux ESII To Change the Cooktop Light some models, To Change the Oven Light some Self Cleaning Models

ESII, ESI specifications

Electrolux has long been a name synonymous with high-quality home appliances, and its ESII and ESI series are no exception. Designed to elevate the cooking experience, these series combine sleek aesthetics with cutting-edge technology, making them a favorite among culinary enthusiasts and home cooks alike.

One of the standout features of the Electrolux ESII and ESI series is their advanced cooking technologies. Both series are equipped with PrecisionCooking, which utilizes sophisticated temperature sensors for optimal cooking results. This technology ensures that dishes are cooked evenly, allowing for consistent quality whether you are baking, roasting, or slow cooking.

Efficiency is a key characteristic of the ESII and ESI series, with energy-efficient designs that help reduce electricity consumption without compromising performance. The appliances meet stringent energy standards, making them a sustainable choice for environmentally conscious users. Additionally, the quick preheat feature saves time, getting you cooking faster when you need to prepare meals in a hurry.

The ESII series takes innovation a step further with its Smart Cook feature. This technology incorporates pre-programmed settings for various dishes, enabling users to select the type of meal they are preparing and receive tailored cooking times and temperatures. This user-friendly approach simplifies the cooking process, making it accessible for novice chefs as well as seasoned cooks.

Another remarkable aspect is the self-cleaning option available in select models. This feature utilizes high temperatures to incinerate food residues, transforming them into ash that can easily be wiped away. This means less time spent on cleaning and more time enjoying delicious meals.

Aesthetic appeal is not overlooked in the Electrolux ESII and ESI series, which showcase modern designs that fit seamlessly into any contemporary kitchen. With options ranging from stainless steel finishes to sleek black glass, these appliances add a touch of elegance to culinary spaces.

Furthermore, both series emphasize safety with child-lock features and auto shut-off settings. This ensures peace of mind for families, making cooking safer for everyone.

In summary, the Electrolux ESII and ESI series combine advanced cooking technology, energy efficiency, user-friendly features, and elegant design. Whether you are preparing a simple dinner or an elaborate feast, these appliances cater to all your cooking needs while enhancing your kitchen’s aesthetic. Investing in Electrolux appliances means embracing innovation and style in culinary endeavors.