24 technical specifications / installation
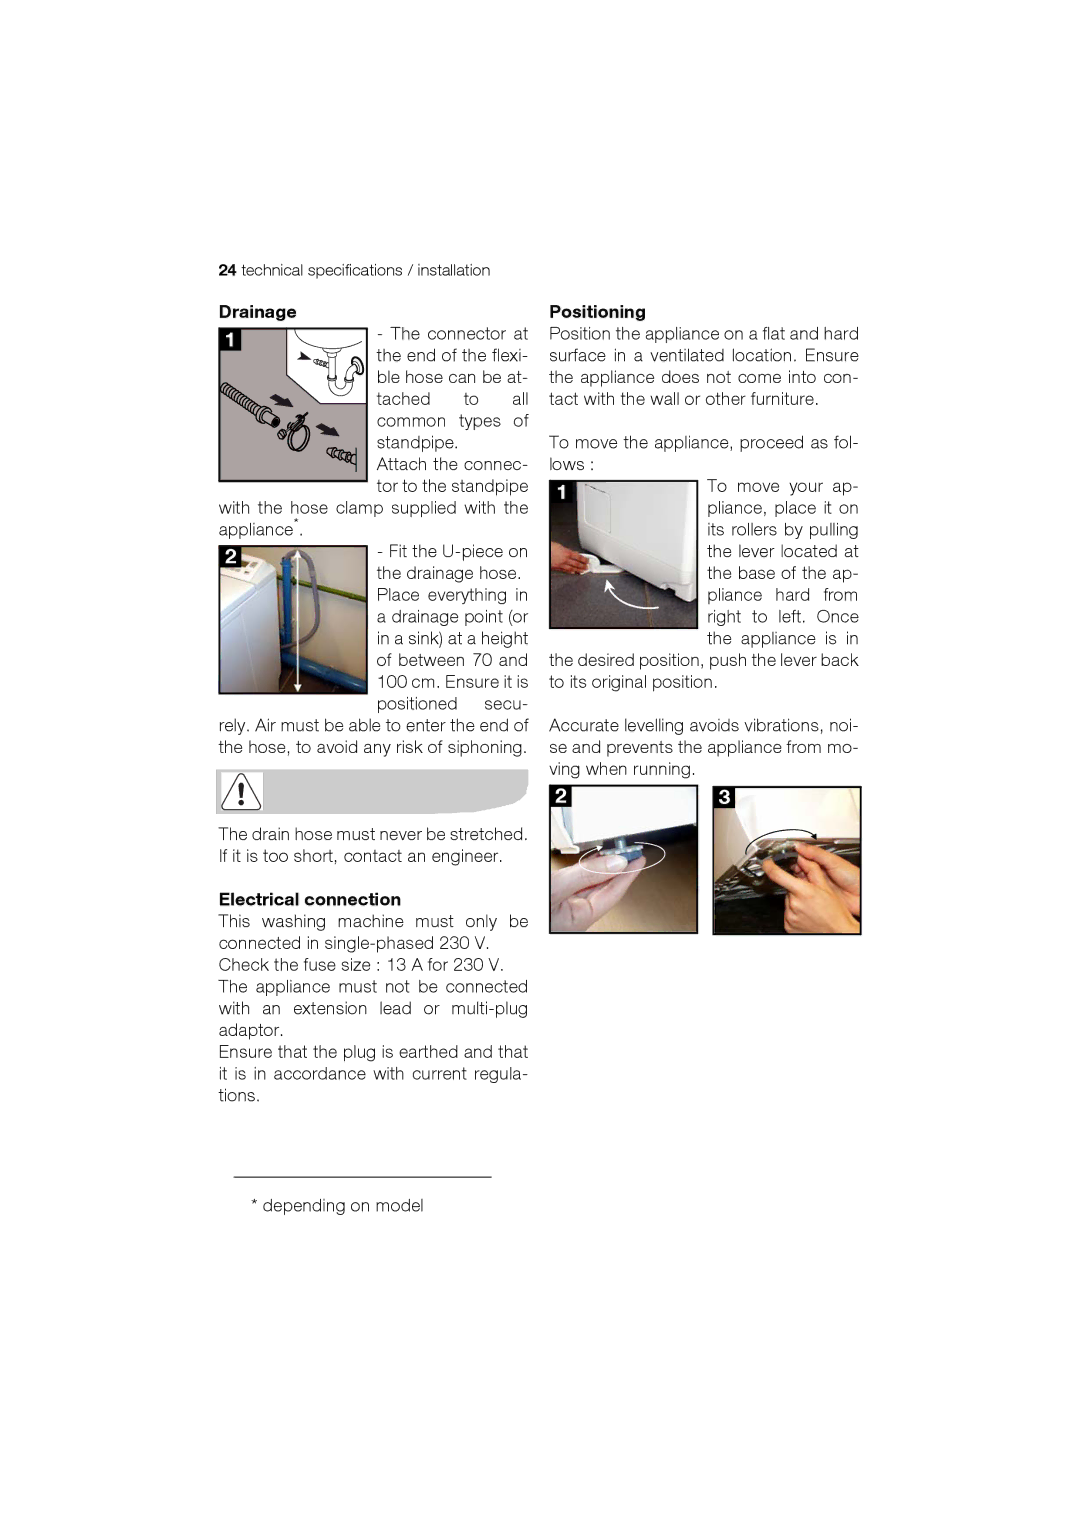
Drainage | - The connector at | ||||||||
1 |
|
|
|
|
|
| |||
|
|
|
|
|
|
| the end of the flexi- | ||
|
|
|
|
|
|
| |||
|
|
|
|
|
|
| ble hose can be at- | ||
|
|
|
|
|
|
| |||
|
|
|
|
|
|
| tached | to | all |
|
|
|
|
|
|
| |||
|
|
|
|
|
|
| common | types | of |
|
|
|
|
|
|
| standpipe. |
| |
|
|
|
|
|
|
| Attach the connec- | ||
|
|
|
|
|
|
| tor to the standpipe | ||
|
|
|
|
|
|
| |||
with the hose clamp supplied with the appliance*.
2 |
| - Fit the |
|
| the drainage hose. |
|
| Place everything in |
|
| a drainage point (or |
|
| in a sink) at a height |
|
| of between 70 and |
|
| 100 cm. Ensure it is |
|
| positioned secu- |
rely. Air must be able to enter the end of the hose, to avoid any risk of siphoning.
The drain hose must never be stretched. If it is too short, contact an engineer.
Electrical connection
This washing machine must only be connected in
Ensure that the plug is earthed and that it is in accordance with current regula- tions.
* depending on model
Positioning
Position the appliance on a flat and hard surface in a ventilated location. Ensure the appliance does not come into con- tact with the wall or other furniture.
To move the appliance, proceed as fol- lows :
1 |
| To move your ap- | ||
|
| pliance, place it on | ||
|
| its rollers by pulling | ||
|
| the lever located at | ||
|
| the base of the ap- | ||
|
| pliance | hard | from |
|
| right to | left. | Once |
|
| the appliance | is in | |
the desired position, push the lever back to its original position.
Accurate levelling avoids vibrations, noi- se and prevents the appliance from mo- ving when running.
2 |
|
| 3 |
|
|
|
|
|
|
