
135170, 71120 specifications
Elite Screens offers a variety of projection screens tailored for both residential and commercial use, and one of its standout models is the Elite Screens 135170,71120. This screen has garnered attention for its impressive features, advanced technologies, and overall performance, making it a popular choice among AV enthusiasts and professionals alike.One of the key characteristics of the Elite Screens 135170,71120 is its size. With a diagonal measurement of 135 inches, this screen provides a large viewing area that is perfect for home theaters, conference rooms, and classrooms. The screen is designed to be wide, ensuring that it accommodates large audiences easily and enhances the overall viewing experience.
The screen features a 16:9 aspect ratio, making it ideal for displaying high-definition content such as movies, presentations, and video games. This aspect ratio is universally used in modern media, ensuring that the content is displayed without distortion, enabling viewers to enjoy their favorite shows and presentations in their intended format.
Another notable feature of the Elite Screens 135170,71120 is its material. The screen is made from a high-quality, tensioned material that enhances brightness and vividness. This specialized material allows for excellent color reproduction, ensuring that images appear sharp and vibrant. Additionally, the screen is designed to reduce glare and enhance contrast, which is essential for viewing in various lighting conditions.
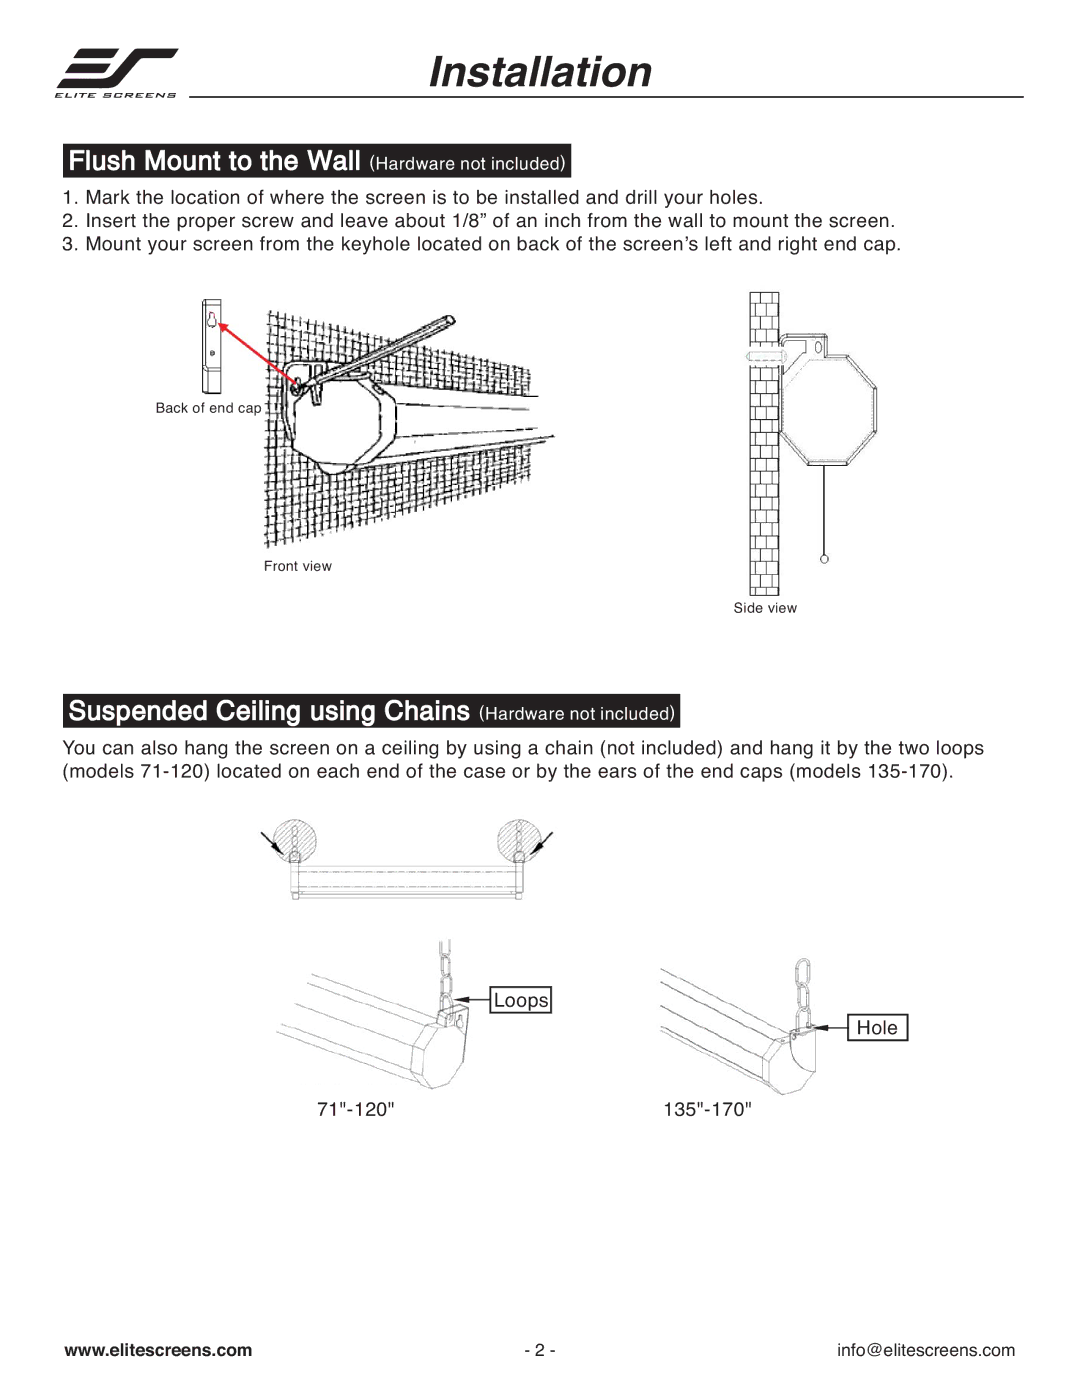
The installation process for the Elite Screens 135170,71120 is also user-friendly. The screen is designed for easy mounting, whether it's for wall or ceiling installation. This versatility makes it a suitable choice for different environments, allowing users to customize their setup according to their specific needs.
Furthermore, the screen features a robust build quality, ensuring its durability and longevity. The frame is constructed from premium materials that resist warping and damage, making it a reliable investment for any AV setup.
In terms of technology, the Elite Screens 135170,71120 is compatible with various projection technologies, including LCD, DLP, and LED projectors. This compatibility ensures that users can leverage their existing technology without needing significant upgrades.
Overall, the Elite Screens 135170,71120 combines impressive size, exceptional image quality, and user-friendly installation, making it a top choice for anyone in need of a high-performance projection screen. Whether for home entertainment or professional presentations, this screen delivers outstanding results across various settings.