AMM170TK/AMM17TK/AMM18TK/AMM19TK/AMM19TK(HB) 29
SPECIFICATION
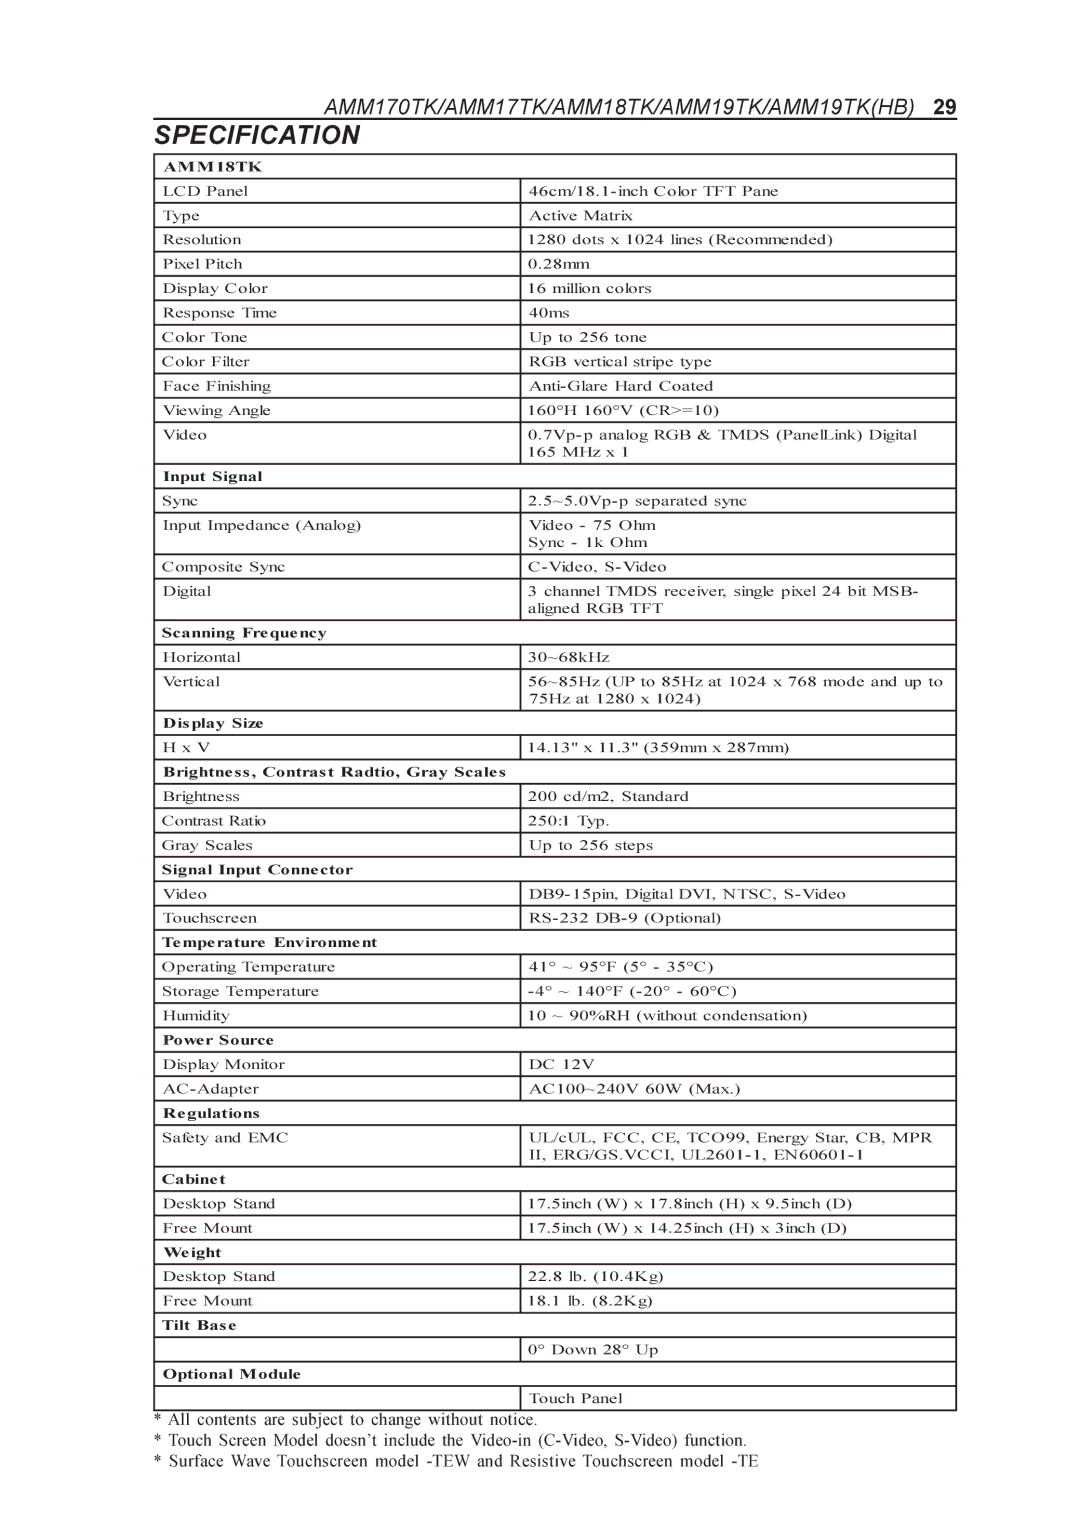
AMM18TK
LCD Panel
Type
Resolution
Pixel Pitch
Display Color
Response Time
Color Tone
Color Filter
Face Finishing
Viewing Angle
Video
Input Signal
Active Matrix
1280 dots x 1024 lines (Recommended)
0.28mm
16 million colors
40ms
Up to 256 tone
RGB vertical stripe type
160°H 160°V (CR>=10)
Sync | |
|
|
Input Impedance (Analog) | Video - 75 Ohm |
| Sync - 1k Ohm |
|
|
Composite Sync | |
|
|
Digital | 3 channel TMDS receiver, single pixel 24 bit MSB- |
| aligned RGB TFT |
|
|
Scanning Frequency |
|
Horizontal
Vertical
Display Size
30~68kHz
56~85Hz (UP to 85Hz at 1024 x 768 mode and up to 75Hz at 1280 x 1024)
H x V
14.13" x 11.3" (359mm x 287mm)
Brightness, Contrast Radtio, Gray Scales
Brightness
Contrast Ratio
Gray Scales
200 cd/m2, Standard
250:1 Typ.
Up to 256 steps
Signal Input Connector
Video
Touchscreen
Temperature Environment
Operating Temperature | 41° ~ 95°F (5° - 35°C) |
Storage Temperature | |
Humidity | 10 ~ 90%RH (without condensation) |
Power Source |
|
|
|
Display Monitor | DC 12V |
|
|
AC100~240V 60W (Max.) | |
|
|
Regulations |
|
Safety and EMC
UL/cUL, FCC, CE, TCO99, Energy Star, CB, MPR II, ERG/GS.VCCI,
Cabinet
Desktop Stand
Free Mount
Weight
Desktop Stand
Free Mount
Tilt Base
17.5inch (W) x 17.8inch (H) x 9.5inch (D)
17.5inch (W) x 14.25inch (H) x 3inch (D)
22.8lb. (10.4Kg)
18.1lb. (8.2Kg)
0° Down 28° Up
Optional Module
Touch Panel
*All contents are subject to change without notice.
*Touch Screen Model doesn’t include the
*Surface Wave Touchscreen model