5Control Panel
INTRODUCTION
|
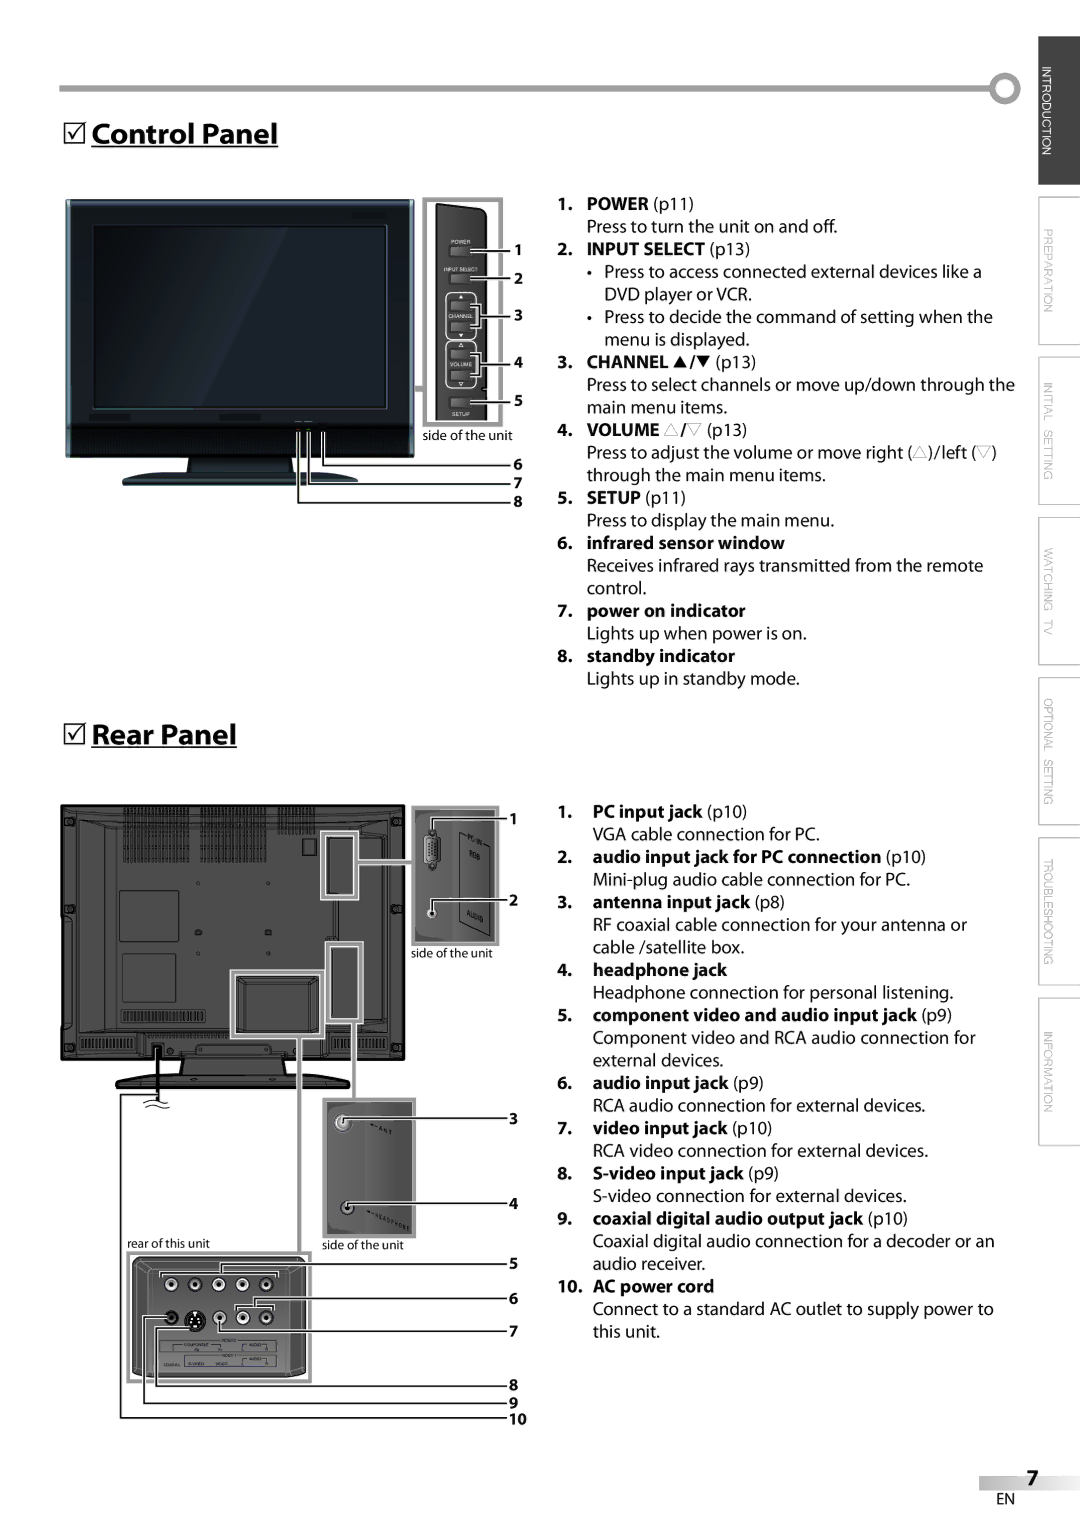
| 1. | POWER (p11) |
|
|
| Press to turn the unit on and off. |
POWER | 1 | 2. | INPUT SELECT (p13) |
| |||
INPUT SELECT | 2 |
| • Press to access connected external devices like a |
|
| DVD player or VCR. | |
| 3 |
| |
CHANNEL |
| • Press to decide the command of setting when the | |
|
|
| menu is displayed. |
VOLUME | 4 | 3. | CHANNEL K/L (p13) |
| 5 |
| Press to select channels or move up/down through the |
SETUP |
| main menu items. | |
side of the unit |
| 4. | VOLUME X/Y (p13) |
| 6 |
| Press to adjust the volume or move right (X)/left (Y) |
|
| through the main menu items. | |
| 7 |
| |
| 5. | SETUP (p11) | |
| 8 | ||
|
|
| Press to display the main menu. |
|
| 6. | infrared sensor window |
|
|
| Receives infrared rays transmitted from the remote |
|
|
| control. |
|
| 7. | power on indicator |
|
|
| Lights up when power is on. |
|
| 8. | standby indicator |
|
|
| Lights up in standby mode. |
5Rear Panel
|
|
|
| 1 | 1. PC input jack (p10) | |
|
|
|
|
| VGA cable connection for PC. | |
|
|
|
|
|
| |
|
|
|
|
| 2. audio input jack for PC connection (p10) | |
|
|
|
|
|
| |
|
|
|
| 2 | 3. | antenna input jack (p8) |
|
|
|
|
|
| RF coaxial cable connection for your antenna or |
|
|
|
| side of the unit |
| cable /satellite box. |
|
|
|
|
| 4. | headphone jack |
|
|
|
|
|
| Headphone connection for personal listening. |
|
|
|
|
| 5. component video and audio input jack (p9) | |
|
|
|
|
|
| Component video and RCA audio connection for |
|
|
|
|
|
| external devices. |
|
|
|
|
| 6. audio input jack (p9) | |
|
|
|
| 3 |
| RCA audio connection for external devices. |
|
|
|
| 7. video input jack (p10) | ||
|
|
|
|
| ||
|
|
|
|
|
| RCA video connection for external devices. |
|
|
|
|
| 8. | |
|
|
|
| 4 |
| |
|
|
|
| 9. coaxial digital audio output jack (p10) | ||
|
|
|
|
| ||
rear of this unit |
|
| side of the unit |
| Coaxial digital audio connection for a decoder or an | |
|
|
|
| 5 |
| audio receiver. |
|
|
|
| 6 | 10. AC power cord | |
|
|
|
|
| Connect to a standard AC outlet to supply power to | |
|
|
|
|
|
| |
| COMPONENT | VIDEO 2 |
| 7 |
| this unit. |
Y | Pr | L | AUDIO |
|
| |
Pb | R |
|
| |||
|
| VIDEO 1 |
| AUDIO |
|
|
COAXIAL | VIDEO | L | R |
|
| |
|
|
|
| 8 |
|
|
|
|
|
| 9 |
|
|
|
|
|
| 10 |
|
|
![]() PREPARATION INITIAL SETTING WATCHING TV OPTIONAL SETTING TROUBLESHOOTING INFORMATION
PREPARATION INITIAL SETTING WATCHING TV OPTIONAL SETTING TROUBLESHOOTING INFORMATION
7
EN