ATTACHING THE DOOR TO THE STAND
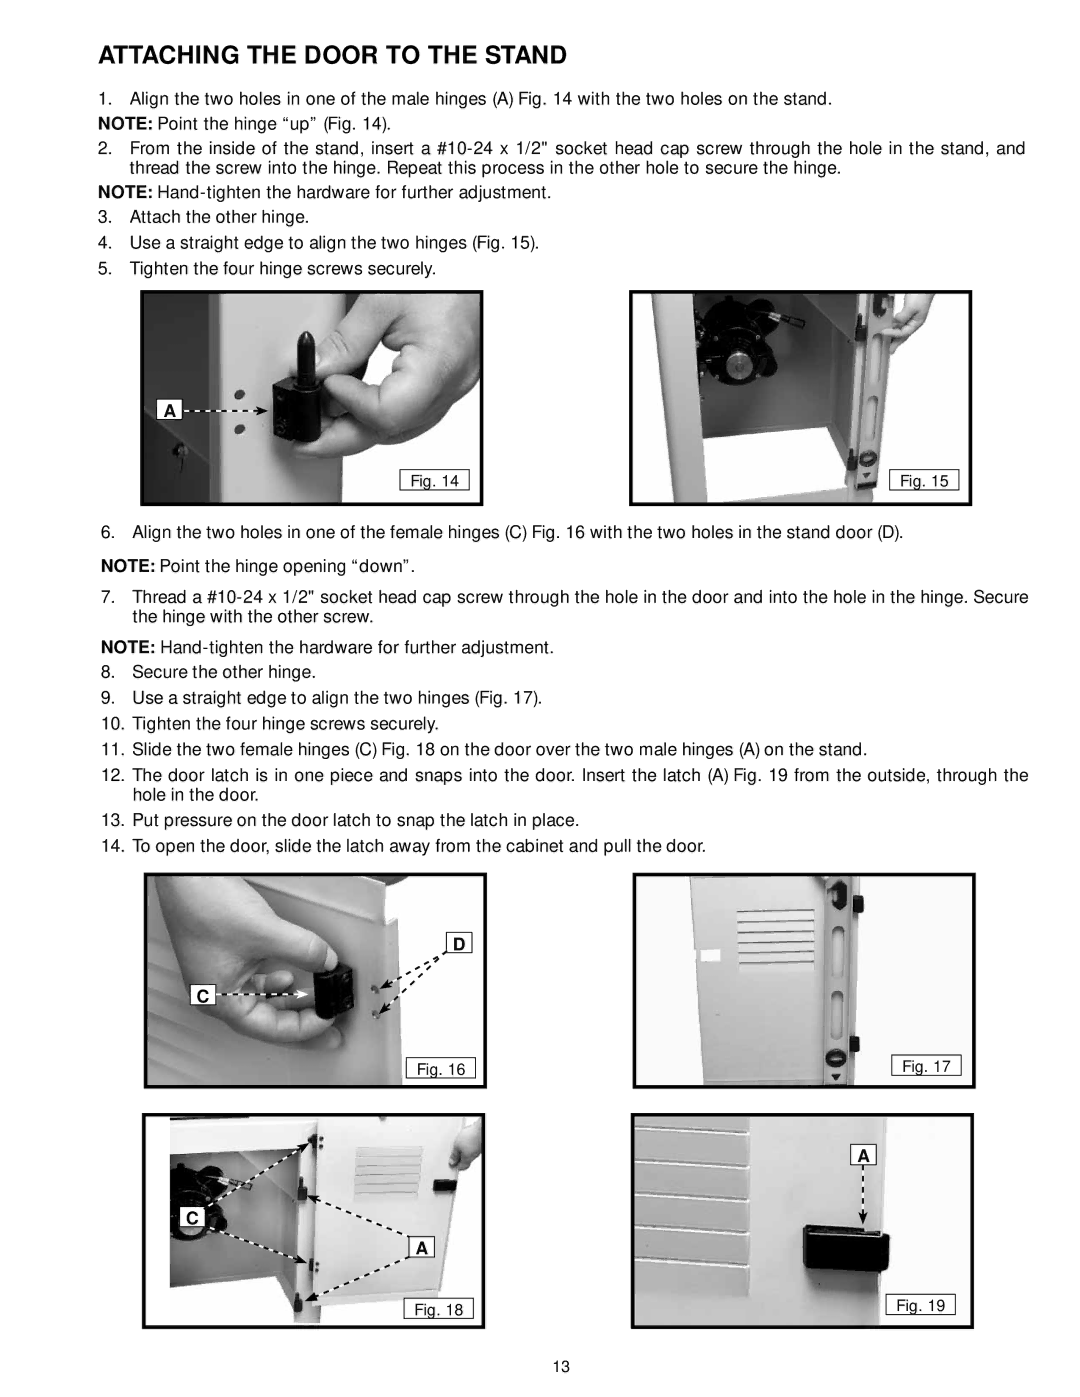
1.Align the two holes in one of the male hinges (A) Fig. 14 with the two holes on the stand. NOTE: Point the hinge “up” (Fig. 14).
2.From the inside of the stand, insert a
NOTE:
3.Attach the other hinge.
4.Use a straight edge to align the two hinges (Fig. 15).
5.Tighten the four hinge screws securely.
A ![]()
Fig. 14
Fig. 15
6. Align the two holes in one of the female hinges (C) Fig. 16 with the two holes in the stand door (D).
NOTE: Point the hinge opening “down”.
7.Thread a
NOTE:
8.Secure the other hinge.
9.Use a straight edge to align the two hinges (Fig. 17).
10.Tighten the four hinge screws securely.
11.Slide the two female hinges (C) Fig. 18 on the door over the two male hinges (A) on the stand.
12.The door latch is in one piece and snaps into the door. Insert the latch (A) Fig. 19 from the outside, through the hole in the door.
13.Put pressure on the door latch to snap the latch in place.
14.To open the door, slide the latch away from the cabinet and pull the door.
D
C ![]()
![]()
Fig. 16
C |
A |
Fig. 18 |
Fig. 17
A
Fig. 19
13
