OPERATION
OPERATIONAL CONTROLS AND ADJUSTMENTS
STARTING AND STOPPING THE SAW
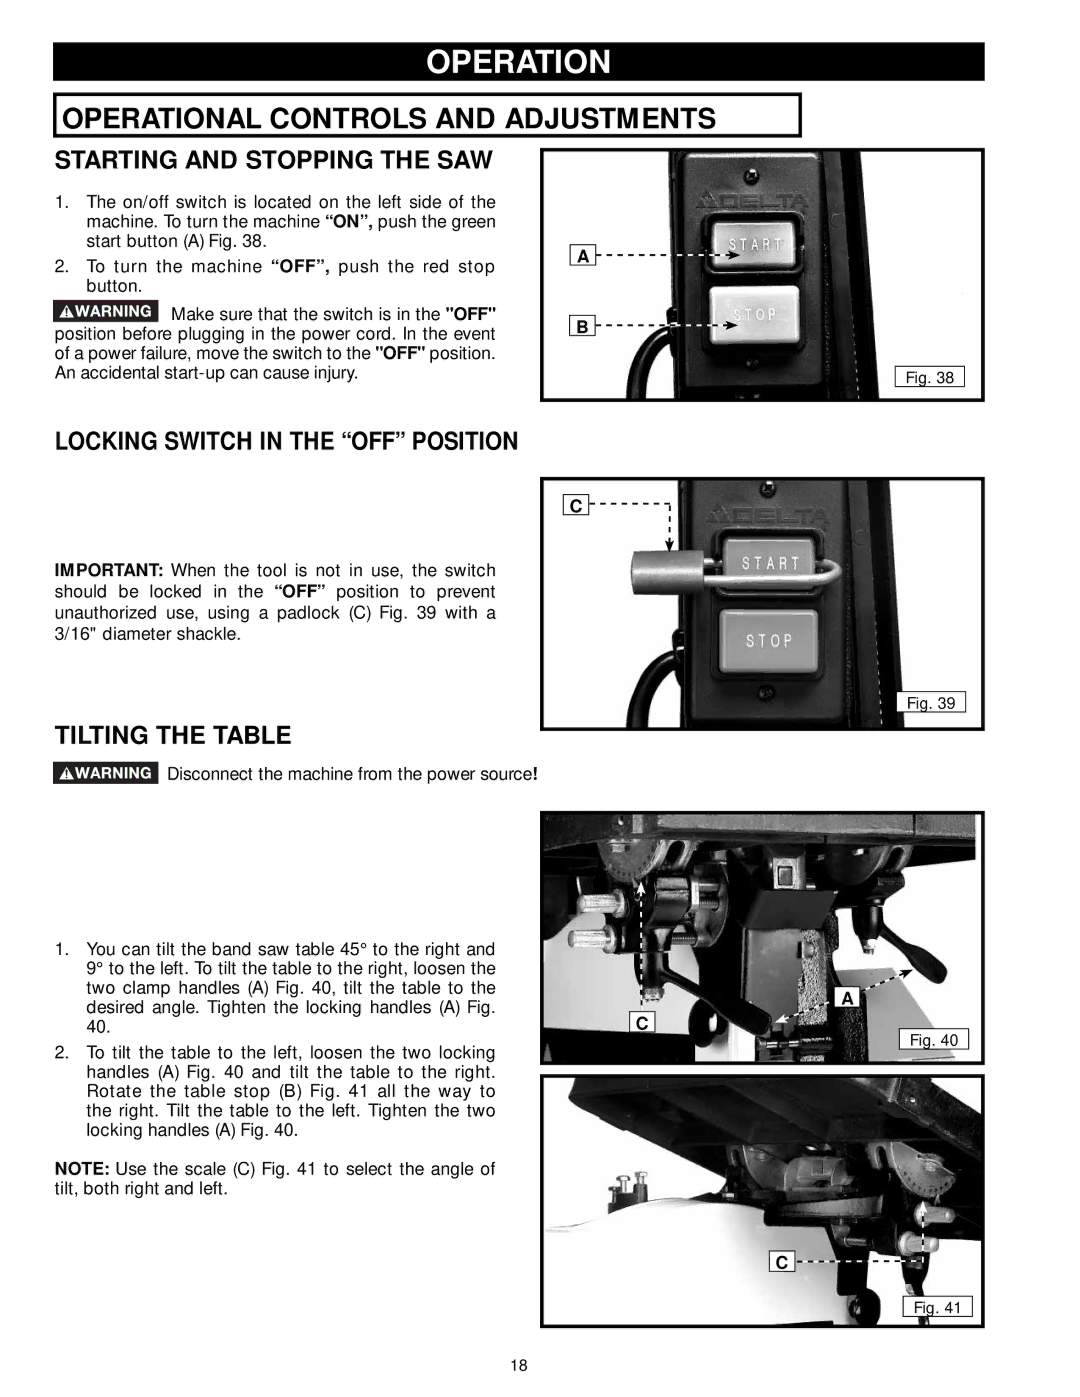
1.The on/off switch is located on the left side of the machine. To turn the machine “ON”, push the green start button (A) Fig. 38.
2.To turn the machine “OFF”, push the red stop button.
![]() Make sure that the switch is in the "OFF" position before plugging in the power cord. In the event of a power failure, move the switch to the "OFF" position. An accidental
Make sure that the switch is in the "OFF" position before plugging in the power cord. In the event of a power failure, move the switch to the "OFF" position. An accidental
A![]()
![]()
B![]()
![]()
Fig. 38
LOCKING SWITCH IN THE “OFF” POSITION
IMPORTANT: When the tool is not in use, the switch should be locked in the “OFF” position to prevent unauthorized use, using a padlock (C) Fig. 39 with a 3/16" diameter shackle.
TILTING THE TABLE
![]() Disconnect the machine from the power source!
Disconnect the machine from the power source!
C ![]()
![]()
Fig. 39
1.You can tilt the band saw table 45° to the right and 9° to the left. To tilt the table to the right, loosen the two clamp handles (A) Fig. 40, tilt the table to the desired angle. Tighten the locking handles (A) Fig. 40.
2.To tilt the table to the left, loosen the two locking handles (A) Fig. 40 and tilt the table to the right. Rotate the table stop (B) Fig. 41 all the way to the right. Tilt the table to the left. Tighten the two locking handles (A) Fig. 40.
NOTE: Use the scale (C) Fig. 41 to select the angle of tilt, both right and left.
A
C
Fig. 40
C
Fig. 41
18
