ATTACHING THE TABLE TO THE SAW
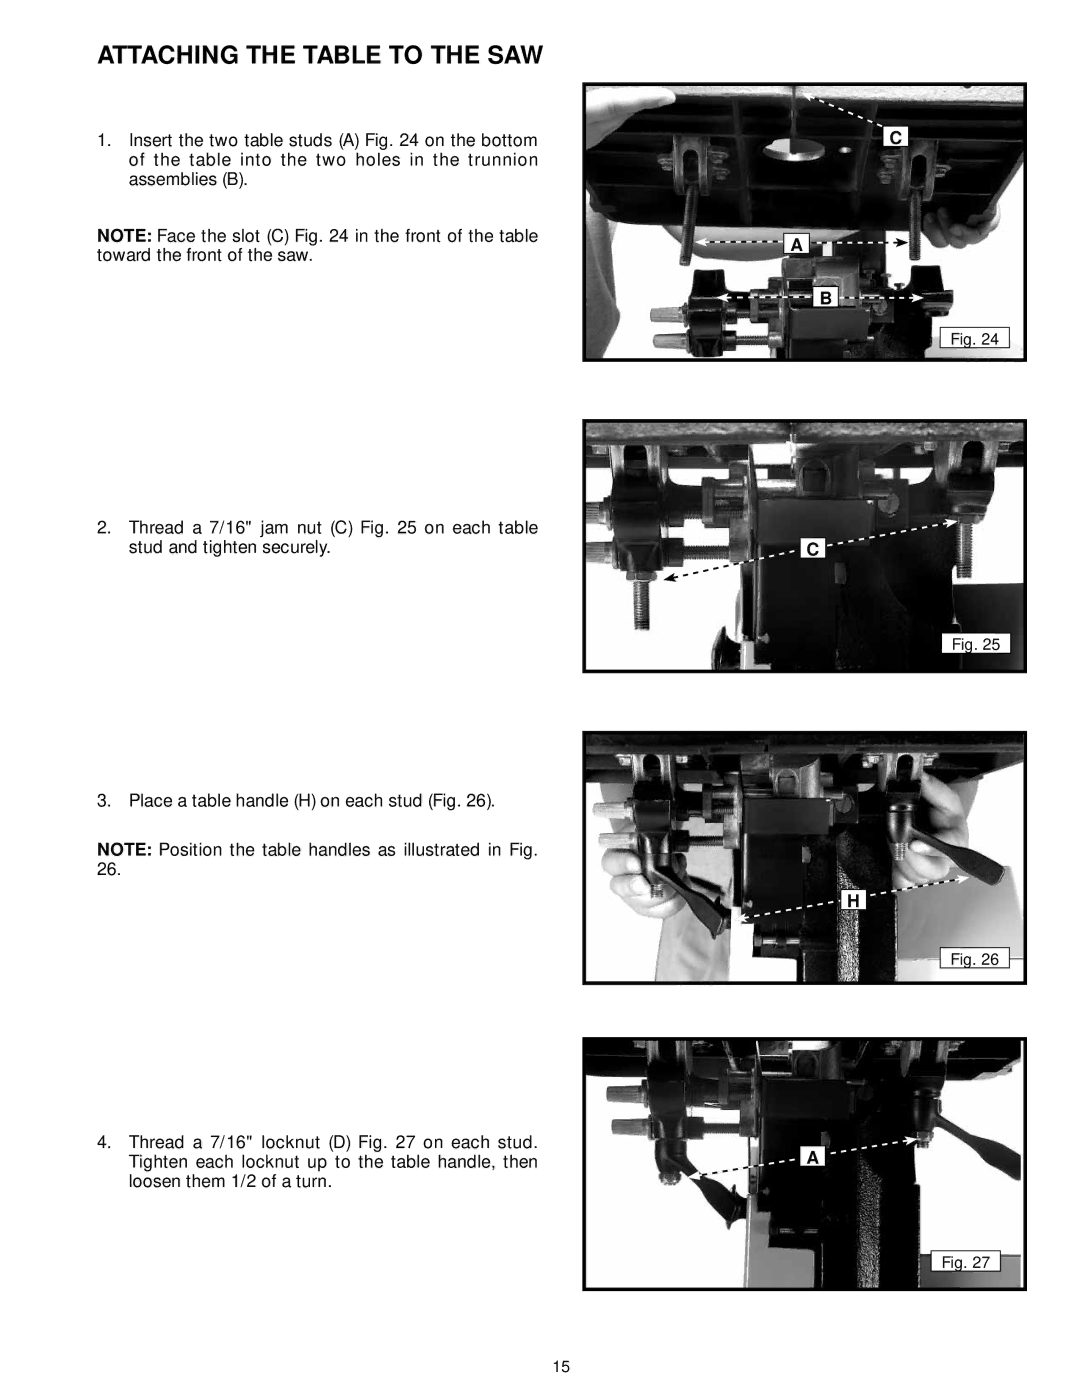
1.Insert the two table studs (A) Fig. 24 on the bottom of the table into the two holes in the trunnion assemblies (B).
NOTE: Face the slot (C) Fig. 24 in the front of the table toward the front of the saw.
2.Thread a 7/16" jam nut (C) Fig. 25 on each table stud and tighten securely.
3. Place a table handle (H) on each stud (Fig. 26).
NOTE: Position the table handles as illustrated in Fig. 26.
4.Thread a 7/16" locknut (D) Fig. 27 on each stud. Tighten each locknut up to the table handle, then loosen them 1/2 of a turn.
C
![]()
![]() A
A ![]()
![]()
![]()
![]() B
B ![]()
![]()
Fig. 24
![]()
![]() C
C
Fig. 25
H
Fig. 26
A
Fig. 27
15
