Installation |
|
|
|
|
|
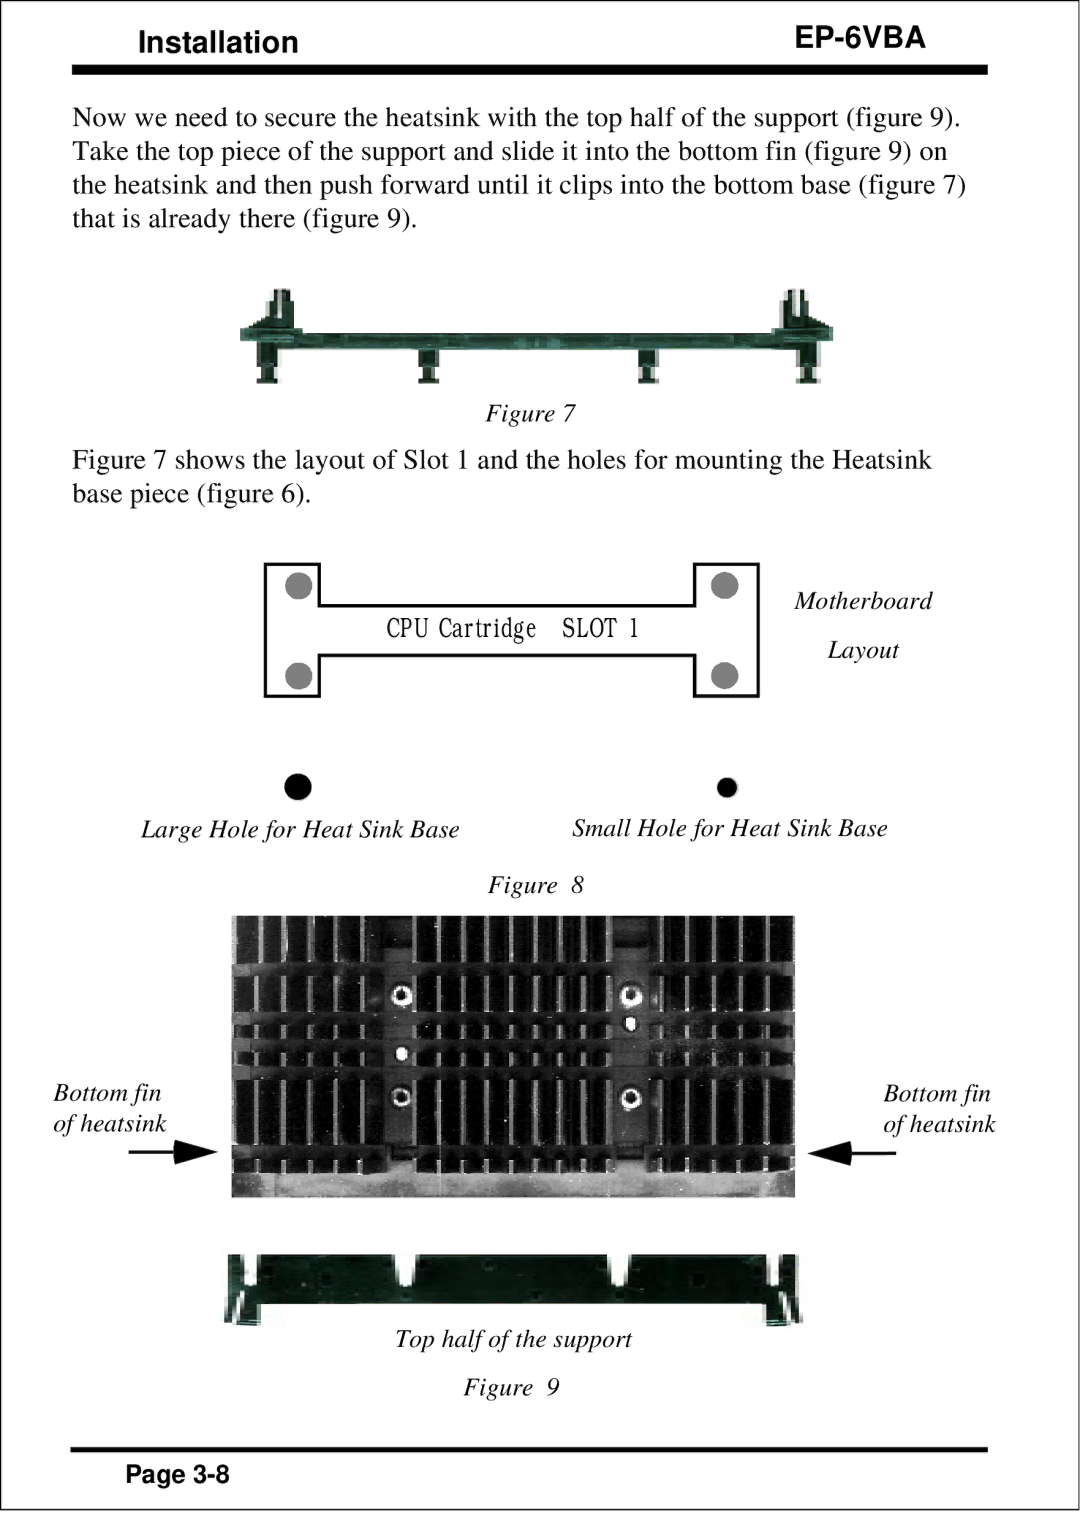
Now we need to secure the heatsink with the top half of the support (figure 9). Take the top piece of the support and slide it into the bottom fin (figure 9) on the heatsink and then push forward until it clips into the bottom base (figure 7) that is already there (figure 9).
Figure 7
Figure 7 shows the layout of Slot 1 and the holes for mounting the Heatsink base piece (figure 6).
Motherboard
CPU Cartridge SLOT 1
Layout
Large Hole for Heat Sink Base | Small Hole for Heat Sink Base |
Figure 8
Bottom fin | Bottom fin |
of heatsink | of heatsink |
Top half of the support
Figure 9
Page
