The printer should come on and the head should move back and forth a few times and do a cleaning cycle. When it stops moving, only the green light should be on.
A red light at this point indicates that one of the chips has not been recognized. If this is the case please LOCK all tubes with the white clamps and very carefully remove the Injectors, Foam Block and Special Chip Block, Now very carefully check the chip that is not registering. It is advisable to clean the chip by wiping the contacts with a soft cloth and
HOW THE SPECIAL PERMACHIP WORKS: -
The PermaChips operate as a normal chip on a injector and while printing the ink levels will drop as a normal injector on the status monitor. When the levels reach a certain point the chips will reset to FULL. Please do not take any notice of the level indicator.
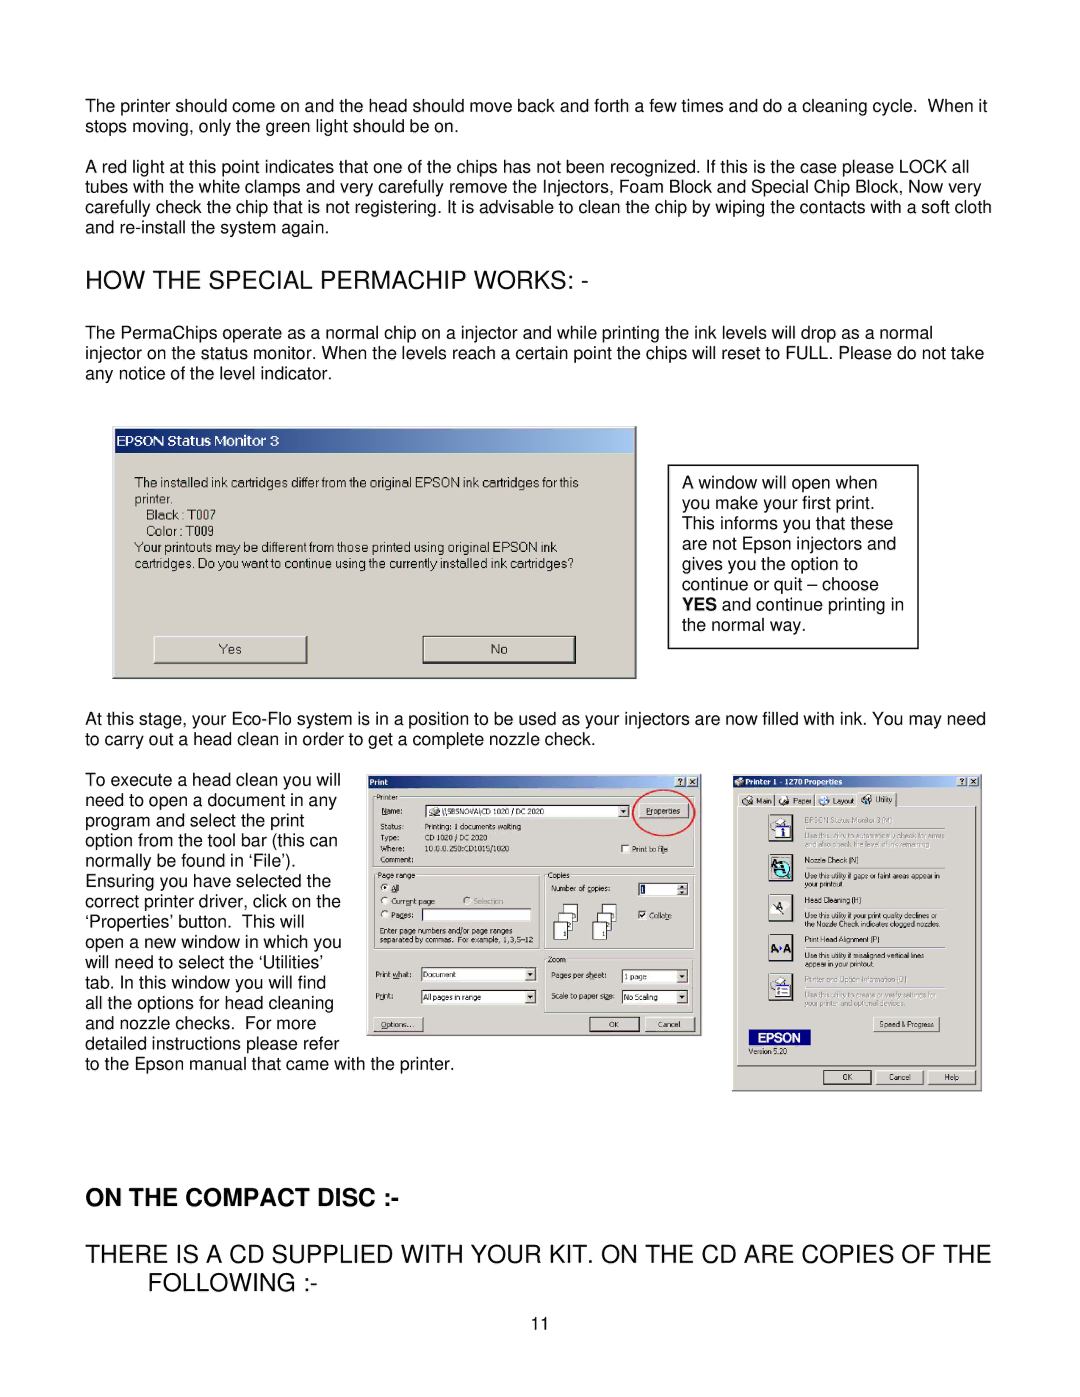
A window will open when you make your first print. This informs you that these are not Epson injectors and gives you the option to continue or quit – choose YES and continue printing in the normal way.
At this stage, your
To execute a head clean you will need to open a document in any program and select the print option from the tool bar (this can normally be found in ‘File’). Ensuring you have selected the correct printer driver, click on the ‘Properties’ button. This will open a new window in which you will need to select the ‘Utilities’ tab. In this window you will find all the options for head cleaning and nozzle checks. For more detailed instructions please refer
to the Epson manual that came with the printer.
ON THE COMPACT DISC :-
THERE IS A CD SUPPLIED WITH YOUR KIT. ON THE CD ARE COPIES OF THE FOLLOWING :-
11
