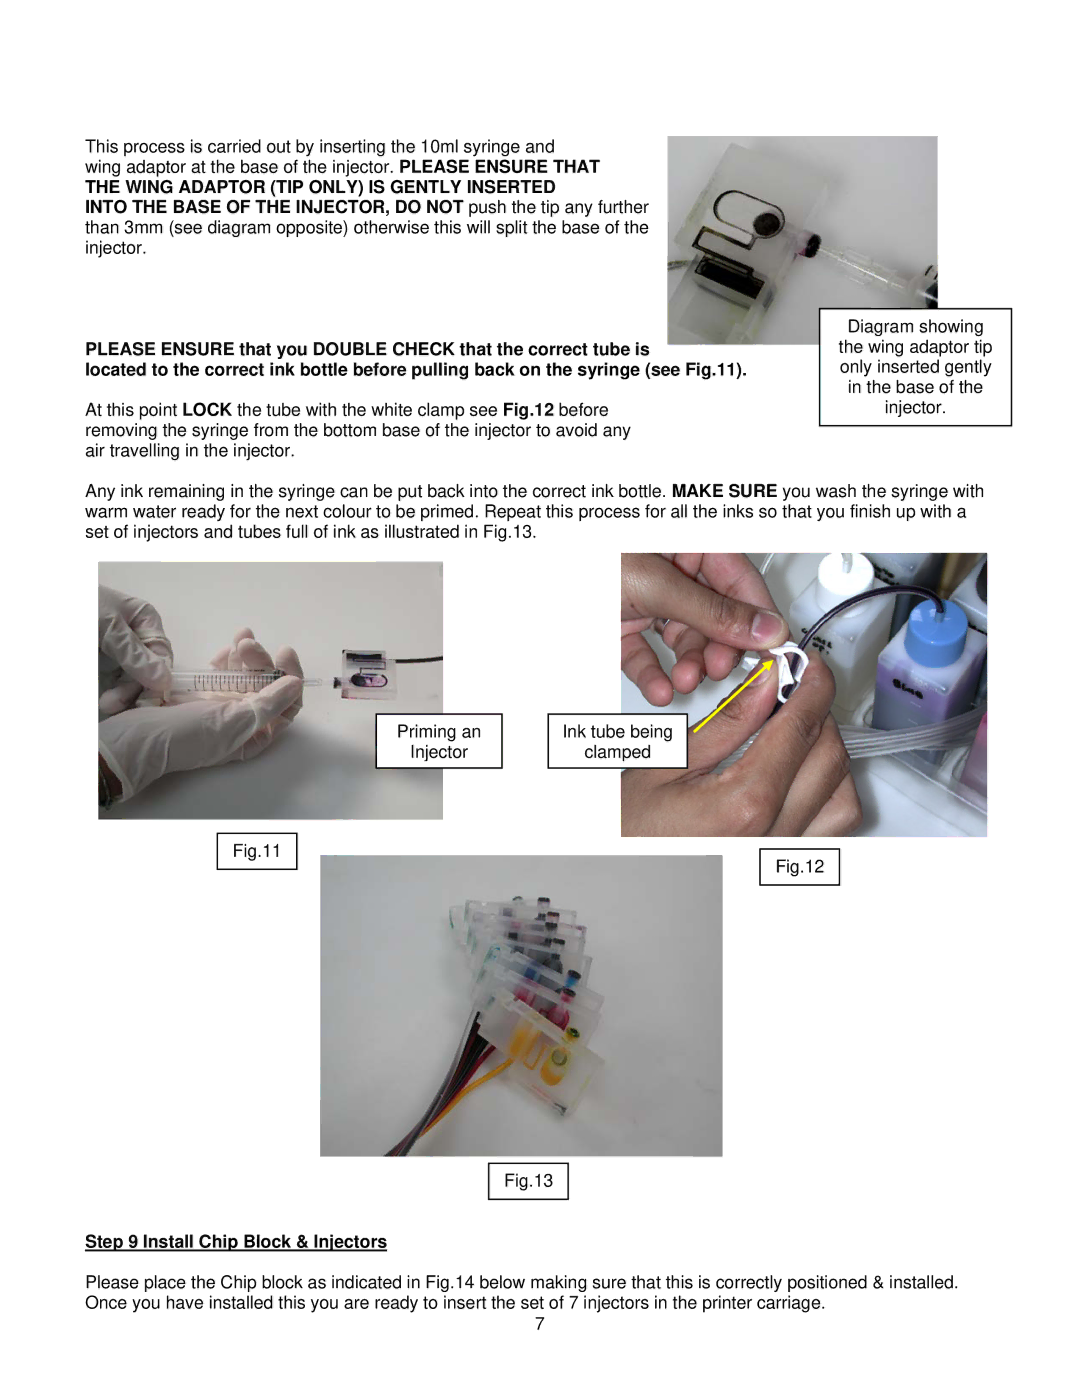
This process is carried out by inserting the 10ml syringe and wing adaptor at the base of the injector. PLEASE ENSURE THAT
THE WING ADAPTOR (TIP ONLY) IS GENTLY INSERTED
INTO THE BASE OF THE INJECTOR, DO NOT push the tip any further than 3mm (see diagram opposite) otherwise this will split the base of the injector.
PLEASE ENSURE that you DOUBLE CHECK that the correct tube is
located to the correct ink bottle before pulling back on the syringe (see Fig.11).
At this point LOCK the tube with the white clamp see Fig.12 before removing the syringe from the bottom base of the injector to avoid any air travelling in the injector.
Diagram showing
the wing adaptor tip only inserted gently in the base of the injector.
Any ink remaining in the syringe can be put back into the correct ink bottle. MAKE SURE you wash the syringe with warm water ready for the next colour to be primed. Repeat this process for all the inks so that you finish up with a set of injectors and tubes full of ink as illustrated in Fig.13.
Priming an
Injector
Fig.11
Step 9 Install Chip Block & Injectors
Ink tube being
clamped
Fig.13
Fig.12
Please place the Chip block as indicated in Fig.14 below making sure that this is correctly positioned & installed. Once you have installed this you are ready to insert the set of 7 injectors in the printer carriage.
7