Disassembly and Assembly
Stylus Color Service Mknual
5. Discomect the cables from the connectors CN5, CN6, CN7, CN8, CN9, CN1O, CN1l, and CN12
of the C137 MAIN board.
+’- ‘!.
4.
■ When you replace the main board, initialize the EEPROM contents as follows;
1) Reassemble the printer.
2) Turn the pn”nter ON while hold down IAltJ, [Font], ILoadlEject] and [Pause] buttons on
the control panel.
■ It is possible to disconnect the cables. When reconnecting the cablesfiom the connectors
CN6, CN7 and connectors CNII, CN12 of the C137MAIN board, see the following
instructions.
1. CN1l: Printhead FFC cable (white color mark)
CN12: Printhead FFC cable (blue color mark)
2. CN6 : Carriage motor cable (red color mark :Also theredcolor indicates thel-p”n of the
CN6J
CN7: Paperfeed motor cable (black color mark :Also the black color indicates thel-pin
of the CAV.)
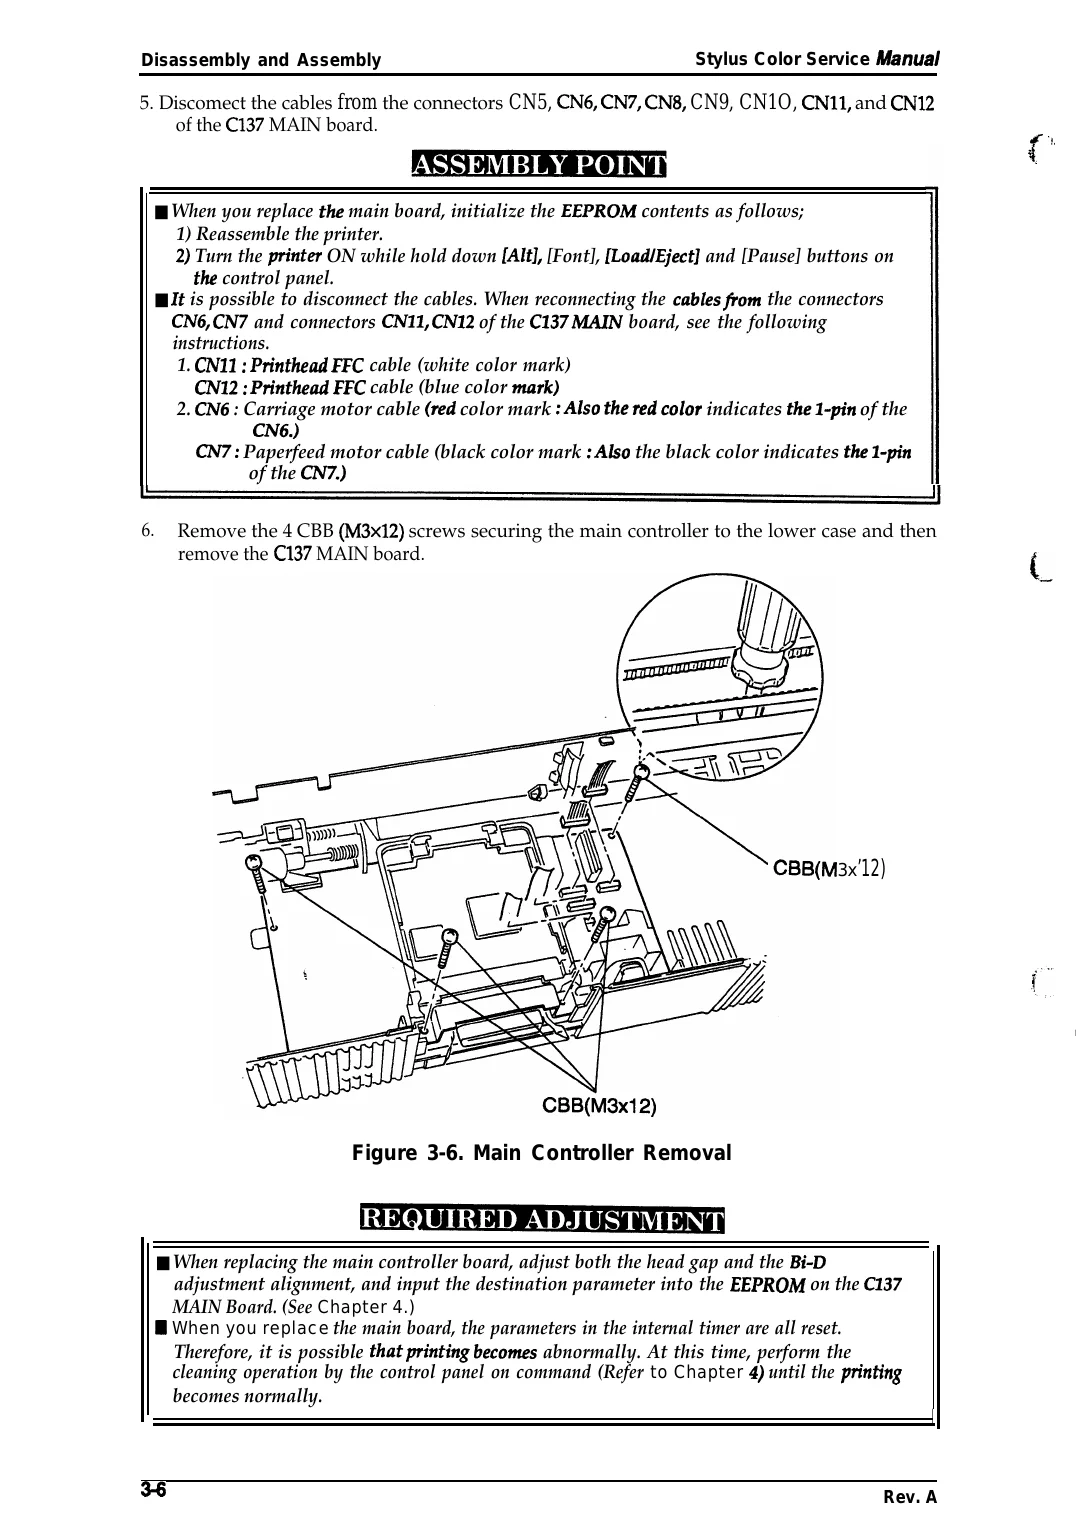
6.
Remove the 4 CBB (M3x12) screws securing the main controller to the lower case and then
remove the C137 MAIN board.
L
3x ’12)
I
Figure 3-6. Main Controller Removal
■ When replacing the main controller board, adjust both the head gap and the Bi-D
adjustment alignment, and input the destination parameter into the EEPROM on the C137
MAIN Board. (See Chapter 4.)
H When you replace the main board, the parameters in the internal timer are all reset.
Therefore, it is possible thatprintingbecomes abnormally. At this time, perform the
cleaning operation by the control panel on command (Refer to Chapter 4) until the p“nting
becomes normally.
I
3+
Rev. A