Getting Started
Use the information in this chapter to set up and configure your Vision system.
To get started you need to:
1.Connect audio and video cables to Vision and your widescreen high definition TV or home theater A/V receiver
2.Connect Vision to your Ethernet network
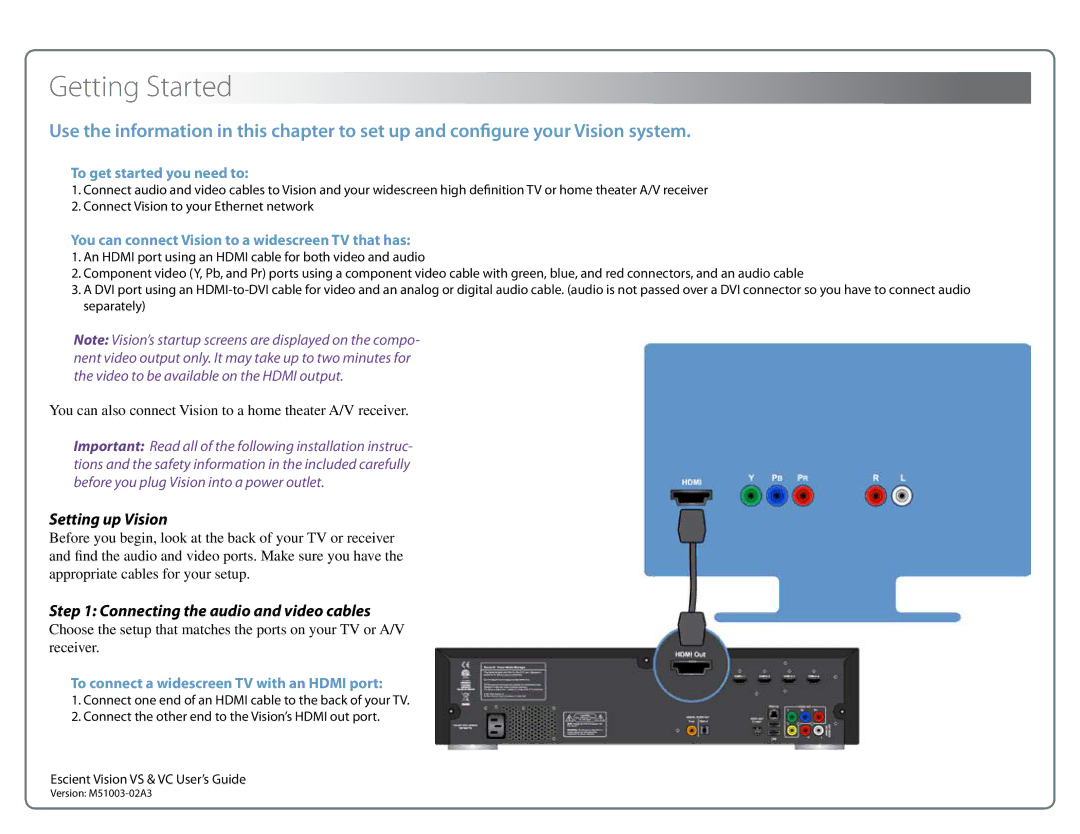
You can connect Vision to a widescreen TV that has:
1.An HDMI port using an HDMI cable for both video and audio
2.Component video (Y, Pb, and Pr) ports using a component video cable with green, blue, and red connectors, and an audio cable
3.A DVI port using an
Note: Vision’s startup screens are displayed on the compo- nent video output only. It may take up to two minutes for the video to be available on the HDMI output.
You can also connect Vision to a home theater A/V receiver.
Important: Read all of the following installation instruc- tions and the safety information in the included carefully before you plug Vision into a power outlet.
Setting up Vision
Before you begin, look at the back of your TV or receiver and find the audio and video ports. Make sure you have the appropriate cables for your setup.
Step 1: Connecting the audio and video cables
Choose the setup that matches the ports on your TV or A/V receiver.
To connect a widescreen TV with an HDMI port:
1.Connect one end of an HDMI cable to the back of your TV.
2.Connect the other end to the Vision’s HDMI out port.
Escient Vision VS & VC User’s Guide | 13 |
Version: |