
CP70 specifications
The Essick Air CP70 is a remarkable evaporative cooler designed to provide enhanced comfort in various indoor environments. This unit is known for its energy efficiency and ability to deliver cool, refreshing air during hot weather. With its sleek design, the CP70 not only looks good in any space but also offers an array of features and technologies that set it apart from traditional cooling systems.One of the standout features of the Essick Air CP70 is its impressive cooling capacity. It is equipped with a powerful fan that can circulate air throughout larger areas, making it an ideal choice for both residential and commercial use. The evaporative technology used in this cooler relies on the natural process of evaporation to lower the air temperature, making it an eco-friendly option compared to conventional air conditioning units that consume a significant amount of energy.
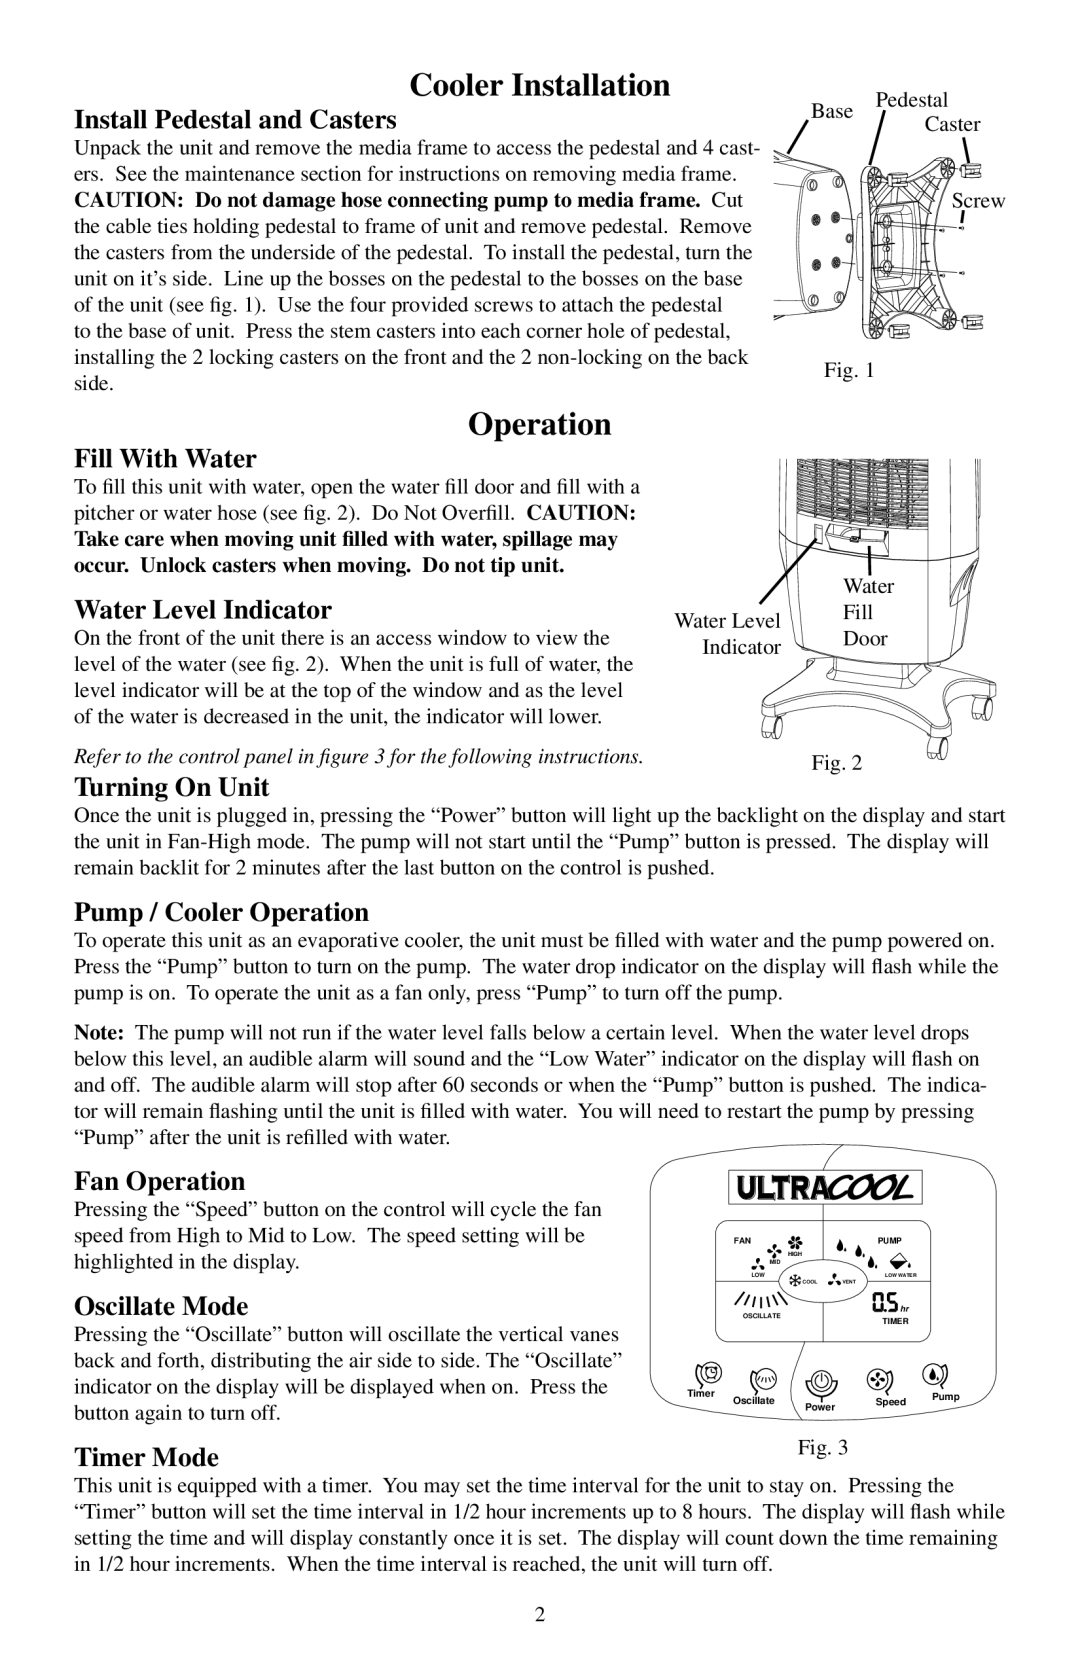
The CP70 also incorporates a large water reservoir that allows for extended use without frequent refills. This feature is particularly beneficial for those in hotter climates, ensuring that the unit can operate for extended periods while consistently delivering cool air. Furthermore, the cooler is designed with a built-in water level indicator, allowing users to easily monitor the water status and prevent any operational hiccups.
In terms of convenience, the Essick Air CP70 is outfitted with user-friendly controls, including an adjustable thermostat and multiple fan speed settings. These options allow users to personalize the cooling experience to fit their preferences, ensuring optimal comfort. Additionally, the unit’s lightweight design and integrated caster wheels make it easy to move from room to room, providing flexibility in cooling various spaces.
A notable aspect of the CP70 is its low maintenance requirements. The cooling pads are designed for durability and can be easily replaced, ensuring the unit operates efficiently for years to come. The easy-access water fill door also simplifies the refill process, enhancing user experience and convenience.
Overall, the Essick Air CP70 is a top-tier evaporative cooler that combines efficiency, convenience, and user-friendly features. It offers an eco-friendly cooling alternative without sacrificing performance, making it an excellent choice for anyone seeking relief from heat.