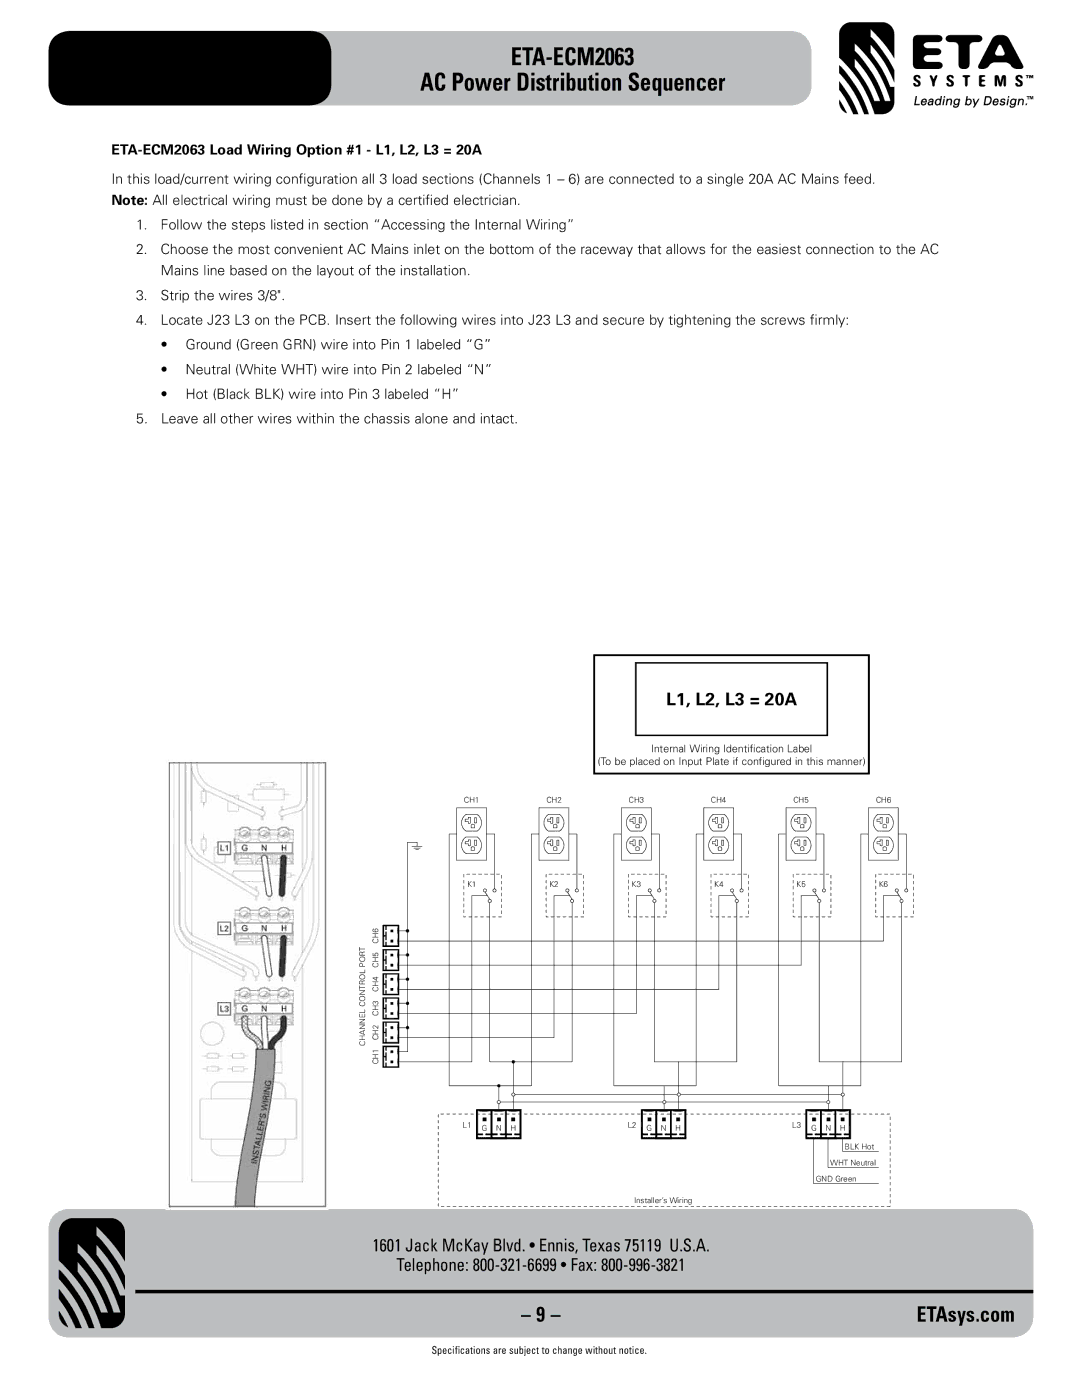
eta-ecm2063 specifications
The ETA Systems ETA-ECM2063 is a cutting-edge electronic control module designed for advanced automotive applications. Known for its robust performance and user-friendly features, the ECM2063 is an essential component for modern vehicles and is widely utilized in various automotive systems today.One of the standout features of the ETA-ECM2063 is its compatibility with a wide range of vehicle platforms. This flexibility allows automotive engineers to incorporate the module into various models and configurations seamlessly. Moreover, it supports both gasoline and diesel engines, making it versatile across different fuel types.
The ECM2063 boasts advanced processing capabilities, equipped with a powerful microcontroller that allows for real-time data processing and control. This high processing power enables the module to manage complex algorithms for fuel injection, ignition timing, and other critical engine parameters, ensuring optimal performance and efficiency.
Another key technology integrated into the ETA-ECM2063 is its scalability. The module is designed to accommodate future software updates and hardware enhancements, providing a long-lasting solution that can adapt to evolving automotive technologies. This means that manufacturers can implement innovations over time without the need to replace the entire system.
Safety is paramount in any automotive application, and the ETA-ECM2063 excels in this area. It incorporates fail-safe mechanisms and diagnostic capabilities, allowing for continuous monitoring of system performance. The module can detect anomalies, troubleshoot issues, and communicate necessary information to technicians for timely repairs, thus enhancing overall vehicle safety.
The robust construction of the ECM2063 makes it resistant to harsh automotive environments, including extreme temperatures, humidity, and vibrations. This durability ensures that the module consistently performs well under varying conditions, contributing to vehicle reliability.
In summary, the ETA Systems ETA-ECM2063 combines flexibility, advanced processing power, scalability, safety features, and durability into a single automotive solution. Its capability to efficiently manage engine functions while adapting to future technology makes it an invaluable tool for both manufacturers and end-users, setting a high standard in electronic control modules for automotive applications.

