![]() NOTE: If power is removed from the unit while the Channel LED Pattern is still active, no change in the units channel selection will be made.
NOTE: If power is removed from the unit while the Channel LED Pattern is still active, no change in the units channel selection will be made.
Changing the 802.11g Radio Channel
The WiRanger can operate on one of three 802.11g radio channels. Each radio channel broadcasts data in a different frequency band within the 2.4GHz range. The WiRanger can be configured to operate on channels: 1, 6, and 11.
By selecting a different Radio Channel, you can try to find a channel with minimal radio interference. This can improve signal quality and data rates.
![]() NOTE: When changing the Radio Channel for a “Paired” system, the channel change MUST BE completed on BOTH the LEX unit and the REX unit. The order is
NOTE: When changing the Radio Channel for a “Paired” system, the channel change MUST BE completed on BOTH the LEX unit and the REX unit. The order is
![]() NOTE: STOP all devices connected to the REX unit prior to changing the channel on either unit. Changing the Radio Channel will disrupt USB traffic.
NOTE: STOP all devices connected to the REX unit prior to changing the channel on either unit. Changing the Radio Channel will disrupt USB traffic.
1.Power on either the LEX unit or the REX unit and wait for approximately 20 seconds before proceeding to step 2. If the unit is already on, proceed to step 2.
2.On the selected LEX unit or REX unit, press and hold (do not release) the Pair/CH button for a minimum of 10 seconds. The button can be released when the Host, Link and Activity LED’s start to blink rapidly.
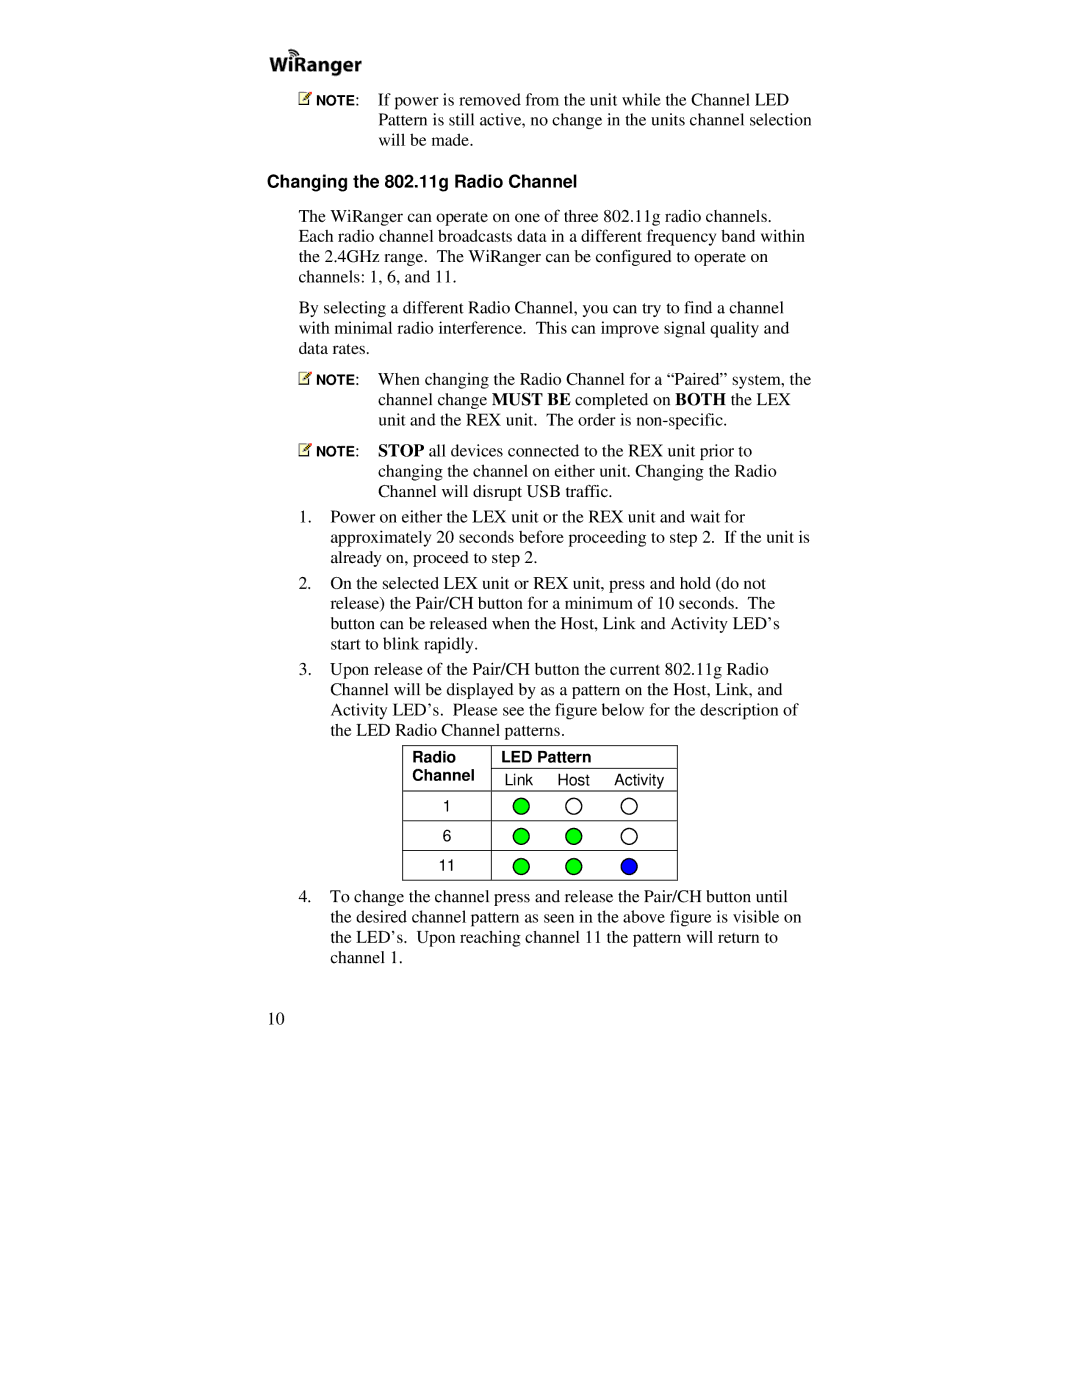
3.Upon release of the Pair/CH button the current 802.11g Radio Channel will be displayed by as a pattern on the Host, Link, and Activity LED’s. Please see the figure below for the description of the LED Radio Channel patterns.
Radio | LED Pattern |
Channel | Link Host Activity |
1 |
|
6
11
4.To change the channel press and release the Pair/CH button until the desired channel pattern as seen in the above figure is visible on the LED’s. Upon reaching channel 11 the pattern will return to channel 1.
10