Power Supply Wiring
NOTES:
•Only one power supply is required. A single power supply connected to either unit in the pair powers both units.
•A power supply is included with each
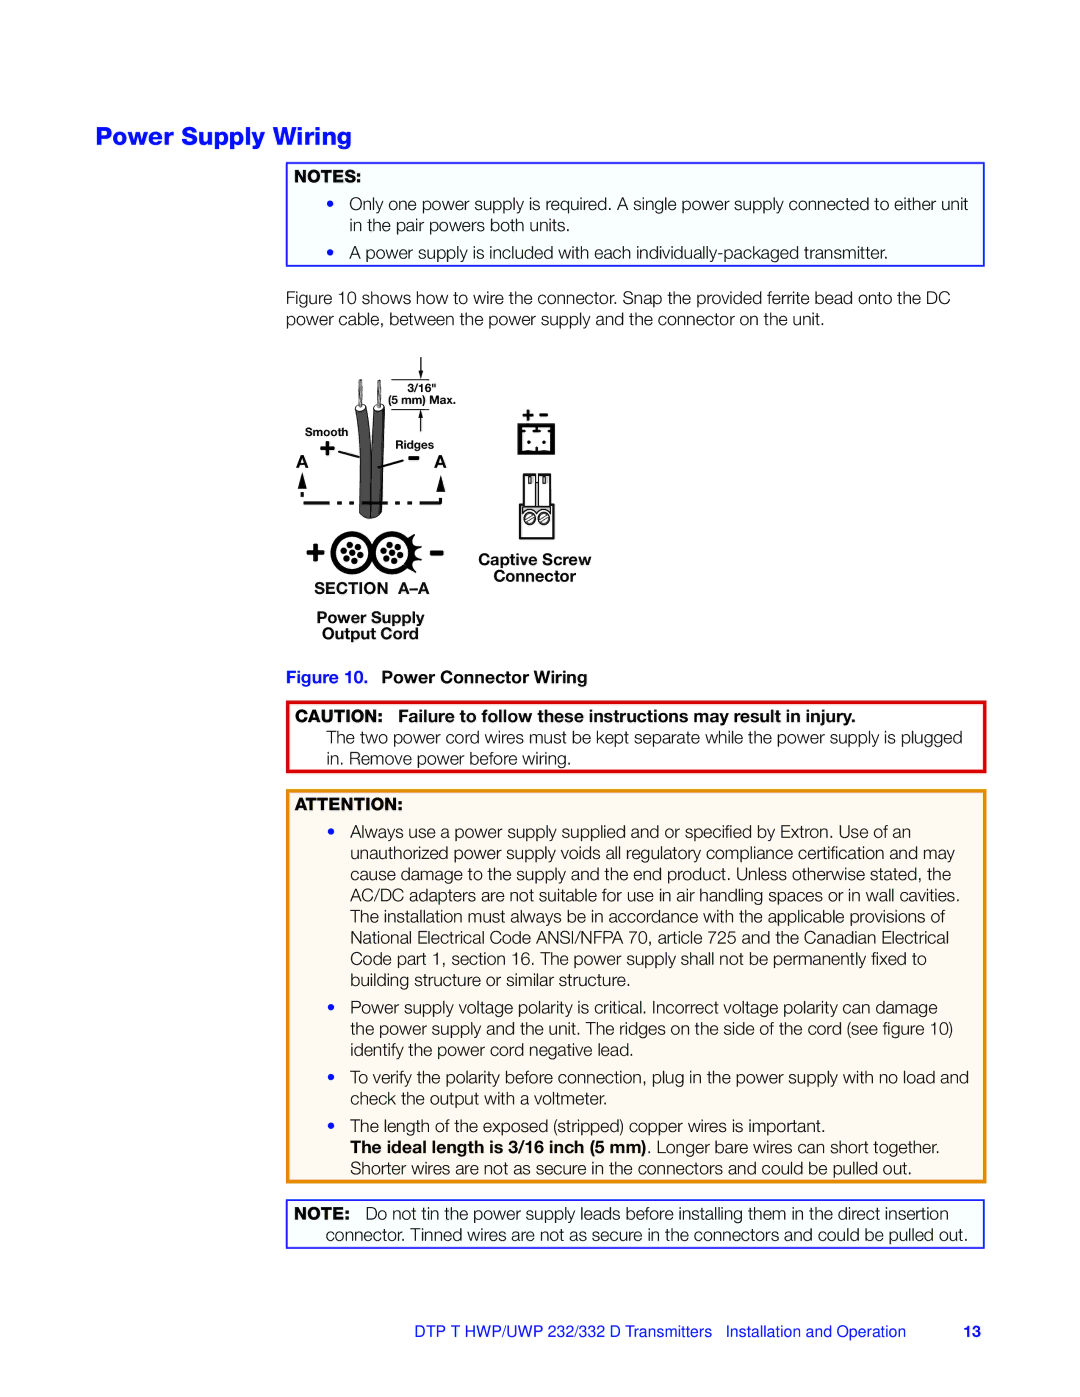
Figure 10 shows how to wire the connector. Snap the provided ferrite bead onto the DC power cable, between the power supply and the connector on the unit.
| 3/16" |
| (5 mm) Max. |
Smooth | Ridges |
| |
A | A |
SECTION
Power Supply
Output Cord
Captive Screw
Connector
Figure 10. Power Connector Wiring
CAUTION: Failure to follow these instructions may result in injury.
The two power cord wires must be kept separate while the power supply is plugged in. Remove power before wiring.
ATTENTION:
•Always use a power supply supplied and or specified by Extron. Use of an
unauthorized power supply voids all regulatory compliance certification and may cause damage to the supply and the end product. Unless otherwise stated, the AC/DC adapters are not suitable for use in air handling spaces or in wall cavities. The installation must always be in accordance with the applicable provisions of National Electrical Code ANSI/NFPA 70, article 725 and the Canadian Electrical Code part 1, section 16. The power supply shall not be permanently fixed to building structure or similar structure.
•Power supply voltage polarity is critical. Incorrect voltage polarity can damage the power supply and the unit. The ridges on the side of the cord (see figure 10) identify the power cord negative lead.
•To verify the polarity before connection, plug in the power supply with no load and check the output with a voltmeter.
•The length of the exposed (stripped) copper wires is important.
The ideal length is 3/16 inch (5 mm). Longer bare wires can short together. Shorter wires are not as secure in the connectors and could be pulled out.
NOTE: Do not tin the power supply leads before installing them in the direct insertion connector. Tinned wires are not as secure in the connectors and could be pulled out.
DTP T HWP/UWP 232/332 D Transmitters • Installation and Operation 13
