Installation and Operation, cont’d
Projector mounting
Projector mount the YCV 100, VYC 100N, or VYC 100P using the optional PMK 100 mounting kit (part
1. | Remove rubber feet if they were previously installed on the |
| bottom of the unit. |
2. | Attach the projector mounting brackets to the unit with the |
| machine screws provided. |
3. | Secure the unit below the ceiling to a projector mount or |
| other surface by inserting the mounting bolt through the |
| bracket’s slotted hole, as shown below. |
| Projector | |
Ceiling | Mounting | |
Bracket | ||
|
Mounting |
Bolt |
Digital Projector
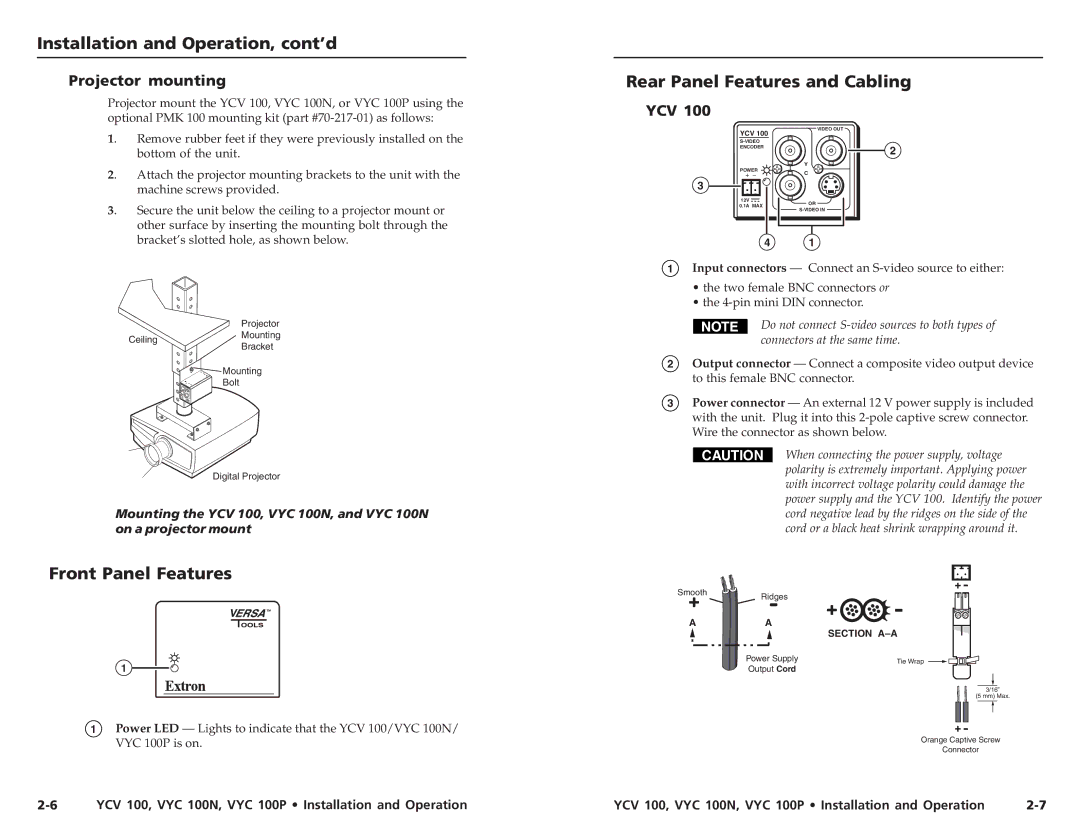
Mounting the YCV 100, VYC 100N, and VYC 100N on a projector mount
Front Panel Features
1![]()
![]()
1Power LED — Lights to indicate that the YCV 100/VYC 100N/ VYC 100P is on.
Rear Panel Features and Cabling
YCV 100
VIDEO OUT
YCV 100 |
| |
| ||
ENCODER | 2 | |
| ||
POWER | Y | |
C | ||
|
3
12V |
| OR | |
0.1A | MAX | ||
|
| ||
| 4 | 1 |
1Input connectors — Connect an
•the two female BNC connectors or
•the
Do not connect
2Output connector — Connect a composite video output device to this female BNC connector.
3Power connector — An external 12 V power supply is included with the unit. Plug it into this
CAUTION | When connecting the power supply, voltage |
| polarity is extremely important. Applying power |
| with incorrect voltage polarity could damage the |
| power supply and the YCV 100. Identify the power |
| cord negative lead by the ridges on the side of the |
| cord or a black heat shrink wrapping around it. |
SmoothRidges
A | A |
SECTION
Power Supply | Tie Wrap |
Output Cord |
|
3/16”
(5 mm) Max.
Orange Captive Screw
Connector
YCV 100, VYC 100N, VYC 100P • Installation and Operation | YCV 100, VYC 100N, VYC 100P • Installation and Operation |
