Cooktop & Installation Manual
Model COGB ENGLISH
Pressure Regulator Conversion
Disconnect all electrical power, at the main circuit breaker or fuse box.
Shut off the gas supply to the cooktop by closing the manual
Adjust the pressure regulator, by following the instructions (see figure 19):
•Unscrew the cap.
•Place your thumb against the flat side of the spring retainer and press down to remove the retainer.
•Carefully look at the spring retainer to locate the NG or LP position.
•Turn the spring retainer over so that LP is showing on the bottom.
•Snap the retainer back into position.
| CAP | |
| GASKET | |
NG | LP / PROPANE | |
POSITION | ||
POSITION | ||
| ||
| PRESSURE | |
| REGULATOR | |
| 020 |
Figure 19. Pressure regulator conversion
To Convert Appliance for Use with NG
If this appliance has been converted for use with LP gas, each of the following modifications must be performed to convert the unit back to natural gas (NG).
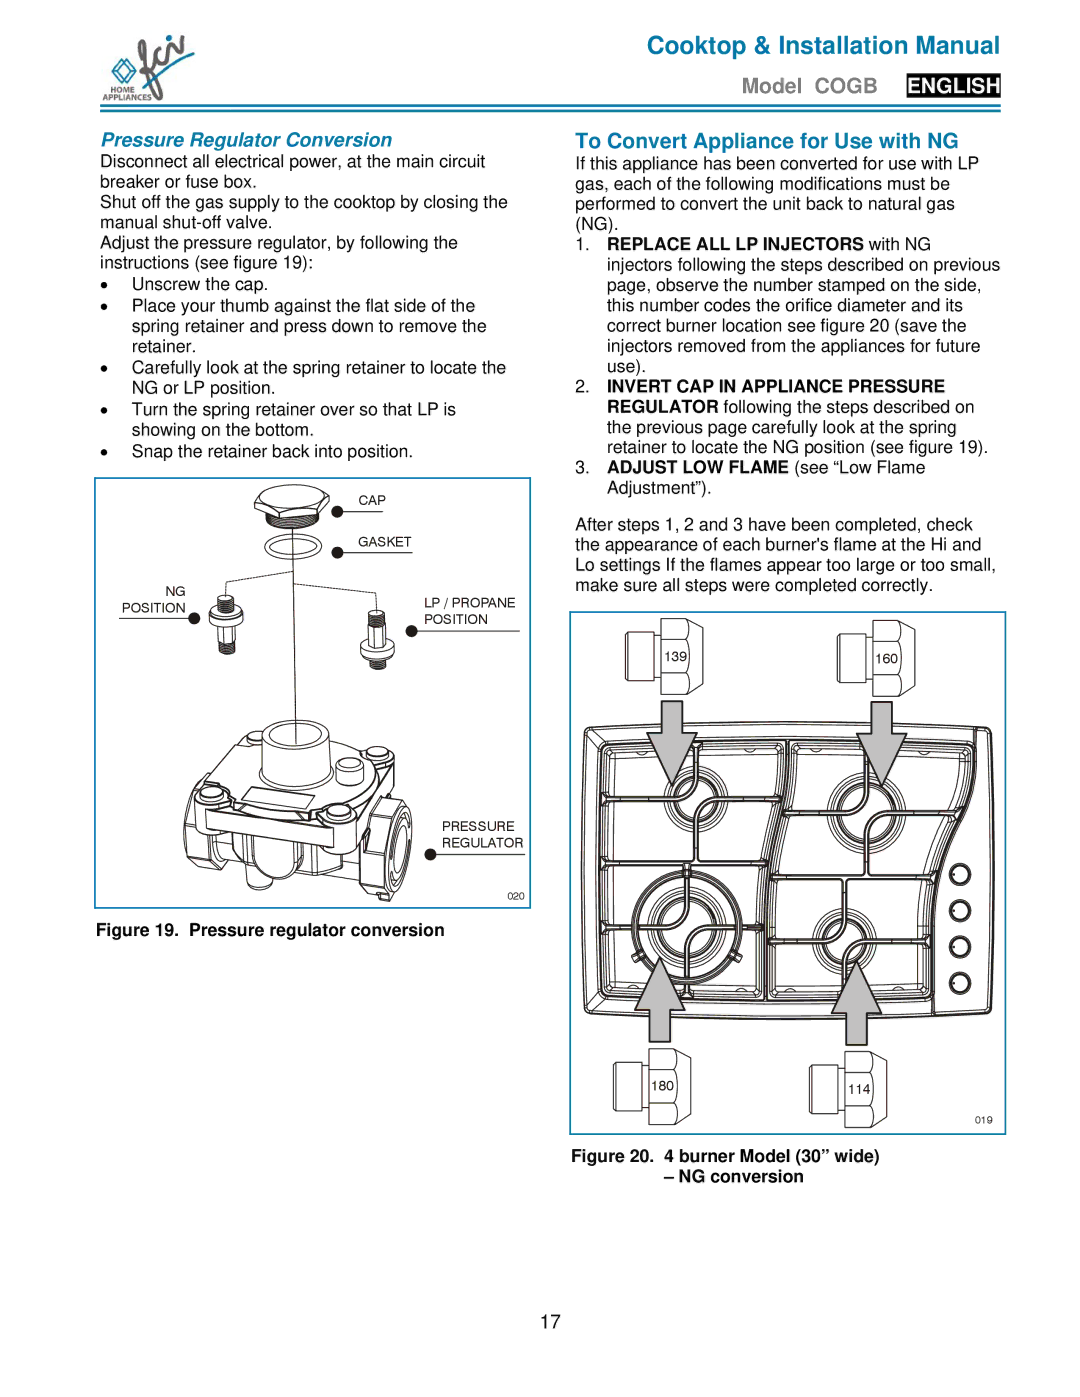
1.REPLACE ALL LP INJECTORS with NG injectors following the steps described on previous page, observe the number stamped on the side, this number codes the orifice diameter and its correct burner location see figure 20 (save the injectors removed from the appliances for future use).
2.INVERT CAP IN APPLIANCE PRESSURE REGULATOR following the steps described on the previous page carefully look at the spring retainer to locate the NG position (see figure 19).
3.ADJUST LOW FLAME (see “Low Flame Adjustment”).
After steps 1, 2 and 3 have been completed, check the appearance of each burner's flame at the Hi and Lo settings If the flames appear too large or too small, make sure all steps were completed correctly.
139 | 160 |
180 | 114 |
| 019 |
Figure 20. 4 burner Model (30” wide)
– NG conversion
17
