Cooktop & Installation Manual
Model COGB ENGLISH
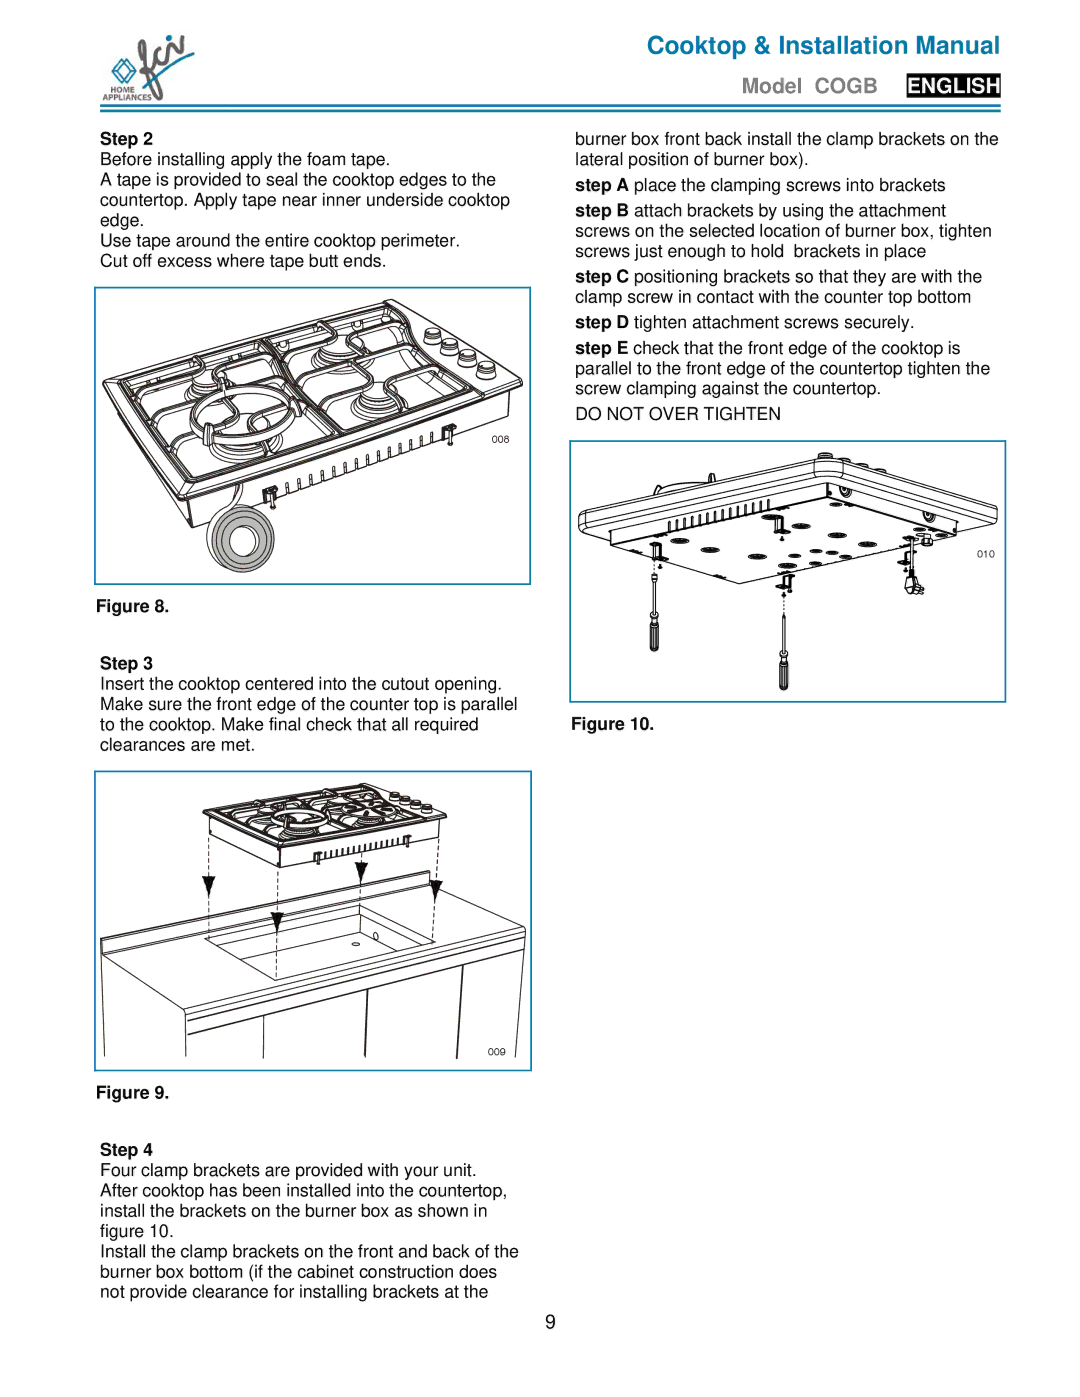
Step 2
Before installing apply the foam tape.
A tape is provided to seal the cooktop edges to the countertop. Apply tape near inner underside cooktop edge.
Use tape around the entire cooktop perimeter. Cut off excess where tape butt ends.
008 |
Figure 8.
Step 3
Insert the cooktop centered into the cutout opening. Make sure the front edge of the counter top is parallel to the cooktop. Make final check that all required clearances are met.
burner box front back install the clamp brackets on the lateral position of burner box).
step A place the clamping screws into brackets
step B attach brackets by using the attachment screws on the selected location of burner box, tighten screws just enough to hold brackets in place
step C positioning brackets so that they are with the clamp screw in contact with the counter top bottom
step D tighten attachment screws securely.
step E check that the front edge of the cooktop is parallel to the front edge of the countertop tighten the screw clamping against the countertop.
DO NOT OVER TIGHTEN
010 |
Figure 10.
009 |
Figure 9.
Step 4
Four clamp brackets are provided with your unit. After cooktop has been installed into the countertop, install the brackets on the burner box as shown in figure 10.
Install the clamp brackets on the front and back of the burner box bottom (if the cabinet construction does not provide clearance for installing brackets at the
9
