INSTALLATION
SIDE SHELF ASSEMBLY INSTRUCTIONS (OPTIONAL)
STEP 6
Optional Attach Side Shelf Accessory on Either Side
NOTE: Side shelf Model
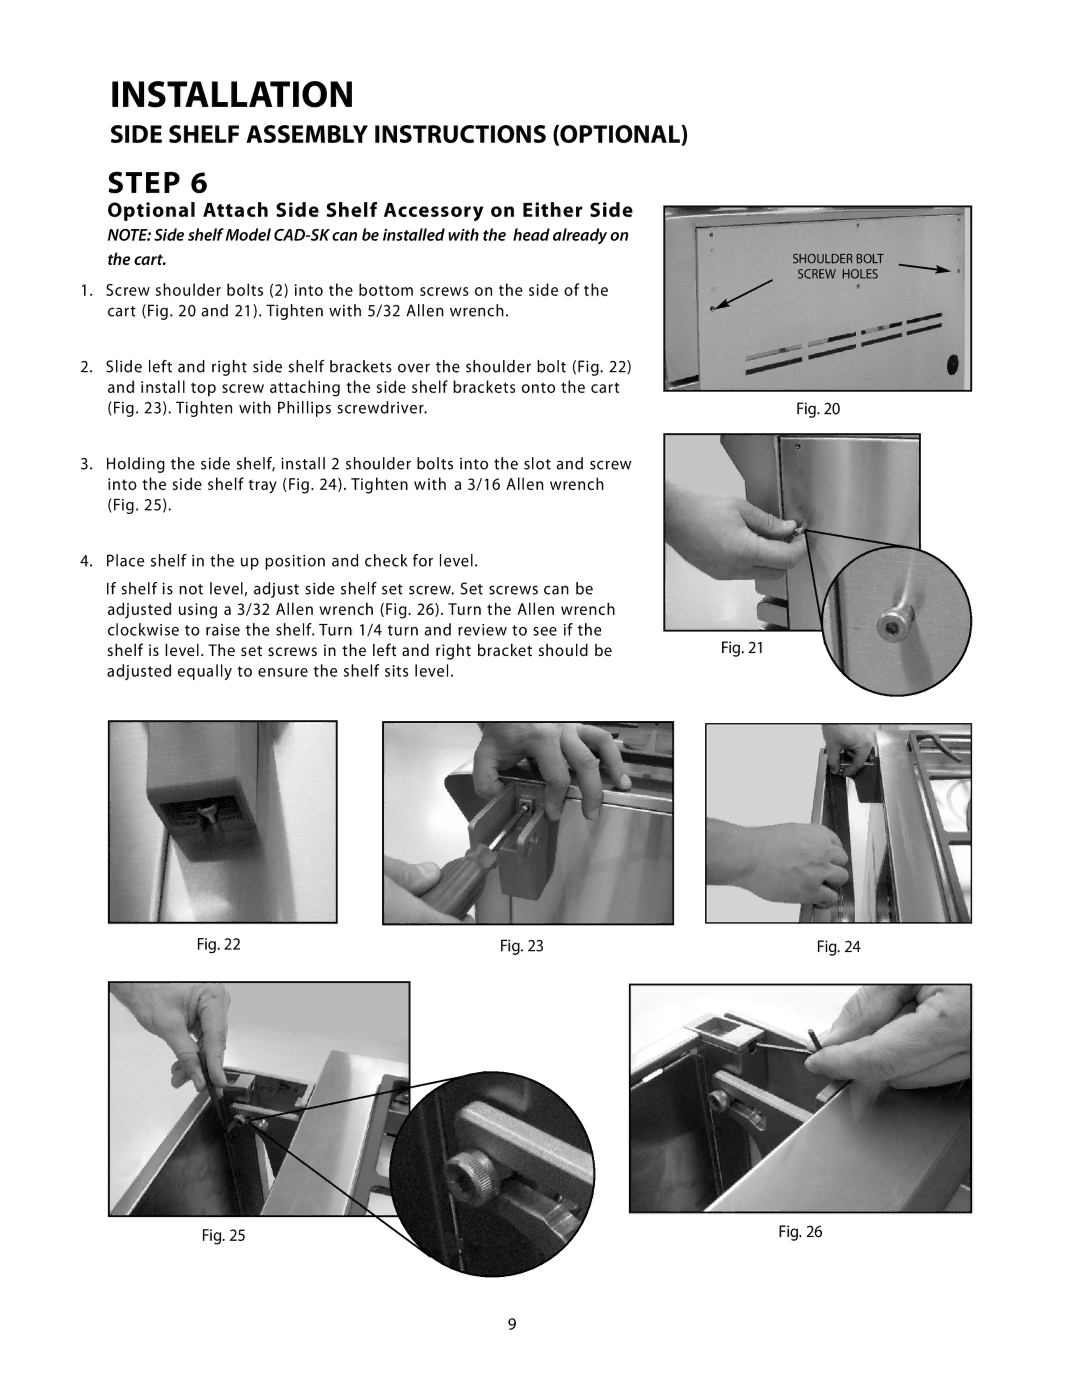
1.Screw shoulder bolts (2) into the bottom screws on the side of the cart (Fig. 20 and 21). Tighten with 5/32 Allen wrench.
2.Slide left and right side shelf brackets over the shoulder bolt (Fig. 22) and install top screw attaching the side shelf brackets onto the cart (Fig. 23). Tighten with Phillips screwdriver.
3.Holding the side shelf, install 2 shoulder bolts into the slot and screw into the side shelf tray (Fig. 24). Tighten with a 3/16 Allen wrench (Fig. 25).
4.Place shelf in the up position and check for level.
If shelf is not level, adjust side shelf set screw. Set screws can be adjusted using a 3/32 Allen wrench (Fig. 26). Turn the Allen wrench clockwise to raise the shelf. Turn 1/4 turn and review to see if the shelf is level. The set screws in the left and right bracket should be adjusted equally to ensure the shelf sits level.
SHOULDER BOLT
SCREW HOLES
Fig. 20
Fig. 21
Fig. 22 | Fig. 23 | Fig. 24 |
|
|
|
|
|
|
|
|
|
Fig. 25 | Fig. 26 |
9