INSTALLATION
SINK DRAIN ASSEMBLY INSTRUCTIONS (OPTIONAL)
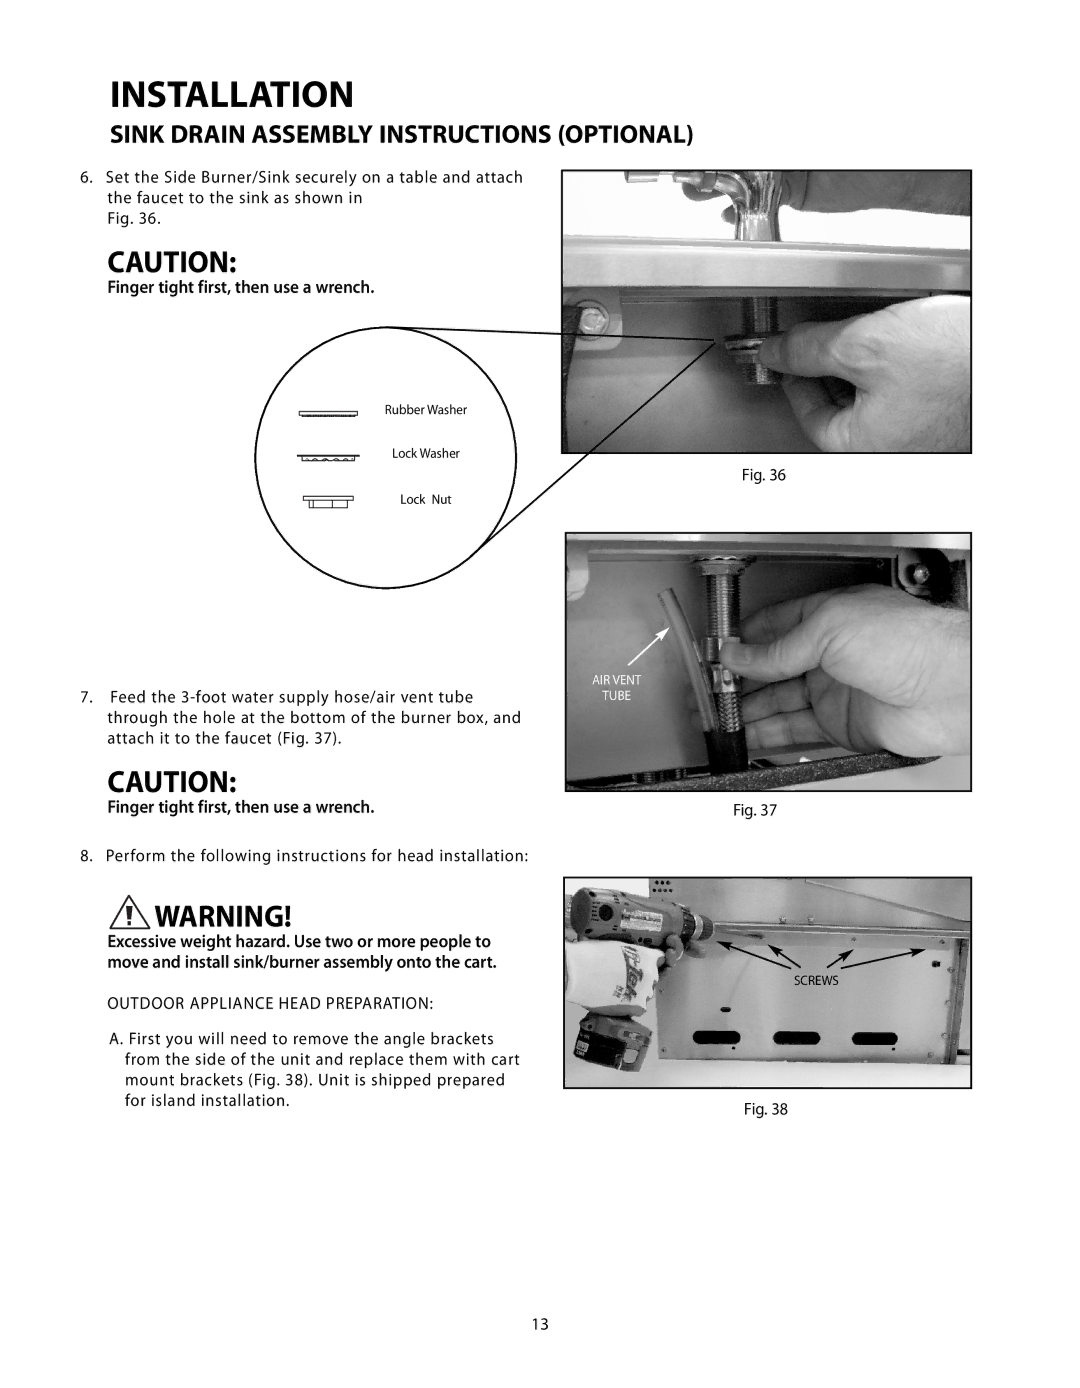
6.Set the Side Burner/Sink securely on a table and attach the faucet to the sink as shown in
Fig. 36.
CAUTION:
Finger tight first, then use a wrench.
Rubber Washer
Lock Washer
Lock Nut
7.Feed the
CAUTION:
Finger tight first, then use a wrench.
Fig. 36
AIR VENT
TUBE
Fig. 37
8. Perform the following instructions for head installation:
![]() WARNING!
WARNING!
Excessive weight hazard. Use two or more people to move and install sink/burner assembly onto the cart.
OUTDOOR APPLIANCE HEAD PREPARATION:
A. First you will need to remove the angle brackets from the side of the unit and replace them with cart mount brackets (Fig. 38). Unit is shipped prepared for island installation.
SCREWS
Fig. 38
13