INSTALLATION
CART ASSEMBLY INSTRUCTIONS
STEP 2
Outdoor Appliance Head Preparation
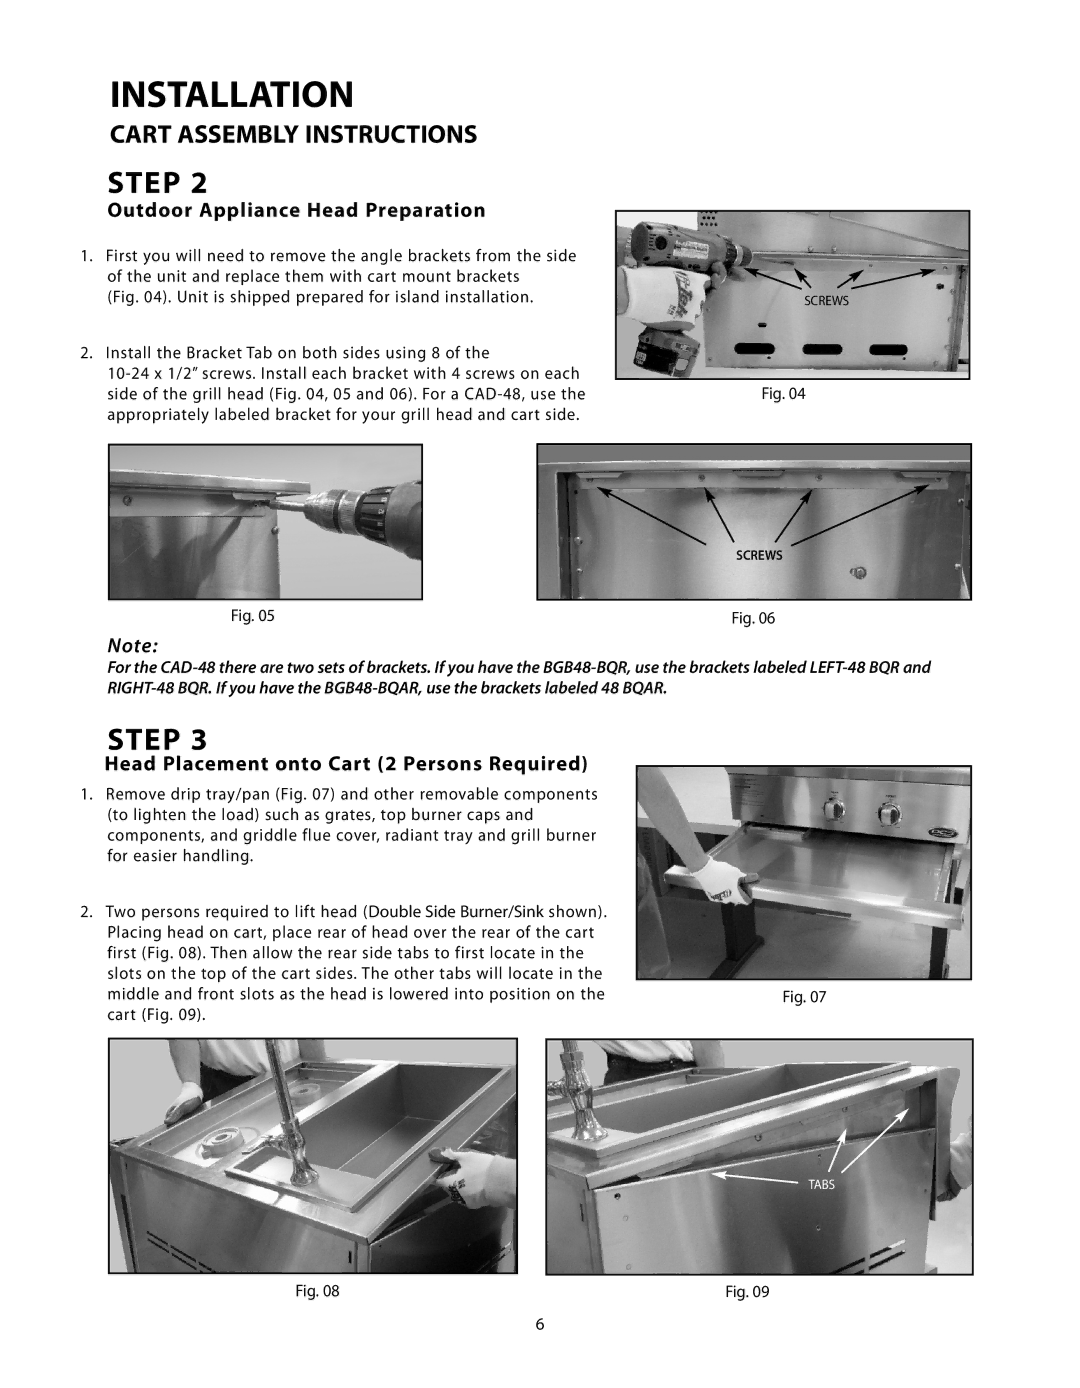
1.First you will need to remove the angle brackets from the side of the unit and replace them with cart mount brackets
(Fig. 04). Unit is shipped prepared for island installation.
2.Install the Bracket Tab on both sides using 8 of the
10-24 x 1/2” screws. Install each bracket with 4 screws on each side of the grill head (Fig. 04, 05 and 06). For a CAD-48, use the appropriately labeled bracket for your grill head and cart side.
SCREWS
Fig. 04
SCREWS
Fig. 05 | Fig. 06 |
Note:
For the
STEP 3
Head Placement onto Cart (2 Persons Required)
1.Remove drip tray/pan (Fig. 07) and other removable components (to lighten the load) such as grates, top burner caps and components, and griddle flue cover, radiant tray and grill burner for easier handling.
2.Two persons required to lift head (Double Side Burner/Sink shown). Placing head on cart, place rear of head over the rear of the cart first (Fig. 08). Then allow the rear side tabs to first locate in the slots on the top of the cart sides. The other tabs will locate in the
middle and front slots as the head is lowered into position on the | Fig. 07 |
cart (Fig. 09). |
|
TABS
Fig. 08 | Fig. 09 |
6