7.Install the replacement element in the frypot and secure with the mounting hardware.
8.Reinstall the temperature probe and
9.Route the element leads (terminals) to the rear of the fryer
10.Secure element wiring with
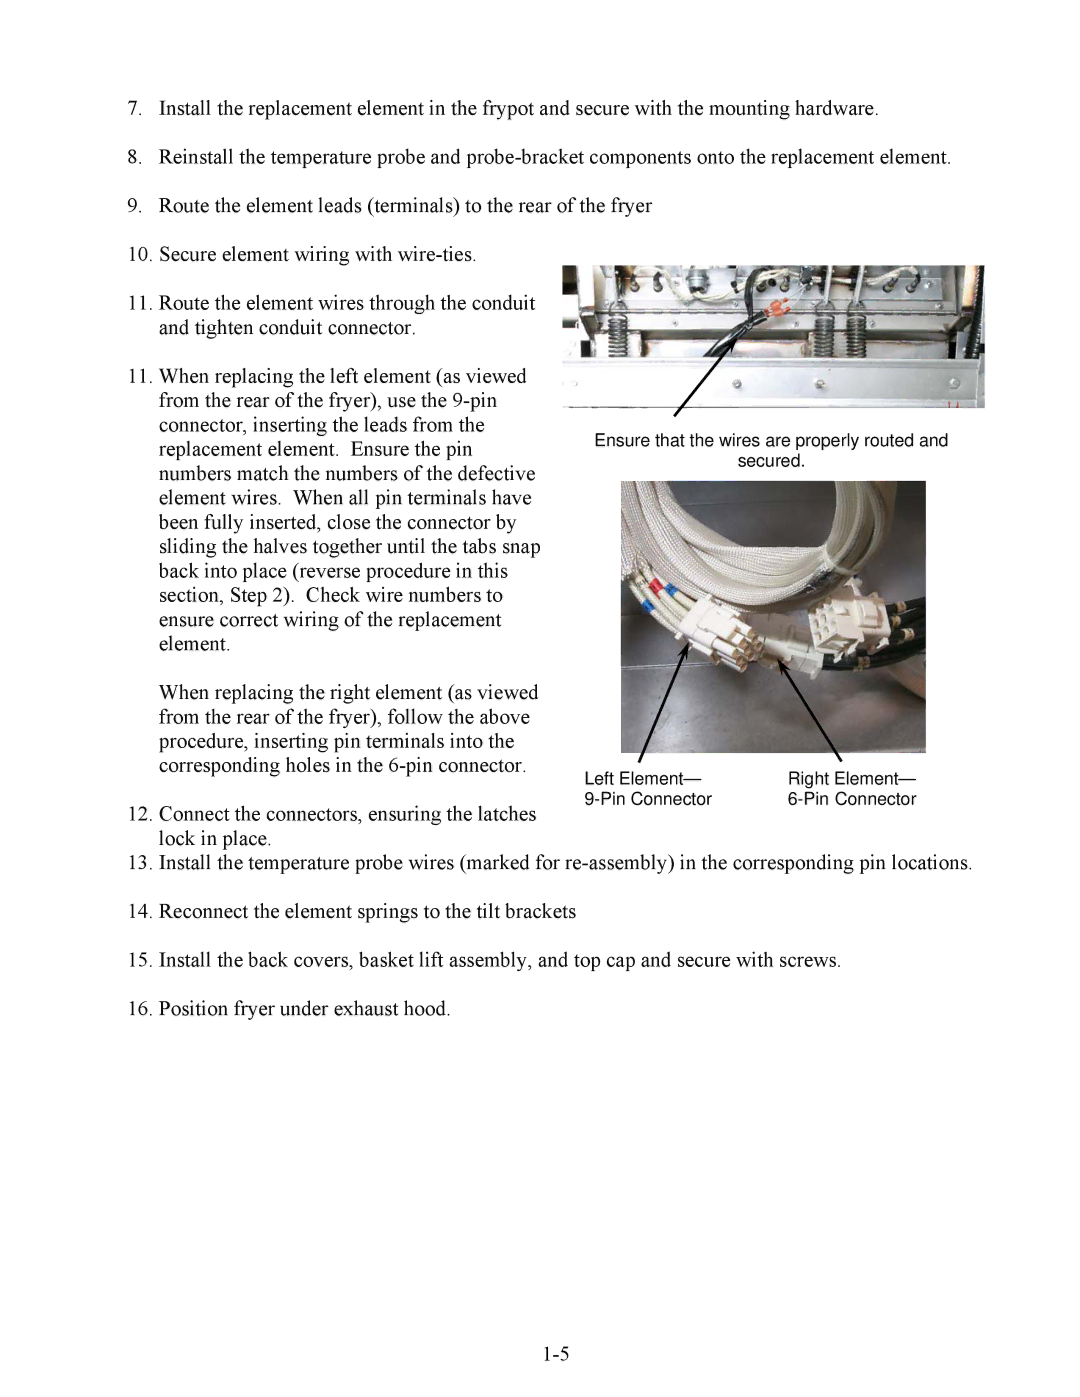
11.Route the element wires through the conduit and tighten conduit connector.
11. When replacing the left element (as viewed from the rear of the fryer), use the
connector, inserting the leads from the | Ensure that the wires are properly routed and | |
replacement element. Ensure the pin | ||
numbers match the numbers of the defective |
| secured. |
|
| |
element wires. When all pin terminals have |
|
|
been fully inserted, close the connector by |
|
|
sliding the halves together until the tabs snap |
|
|
back into place (reverse procedure in this |
|
|
section, Step 2). Check wire numbers to |
|
|
ensure correct wiring of the replacement |
|
|
element. |
|
|
When replacing the right element (as viewed |
|
|
from the rear of the fryer), follow the above |
|
|
procedure, inserting pin terminals into the |
|
|
corresponding holes in the | Left Element— | Right Element— |
| ||
12. Connect the connectors, ensuring the latches | ||
|
| |
lock in place.
13. Install the temperature probe wires (marked for
14. Reconnect the element springs to the tilt brackets
15. Install the back covers, basket lift assembly, and top cap and secure with screws.
16. Position fryer under exhaust hood.