1.5Cleaning the Gas Valve Vent Tube
1.Carefully unscrew the vent tube from the gas valve. NOTE: The vent tube may be straightened for ease in removal.
2.Pass a piece of ordinary binding wire (.052 inch diameter) or equivalent through the tube to re- move any obstruction.
3.Remove the wire, then blow through the tube to ensure it is clear.
4.Reinstall tube and bend it so that the opening is pointing downward.
1.6Adjusting Burner Ceramic Target Spacing and Alignment
![]() DANGER
DANGER
Drain the frypot or remove the handle from the drain valve before proceeding further.
Proper spacing of the top edge of the burner ceramic targets is ¾ inch (13 mm) from the frypot side. To adjust target spacing, bend the brackets to which they are attached away or toward the frypot to the proper distance. (A length of board of the proper thickness is useful as a gauge to verify spacing and alignment.)
1.7Calibrating the Thermostat Control
NOTE: The fryer control panel must be hinged down from the control panel mounting frame to per- form thermostat calibration. In order to hinge the control panel down, the thermostat knob must be removed from its shaft. It is secured with a setscrew located opposite the index mark on the knob.
1.Fill the frypot to the lower
2.Ensure the fryer ON/OFF Switch is in the OFF position, then light the pilot. (Refer to Chapter 3 of the 45 Series Gas Fryer Installation and Operation Manual for detailed lighting instructions.)
3.Insert a good grade thermometer or pyrometer into the frypot so that it touches the thermostat guard.
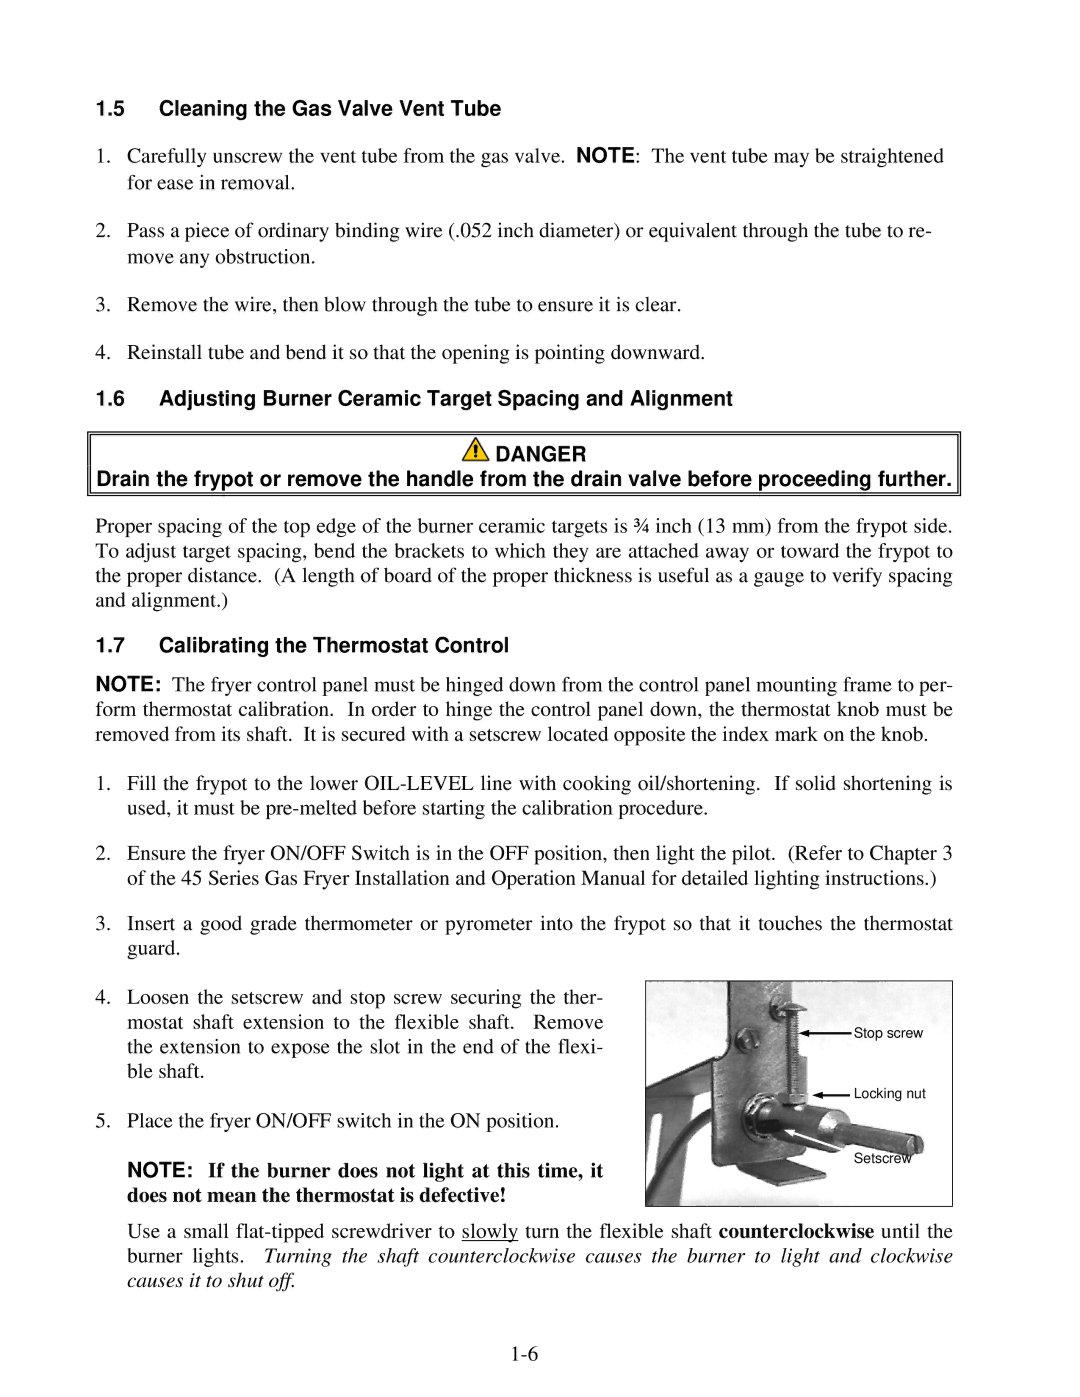
4.Loosen the setscrew and stop screw securing the ther- mostat shaft extension to the flexible shaft. Remove the extension to expose the slot in the end of the flexi- ble shaft.
5.Place the fryer ON/OFF switch in the ON position.
NOTE: If the burner does not light at this time, it does not mean the thermostat is defective!
Stop screw
Locking nut
Setscrew
Use a small
