FDR-90E
Supplied Accessory
Laser Safety
Precautions
Before you start
Make your contribution to the environment
Precautions cont’d
Important Safeguards
Maintenance
Installation Location
Avoid the Hazards of Electrical Shock and Fire
Moisture Condensation Warning
Table of contents
Features
Functional overview
Functional overview cont’d
Within about 23feet 7m 60˚
SETUP/DISC/CD menu
Indicates a disc type and a format mode
Display menu
Details are on
Disc type
Display message
Recording speed
Title/Track and Chapter mark
Connections
Connection to a TV
If your TV is not compatible with progressive scanning
RF cable
Connection to a cable box or satellite box
Audio OUT
Connection to an Audio System
Getting started
Remote Control
Easy DVD recording
This unit can record on the follow- ing type of discs only
Discs
Easy DVD recording Cont’d
Getting channels auto- matically
Channel setting
Select Manual Preset using Buttons, then press Enter button
Channel setting cont’d
Select Channel using K / L Buttons, then press Enter button
Adding/deleting chan Nels
SETUP/DISC menu will appear Screen
Guide channel setting
Guide Channel Setting list will Appear
Assign channel numbers to the guide channels as neces- sary
To erase a TV channel, press Button at step
Buttons, then press Enter button
Selecting the TV stereo or SAP
Stereo
Secondary Audio Program
Auto Clock Setting
Clock setting
Manual Clock Setting
Clock setting cont’d
Select Clock Setting using Buttons, then press Enter button
Press Enter button again
Select Auto Clock Setting Select OFF using K / L
Clock menu will appear, then the settings will be activated
Using K / L buttons, then Buttons, then press Enter
Press Enter button Button
Setting the daylight sav- ing time
Select on or OFF using Buttons, then press Enter button
Daylight Saving Time options will appear
Selecting the TV aspect ratio
Select TV Aspect using K Buttons, then press Enter
Playback menu will appear
If you have a widescreen TV
Information on DVD recording
Recording
Information
Recording speed
Information on copy control
Information on DVD recording cont’d
Making discs playable in other DVD player Finalize
This recorder cannot record CD-R or CD- RW discs
Formatting a disc
Settings for the recording format to a blank disc
Minutes has been selected as the default
Select Auto Chapter using Buttons, then press Enter button
Press Setup button to exit Setup menu
Formatting a disc cont’d
Reformatting a disc
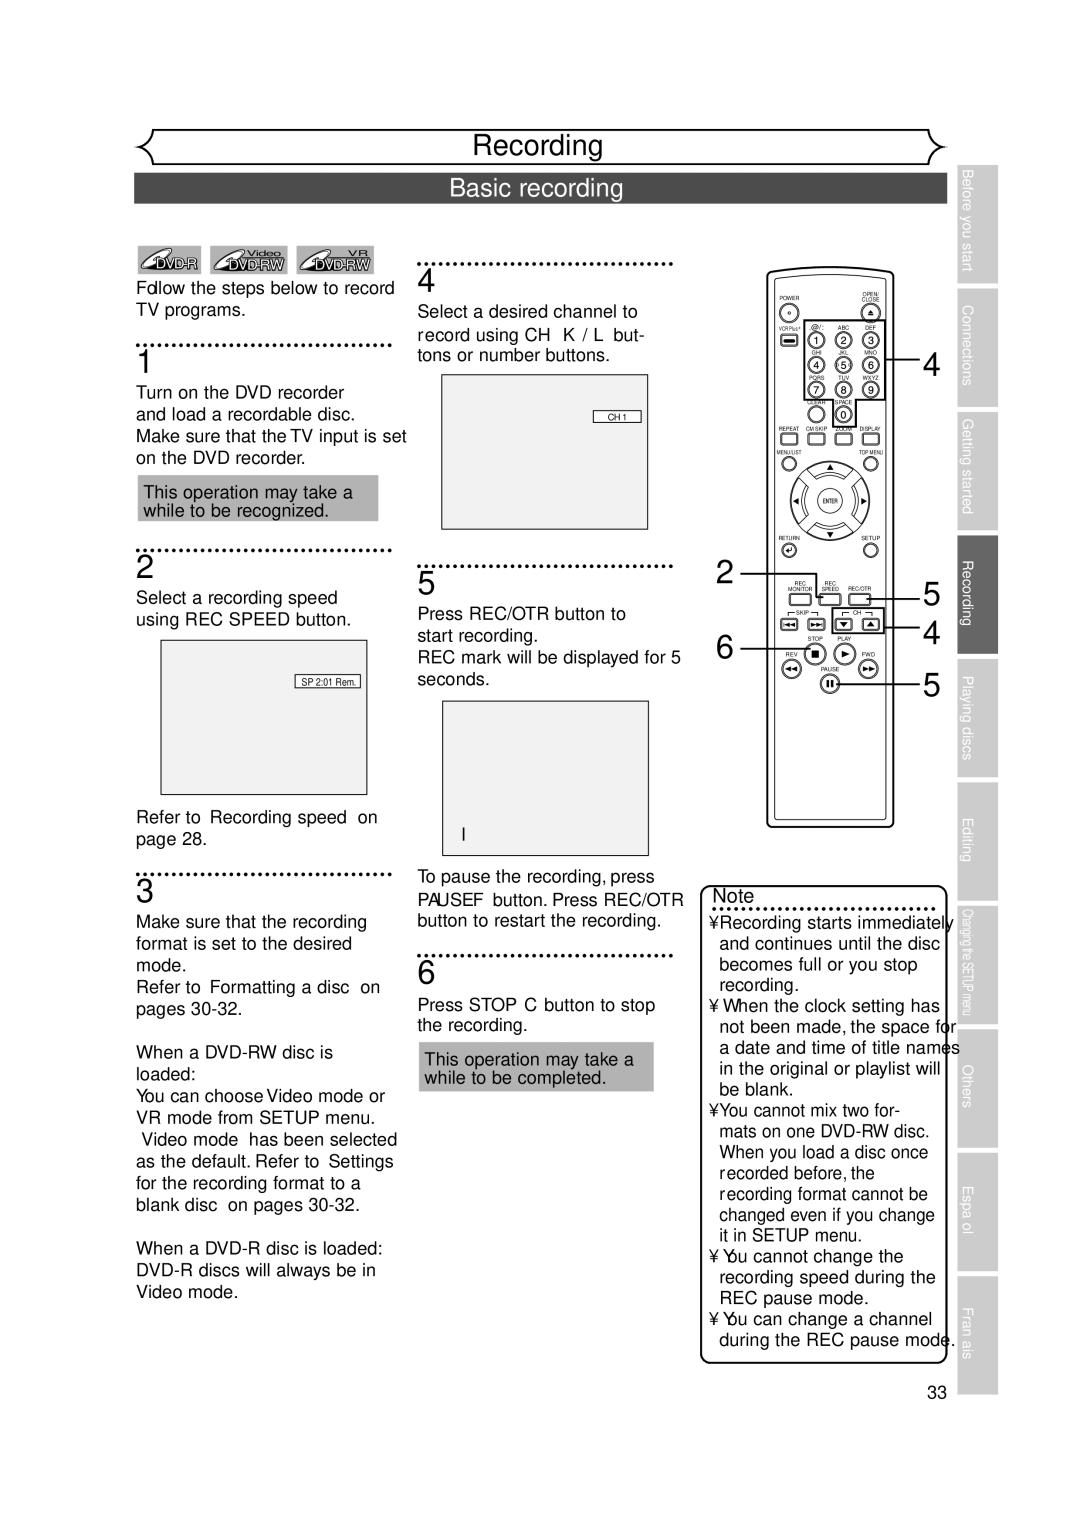
Basic recording
XP SP LP
Recording
When a power failure occurs
One-touch timer recording
Recording will start
TV screen
Timer recording
Select a recording speed using K / L buttons
Timer recording cont’d
Press Enter button when all information required is
Press Power button to turn
Priority of overlapped settings
Hints for timer recording
Not been assigned
When the Guide channel has
Press VCR Plus+ button to exit
Remember
Select L2 Front using K / Lbuttons, then press Enter button
Settings for an external source
Select L1 Rearusing K / Lbuttons, then press Enter button
Connection to an external source
Select a recording speed using REC Speed button. Refer to
Settings for an external source cont’d
Recording from an external source
Recording speed on
Finalizing the discs
To cancel finalizing, press Stop C button
Finalizing will start
Finalizing is complete
Setting a disc to protect
Information on DVD play
Playing discs
Playback
Basic playback
For MP3 playback
Basic playback cont’d
Select an item using K / L Buttons, then press
Playing discs using the disc menu
Press MENU/LIST button
B buttons
Playing discs using the title menu
Press TOP Menu button
Press TOP Menu button to exit the title menu
Special playback
Resume play
Fast forward / Fast reverse
Special playback cont’d
Skipping TV commercials during play
Pause
Slow forward / Slow reverse play
Step by step playback
Press Skip G button repeatedly
To play step by step back- ward
Select icon using / B buttons, then press Enter button
Spatializer setting Virtual surround
Zoom
During play, press Zoom but- ton
During play, press Display button
Marker setup menu will appear. Screen for DVD
Screen for CD
You can mark up to 6 points
Using Display button
Using Skip H / G buttons
Search
Title/Chapter search
Search cont’d
Select icon using / B buttons, then press Enter
Track search
Time search
Repeat/Random/Program playback
Repeat play
Random playback
Repeat/Random/Program playback cont’d
Select Program Play using Buttons, then press Enter button
Program play
Press Play B button to start program play
DVD-Video Audio soundtrack will switch DVD-RW VR mode
Switching audio soundtrack
Audio channel will switch
Selecting the format of audio and video
Selecting the format of audio and video cont’d
Switching subtitles
Some discs will only allow
List button to display
Angle will switch each time you press Enter button
Switching camera angles
Reducing block noise
NR menu will appear
Editing
Editing discs with Video mode
Information on disc editing
Guide to a title list
Information on disc editing cont’d
Editing discs with VR mode
Editing original titles
Editing playlists
Deleting titles
Editing DVD-RW discs in Video mode
Titlelist will appear Screen
Title will be deleted
Putting names on titles
Editing DVD-RW discs in Video mode cont’d
Window for entering a title name will appear
Character set
Abc
Name you entered will be activated for the title
Setting or clearing chapter markers
Select Chapter Mark using Buttons, then press Enter button
Chapter markers will be added at the specified time
Press Setup button. Select
Editing DVD-RW discs in VR mode Original
Disc using / B buttons
Select Original using / B buttons, then press Enter button
Editing DVD-RW discs in VR mode Original cont’d
Select Scene Delete using Buttons, then press Enter button
Deleting parts of titles
Pleted, press Setup button
Select Delete using K / L buttons, then press Enter button
This operation may take a
While to be completed
Protect OFF JAN 100AM CH12 00125
Option window will appear. Add
Select Yes using / B but- tons, then press Enter button
Setting pictures for thumbnails
Delete
Delete Chapter marker which you selected will be deleted
Picture for thumbnail will be set
Setting titles to protect
To prevent accidental editing, or
Them from the original menu Buttons, then press
You are allowed to release
Releasing titles from protecting
Tected Buttons, then press
Original menu will appear
Editing DVD-RW discs in VR mode Playlist
Select PlayList using / B buttons, then press Enter button
Playlist will appear
Editing DVD-RW discs in VR mode Playlist cont’d
Playlist menu will appear
Cursor will move to Preview You can check a preview
Original/PlayList menu will appear Screen
Disc Edit Playlist Edit Title Name
Index PictureDeleteSet JAN/ 1 100AM CH12 XP 00125
Chapter marker will be added. Add
Select Yes using / B but- tons, then press Enter but- ton
To delete a title from Playlist, refer to Deleting titles on
Adding titles to a Playlist
Playlist can be deleted if no longer needed
Deleting a Playlist
Select Title Delete using Buttons, then press Enter button
Editing DVD-R discs
You cannot select Chapter Mark
Editing DVD-R discs cont’d
Select Yes using / B but- tons, then press Enter but Ton
Tour of the Setup menu
Changing the Setup menu
Settings for Language
Press Setup button to display SETUP/DISC menu
SETUP/DISC menu will appear
Settings for Language cont’d
Settings for Display
Select Setup using / B buttons, then press
Enter button Setup menu will appear
OSD Background Transparency Default 35%
Settings for Display cont’d
OSD Language Default English
Screen Saver Default 10 minutes
Choose the appropriate Audio settings for your equipment
Settings for Audio
Select Playback using K / L / / B buttons, then press
It will only affect DVD discs during playback
Select a setting using K / L buttons, then
Settings for Audio cont’d
Dynamic Range Control Default on
Fast Forward with Audio Default OFF
Settings for Parental lock level
Settings for Parental lock level cont’d
Power
Troubleshooting
Others
Picture
Troubleshooting cont’d
Recording/Timer recording/Editing
Playback
Others
Remote control
This disc has no space to write
Glossary
101
Specifications
Video recording format
Audio recording format
Fácil grabación de DVD
Español
Puede editar lo siguiente de la lista de títulos
¿Qué son títulos y capítulos?
Original y Playlist modo VR
¿Qué significa Original o Playlist?
Français
Télécommande
Enregistrement simple de DVD
Remarque
Qu’est-ce que titres et chapitres?
Original et Playlist mode VR
Ce qui suit peut être monté à partir d’une liste de titres
Quoi servent Original ou Playlist?
106
107
Limited Warranty