Mounting on a platform
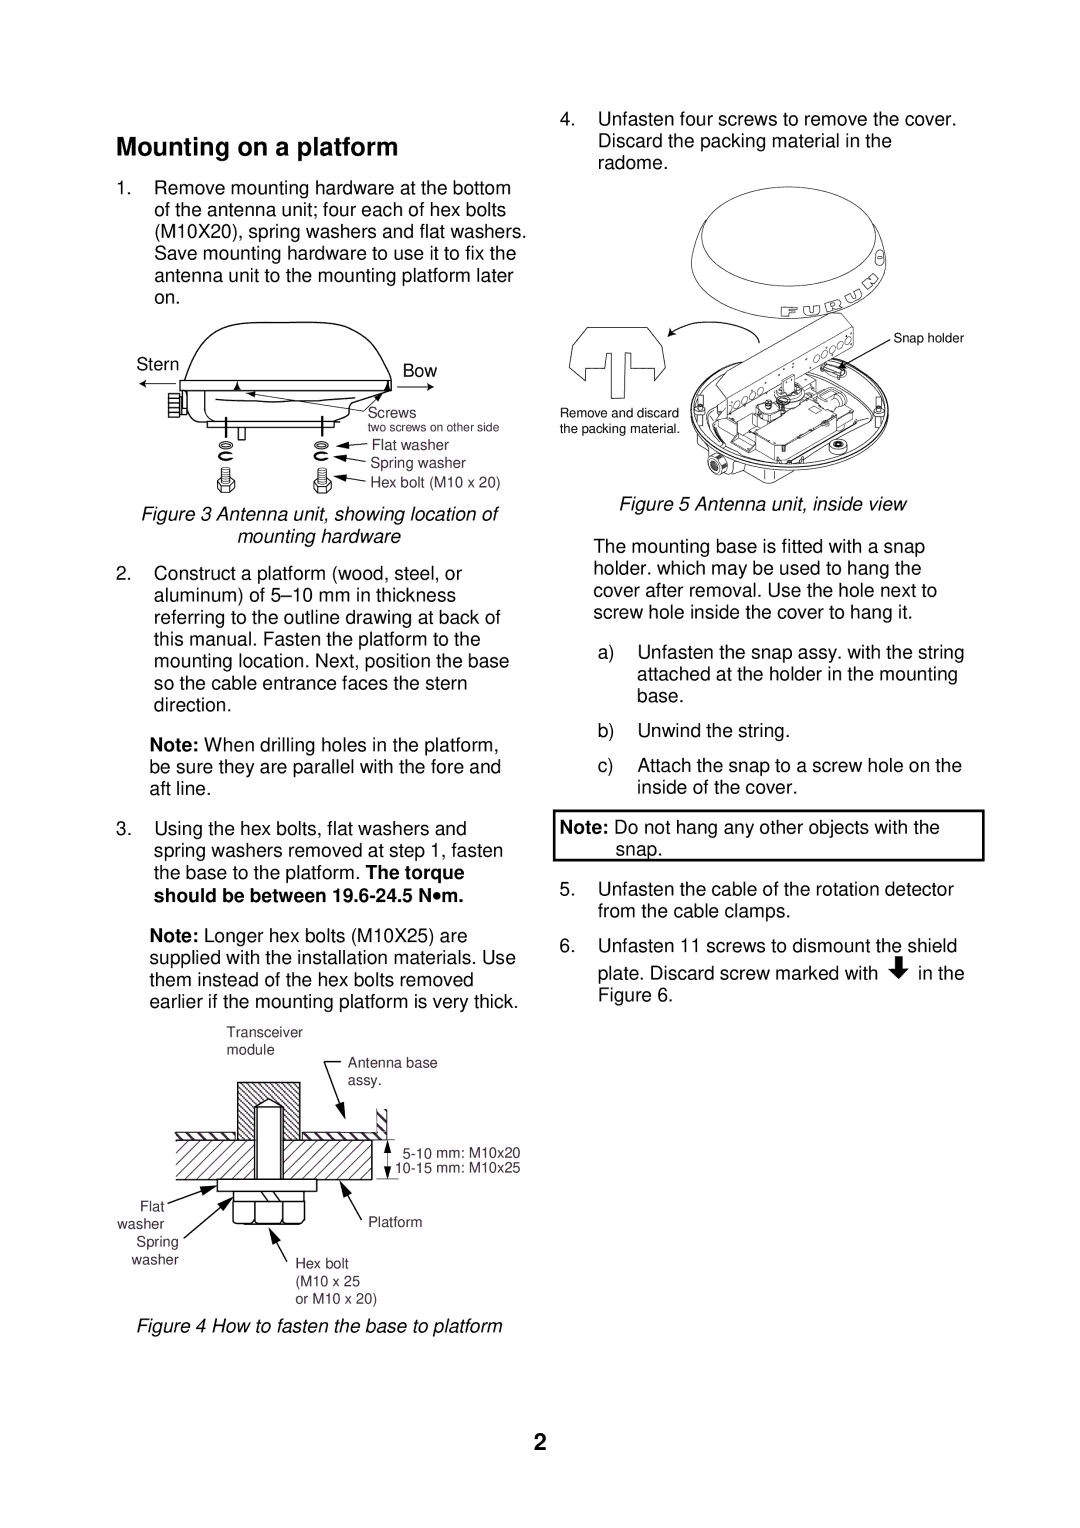
1.Remove mounting hardware at the bottom of the antenna unit; four each of hex bolts (M10X20), spring washers and flat washers. Save mounting hardware to use it to fix the antenna unit to the mounting platform later on.
Stern | Bow |
|
Screws
two screws on other side
![]()
![]() Flat washer
Flat washer
![]()
![]() Spring washer
Spring washer
Hex bolt (M10 x 20)
Figure 3 Antenna unit, showing location of
mounting hardware
2.Construct a platform (wood, steel, or aluminum) of
Note: When drilling holes in the platform, be sure they are parallel with the fore and aft line.
3.Using the hex bolts, flat washers and spring washers removed at step 1, fasten
the base to the platform. The torque should be between
Note: Longer hex bolts (M10X25) are supplied with the installation materials. Use them instead of the hex bolts removed earlier if the mounting platform is very thick.
Transceiver |
module |
Antenna base |
assy. |
Flat | Platform |
washer | |
Spring |
|
washer | Hex bolt |
| (M10 x 25 |
| or M10 x 20) |
Figure 4 How to fasten the base to platform
4.Unfasten four screws to remove the cover. Discard the packing material in the radome.
Snap holder
Remove and discard the packing material.
Figure 5 Antenna unit, inside view
The mounting base is fitted with a snap holder. which may be used to hang the cover after removal. Use the hole next to screw hole inside the cover to hang it.
a)Unfasten the snap assy. with the string attached at the holder in the mounting base.
b)Unwind the string.
c)Attach the snap to a screw hole on the inside of the cover.
Note: Do not hang any other objects with the snap.
5.Unfasten the cable of the rotation detector from the cable clamps.
6.Unfasten 11 screws to dismount the shield
plate. Discard screw marked with ![]() in the Figure 6.
in the Figure 6.
2