Remove the Fresh Food Door
1 | Tape the door shut with masking tape. |
|
2 | Remove the hinge pin with a 3/8″ socket and ratchet. |
|
3 | Remove tape and tilt the door away from the cabinet. Remove and save the washer on the hinge pin. | |
4 | Lift the door straight up to free its bottom socket from the pin in the bottom hinge bracket. | |
5 | Set the door on a |
|
Reversing the hardware. |
| |
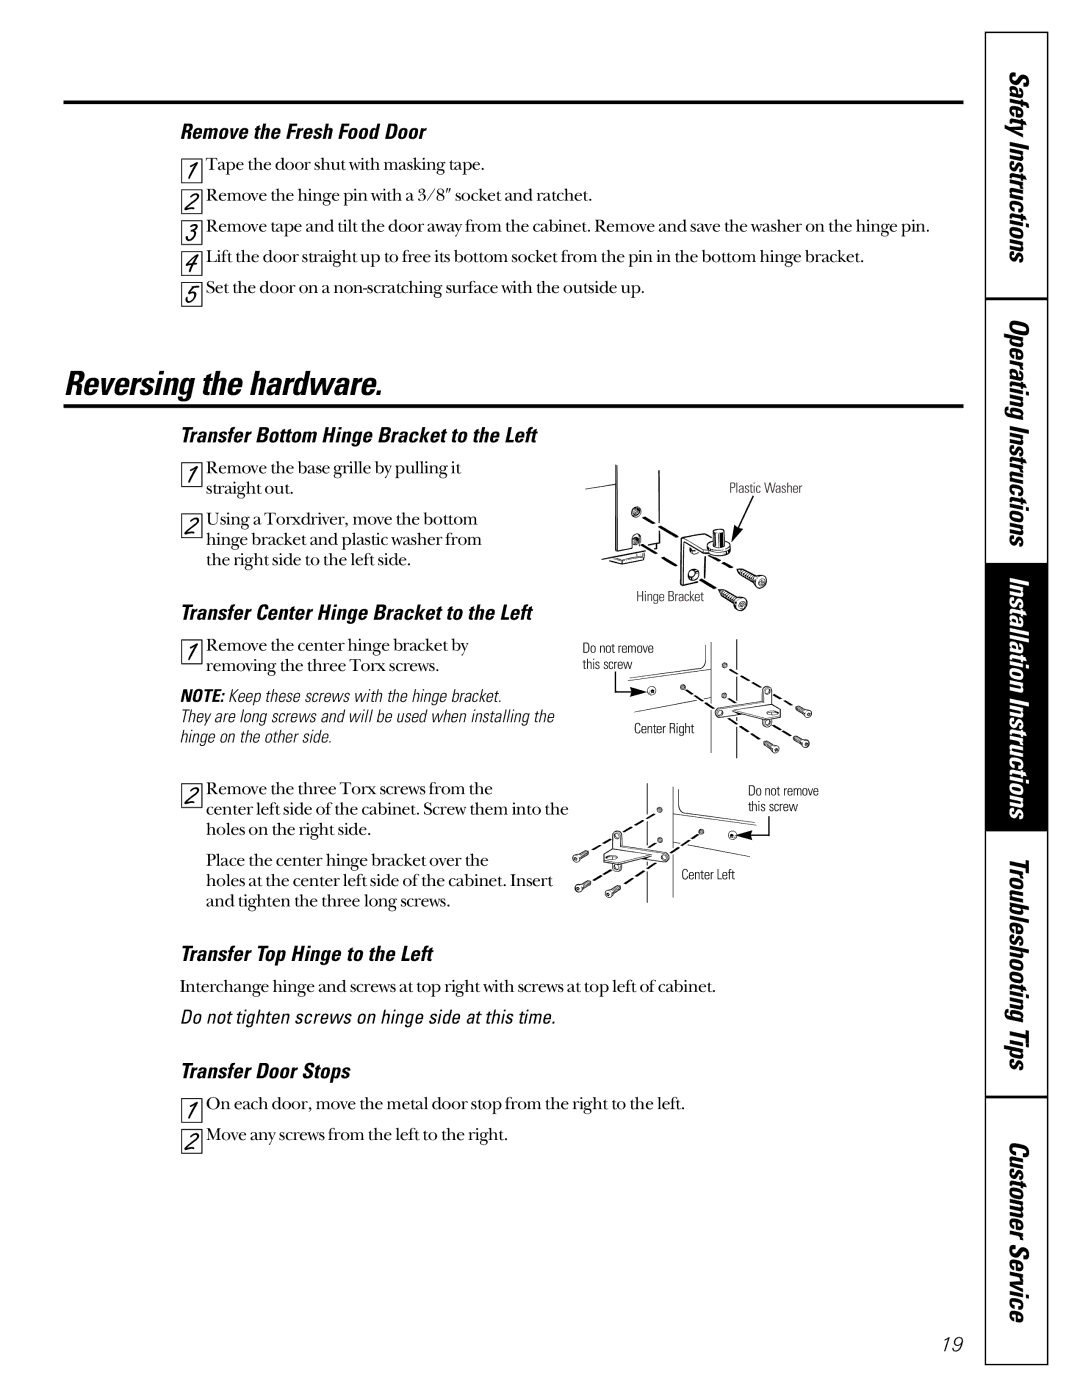
Transfer Bottom Hinge Bracket to the Left |
| |
1 | Remove the base grille by pulling it |
|
| straight out. | Plastic Washer |
| Using a Torxdriver, move the bottom |
|
2 hinge bracket and plastic washer from |
| |
| the right side to the left side. |
|
Safety Instructions Operating Instructions
Transfer Center Hinge Bracket to the Left
1 Remove the center hinge bracket by removing the three Torx screws.
NOTE: Keep these screws with the hinge bracket.
They are long screws and will be used when installing the hinge on the other side.
2 Remove the three Torx screws from the
center left side of the cabinet. Screw them into the holes on the right side.
Place the center hinge bracket over the
holes at the center left side of the cabinet. Insert and tighten the three long screws.
Hinge Bracket
Do not remove this screw
Center Right
Do not remove this screw
Center Left
Installation Instructions Troubleshooting
Transfer Top Hinge to the Left
Interchange hinge and screws at top right with screws at top left of cabinet.
Do not tighten screws on hinge side at this time.
Transfer Door Stops
1 On each door, move the metal door stop from the right to the left.
2 Move any screws from the left to the right.
19