MX150 Microprocessor Controller (cont’d)
LCD & Keypad
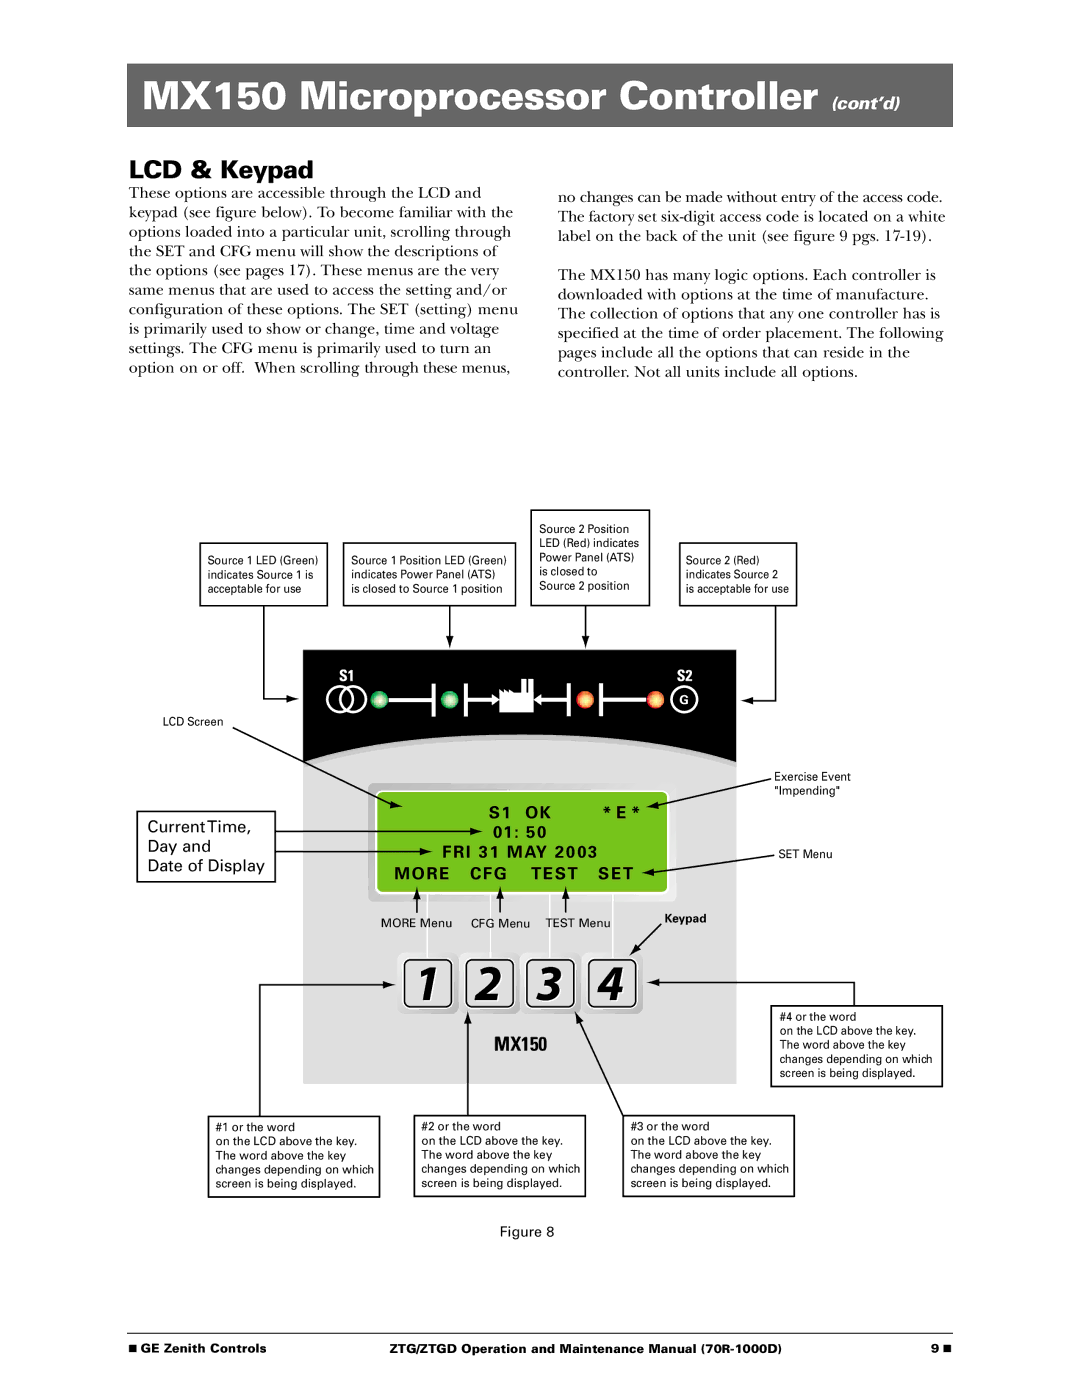
These options are accessible through the LCD and keypad (see figure below). To become familiar with the options loaded into a particular unit, scrolling through the SET and CFG menu will show the descriptions of the options (see pages 17). These menus are the very same menus that are used to access the setting and/or configuration of these options. The SET (setting) menu is primarily used to show or change, time and voltage settings. The CFG menu is primarily used to turn an option on or off. When scrolling through these menus,
no changes can be made without entry of the access code. The factory set
The MX150 has many logic options. Each controller is downloaded with options at the time of manufacture. The collection of options that any one controller has is specified at the time of order placement. The following pages include all the options that can reside in the controller. Not all units include all options.
Source 1 LED (Green) indicates Source 1 is acceptable for use
Source 1 Position LED (Green) indicates Power Panel (ATS) is closed to Source 1 position
Source 2 Position LED (Red) indicates Power Panel (ATS) is closed to Source 2 position
Source 2 (Red) indicates Source 2 is acceptable for use
LCD Screen
CurrentTime,
Day and
Date of Display
|
|
|
| Exercise Event |
|
|
|
| "Impending" |
|
| S1 | OK | * E * |
|
| |||
| 01: 50 |
| ||
|
| |||
| FRI 31 MAY 20 03 | SET Menu | ||
| ||||
MORE CFG | TEST | SET | ||
MORE Menu CFG Menu TEST Menu
Keypad
#4 or the word
on the LCD above the key. The word above the key changes depending on which screen is being displayed.
#1 or the word
on the LCD above the key. The word above the key changes depending on which screen is being displayed.
#2 or the word
on the LCD above the key. The word above the key changes depending on which screen is being displayed.
#3 or the word
on the LCD above the key. The word above the key changes depending on which screen is being displayed.
Figure 8
■ GE Zenith Controls | ZTG/ZTGD Operation and Maintenance Manual | 9 ■ |
