Stainless Steel Range
Before a clean cycle
The range must be completely cool in order to set the
We recommend venting with an open window or using a ventilation fan or hood during the first
Remove all cookware and any aluminum foil from the oven.
Remove the oven shelves and shelf slide assembly.
Make sure the oven light bulb cover is in place and the oven light is off.
Do not use commercial oven cleaners or oven protectors in or near the
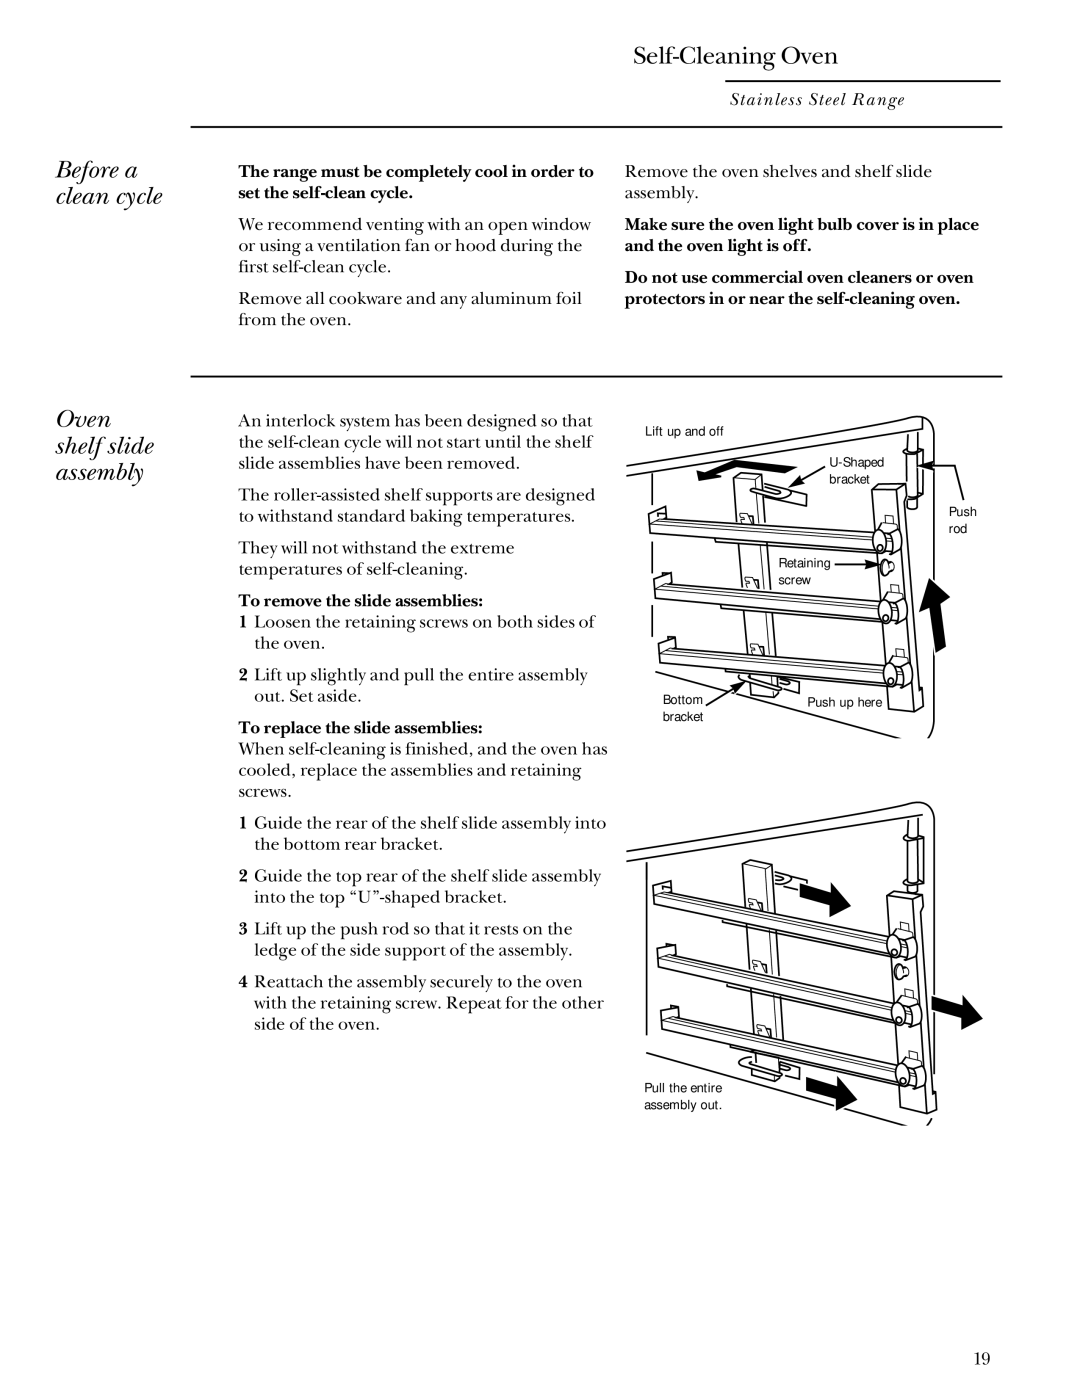
Oven shelf slide assembly
An interlock system has been designed so that the
The
They will not withstand the extreme temperatures of
To remove the slide assemblies:
1Loosen the retaining screws on both sides of the oven.
2Lift up slightly and pull the entire assembly out. Set aside.
To replace the slide assemblies:
When
1Guide the rear of the shelf slide assembly into the bottom rear bracket.
2Guide the top rear of the shelf slide assembly into the top
3Lift up the push rod so that it rests on the ledge of the side support of the assembly.
4Reattach the assembly securely to the oven with the retaining screw. Repeat for the other side of the oven.
Lift up and off
![]() bracket
bracket
Retaining ![]()
![]() screw
screw
Bottom | Push up here |
bracket |
|
Pull the entire assembly out.
Push rod
19