Mounting Belt/Disc Sander
If during operation of the Belt/Disc Sander, there is any tendency for the sander to slide or "walk" or to tip over, then the sander must be secured to a work bench or other supporting surface using fasteners (not supplied) through the two holes in the sander base.
ADJUSTMENTS
![]() WARNING: Always be sure that the tool is switched off and unplugged from the power source before adjusting, adding accessories, or checking a function on the tool.
WARNING: Always be sure that the tool is switched off and unplugged from the power source before adjusting, adding accessories, or checking a function on the tool.
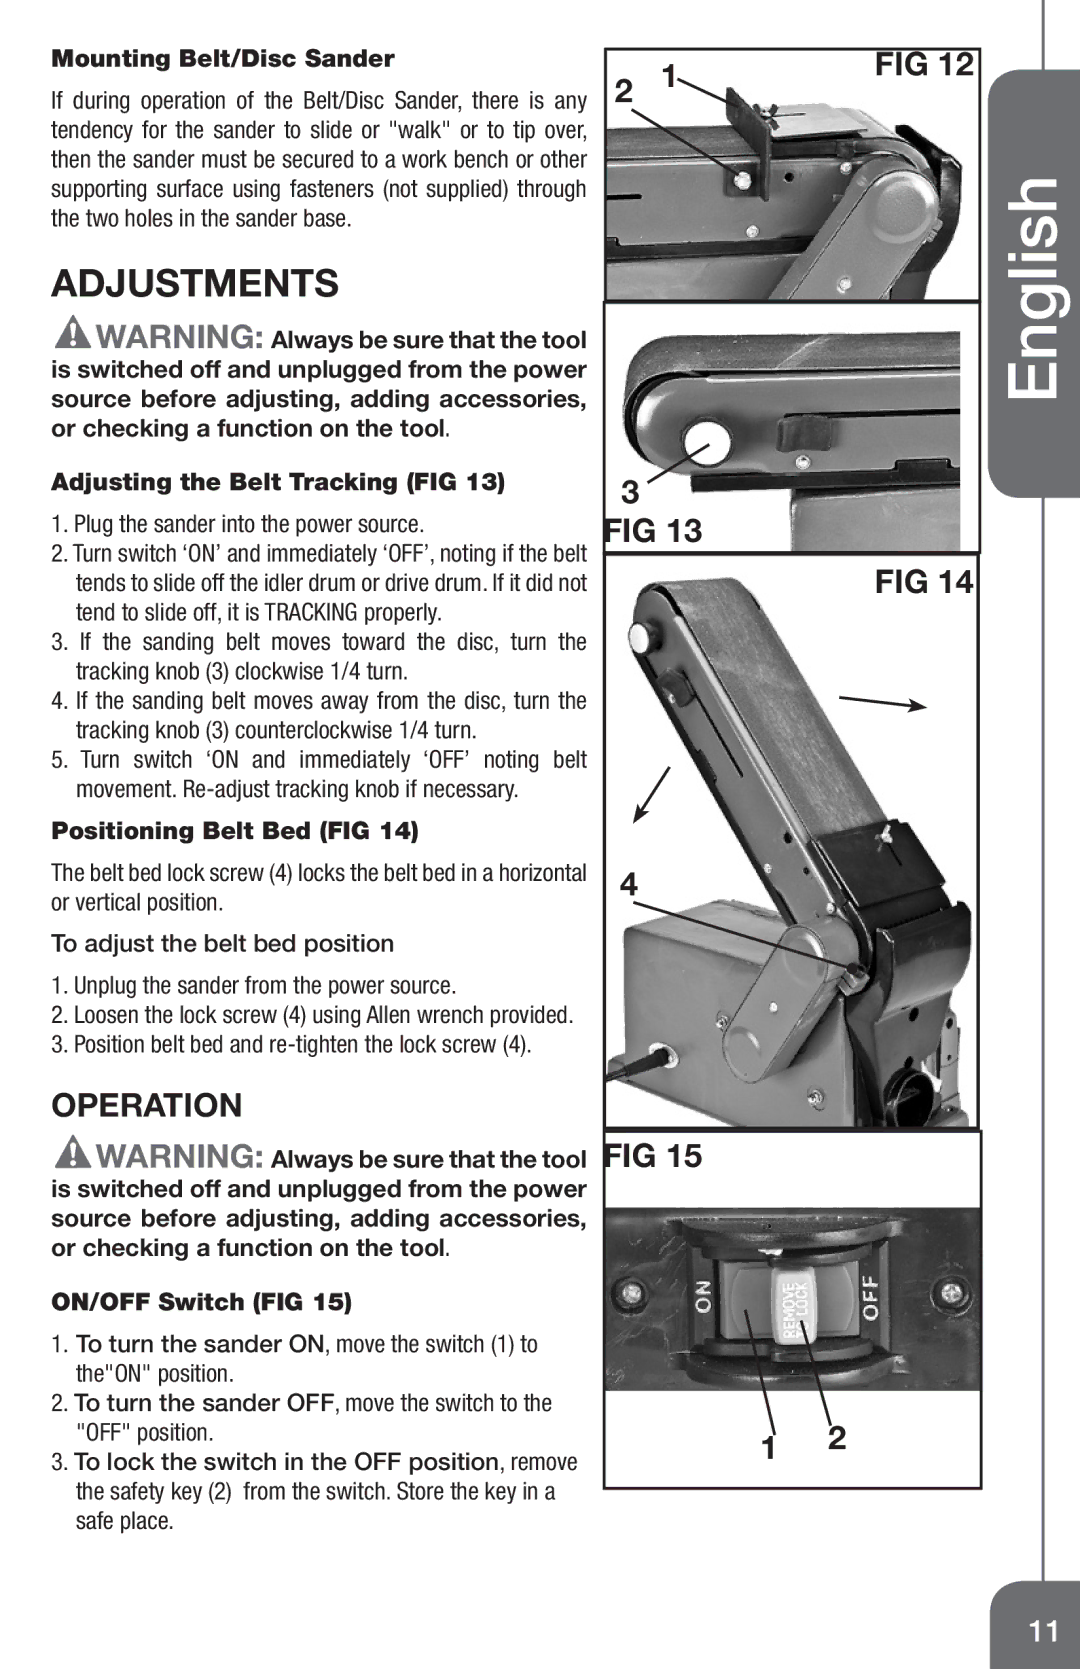
Adjusting the Belt Tracking (FIG 13)
1.Plug the sander into the power source.
2.Turn switch ‘ON’ and immediately ‘OFF’, noting if the belt tends to slide off the idler drum or drive drum. If it did not tend to slide off, it is TRACKING properly.
3.If the sanding belt moves toward the disc, turn the tracking knob (3) clockwise 1/4 turn.
4.If the sanding belt moves away from the disc, turn the tracking knob (3) counterclockwise 1/4 turn.
5.Turn switch ‘ON and immediately ‘OFF’ noting belt movement.
Positioning Belt Bed (FIG 14)
The belt bed lock screw (4) locks the belt bed in a horizontal or vertical position.
To adjust the belt bed position
1.Unplug the sander from the power source.
2.Loosen the lock screw (4) using Allen wrench provided.
3.Position belt bed and
OPERATION
![]() WARNING: Always be sure that the tool is switched off and unplugged from the power source before adjusting, adding accessories, or checking a function on the tool.
WARNING: Always be sure that the tool is switched off and unplugged from the power source before adjusting, adding accessories, or checking a function on the tool.
ON/OFF Switch (FIG 15)
1.To turn the sander ON, move the switch (1) to the"ON" position.
2.To turn the sander OFF, move the switch to the "OFF" position.
3.To lock the switch in the OFF position, remove the safety key (2) from the switch. Store the key in a safe place.
|
|
|
2 | 1 | FIG 12 |
|
English
3 |
FIG 13 |
FIG 14 |
4 |
FIG 15
1 2
11
