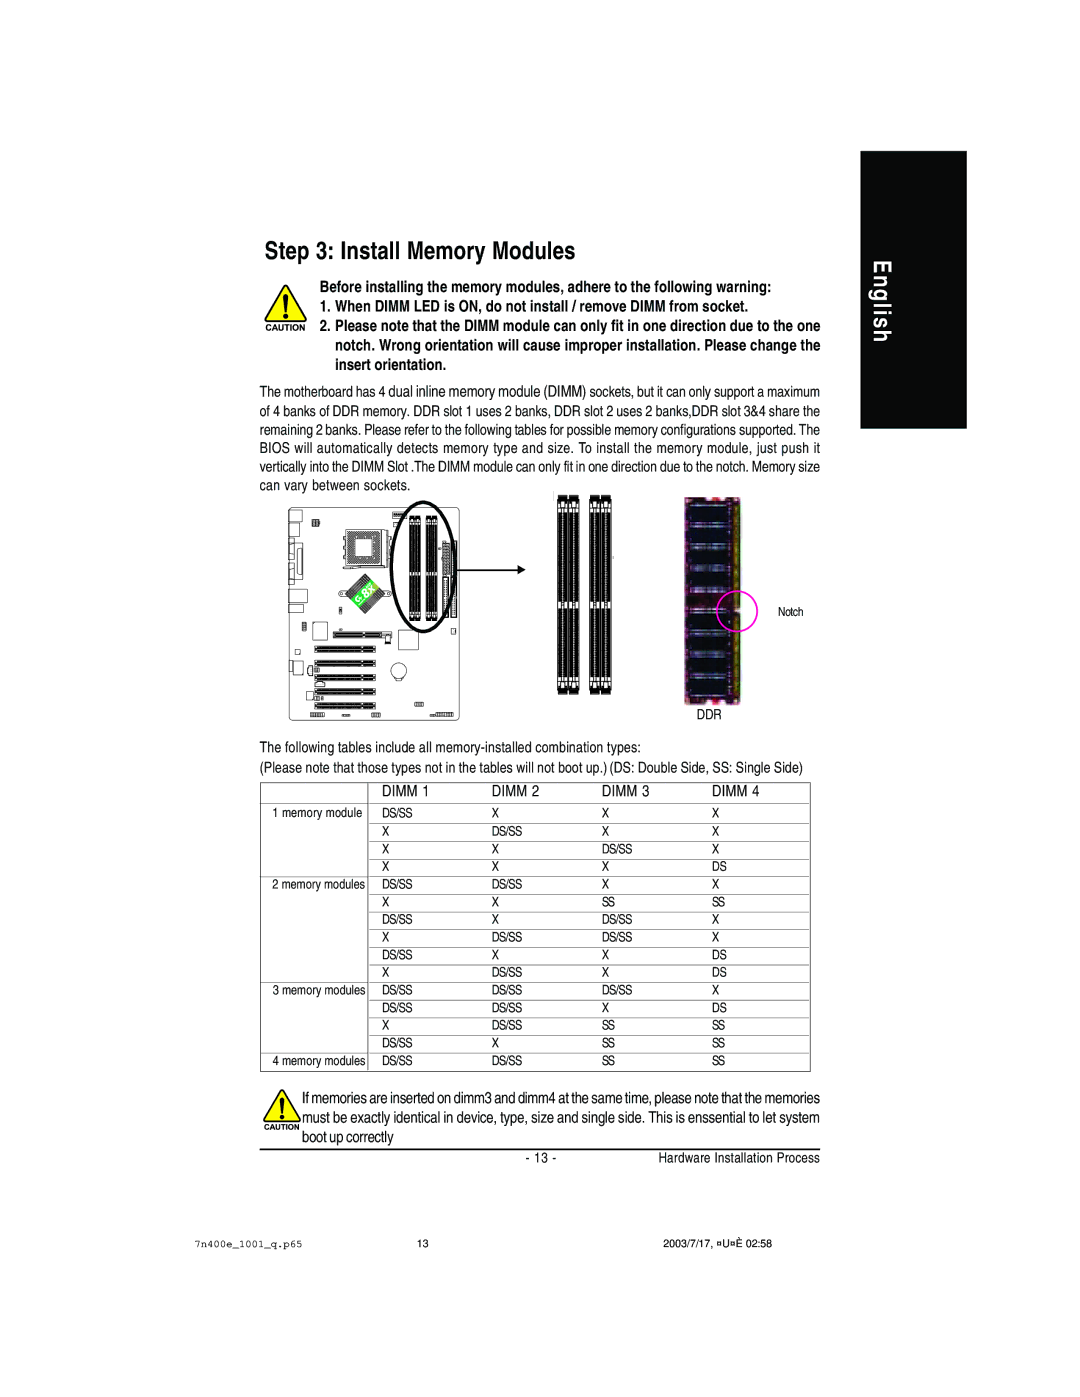
Step 3: Install Memory Modules
Before installing the memory modules, adhere to the following warning:
1. When DIMM LED is ON, do not install / remove DIMM from socket.
2. Please note that the DIMM module can only fit in one direction due to the one notch. Wrong orientation will cause improper installation. Please change the insert orientation.
The motherboard has 4 dual inline memory module (DIMM) sockets, but it can only support a maximum of 4 banks of DDR memory. DDR slot 1 uses 2 banks, DDR slot 2 uses 2 banks,DDR slot 3&4 share the remaining 2 banks. Please refer to the following tables for possible memory configurations supported. The BIOS will automatically detects memory type and size. To install the memory module, just push it vertically into the DIMM Slot .The DIMM module can only fit in one direction due to the notch. Memory size can vary between sockets.
English
Notch
DDR
The following tables include all
(Please note that those types not in the tables will not boot up.) (DS: Double Side, SS: Single Side)
| DIMM 1 | DIMM 2 | DIMM 3 | DIMM 4 |
1 memory module | DS/SS | X | X | X |
|
|
|
|
|
| X | DS/SS | X | X |
|
|
|
|
|
| X | X | DS/SS | X |
|
|
|
|
|
| X | X | X | DS |
2 memory modules | DS/SS | DS/SS | X | X |
|
|
|
|
|
| X | X | SS | SS |
|
|
|
|
|
| DS/SS | X | DS/SS | X |
| X | DS/SS | DS/SS | X |
|
|
|
|
|
| DS/SS | X | X | DS |
|
|
|
|
|
| X | DS/SS | X | DS |
3 memory modules | DS/SS | DS/SS | DS/SS | X |
|
|
|
|
|
| DS/SS | DS/SS | X | DS |
|
|
|
|
|
| X | DS/SS | SS | SS |
| DS/SS | X | SS | SS |
|
|
|
|
|
4 memory modules | DS/SS | DS/SS | SS | SS |
|
|
|
|
|
If memories are inserted on dimm3 and dimm4 at the same time, please note that the memories must be exactly identical in device, type, size and single side. This is enssential to let system boot up correctly
- 13 - | Hardware Installation Process |
7n400e_1001_q.p65 | 13 | 2003/7/17, ¤U¤È 02:58 |
