Connections
Battery Connections
Charging the Battery
•Attach the supplied battery pack to the back of the portable DVD player.
•Plug the supplied AC adapter into a standard power outlet, and then connect it to the DC IN 12V jack on the left side of the player.
•Turn off the player. The battery pack will NOT charge while the portable DVD player is powered on.
•The red “Batt Chrg.” light will glow while the battery pack is charging and will turn green when fully charged. Allow several hours to charge the battery pack.
•When fully charged the battery will last ~2.5 hours.
Removing the Battery
•Press the PUSH button to remove the battery pack.
CAUTION
• Use specifi ed charger only.
•May explode if battery is incorrectly replaced or disposed of in fi re.
•Do not short circuit.
•Danger of explosion if battery is incorrectly replaced. Replace only with the same or equivalent type.
•Do not place the battery pack under direct sunlight or in excessively hot places (over 60°C (140°F)) such as the dashboard of cars.
•Only use with the specifi c power adapter by manufacturer.
•The battery pack will not charge while the DVD player is turned on.
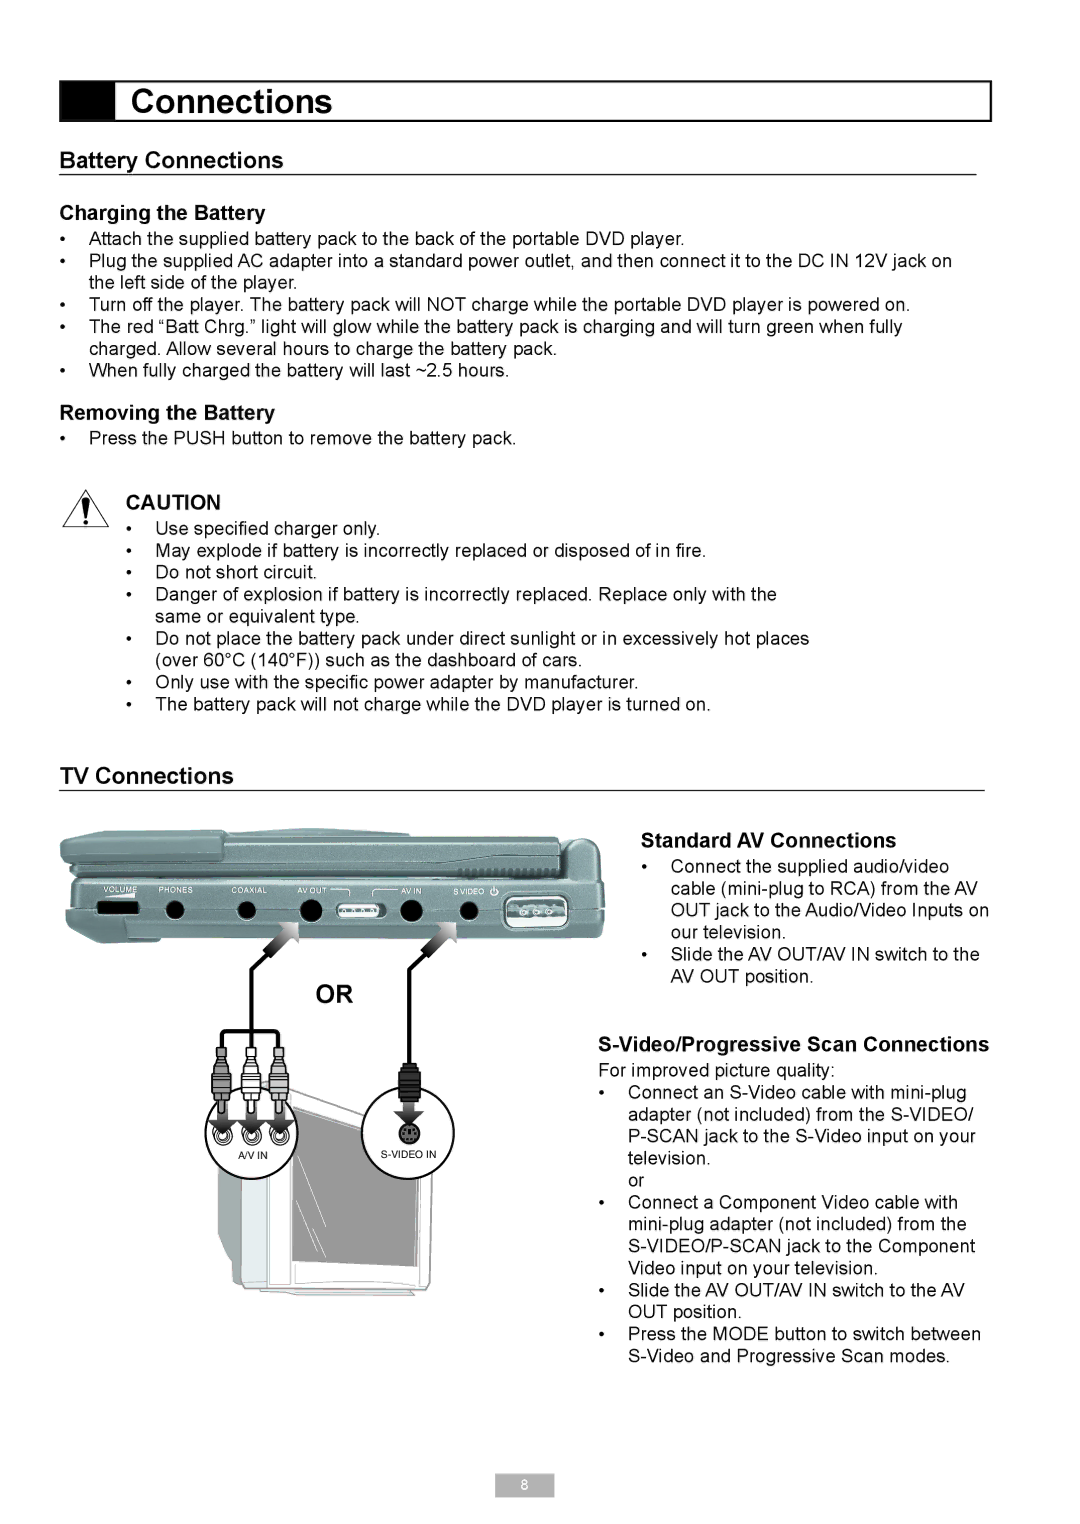
TV Connections
OR
����������������
Standard AV Connections
•Connect the supplied audio/video cable
•Slide the AV OUT/AV IN switch to the AV OUT position.
S-Video/Progressive Scan Connections
For improved picture quality:
•Connect an
or
•Connect a Component Video cable with
•Slide the AV OUT/AV IN switch to the AV OUT position.
•Press the MODE button to switch between
8