Installation
Check Fluid Viscosity
To check fluid viscosity you will need:
•a viscosity cup
•a stopwatch.
1. | Completely submerge the viscosity cup in the fluid. |
| Lift the cup out quickly, starting the stopwatch as |
| soon as the cup is completely removed. |
2. | Watch the stream of fluid coming from the bottom of |
| the cup. As soon as there is a break in the stream, |
| shut off the stopwatch. |
4. Fully open atomizing air restrictor valve.
ti1272a
5. Check that ES ON/OFF switch is OFF (O).
![]() LO ES MAX AIR
LO ES MAX AIR
WPR: 100 PSI
NOTE: This illustration
(7bar, 0.7 Mpa)
3. Record the fluid type, elapsed time, and size of the |
viscosity cup. |
shows the switch in the ON (I) position to view I and O indicators.
I ES O
4. If the viscosity is too high or too low, contact the |
material supplier. Adjust as necessary. |
Prepare to Paint
1. Position air cap.
2. Fully open fan air adjustment valve.
To avoid shock or explosion •Use properly grounded air hose •Read instruction manual
I ES O
3. Fully open fluid adjustment valve.
To avoid shock or explosion •Use properly grounded air hose •Read instruction manual
I ES O
ti12723
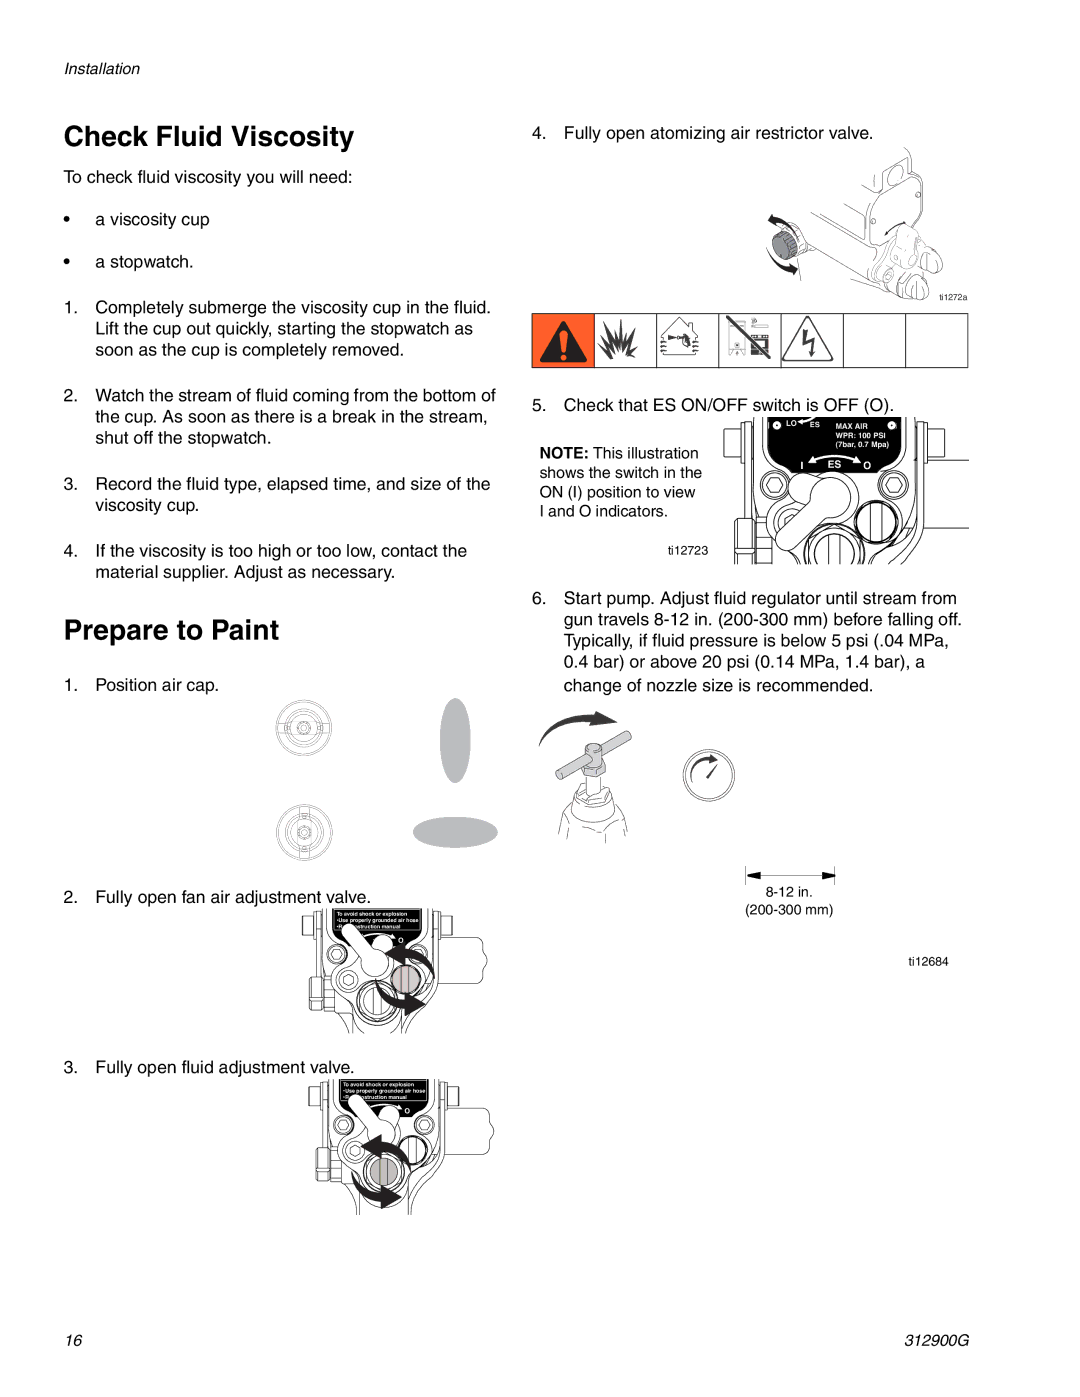
6.Start pump. Adjust fluid regulator until stream from gun travels
change of nozzle size is recommended.
ti12684
16 | 312900G |