253697, 307932R, 245185, 245186, 245187 specifications
Graco is a well-respected name in the realm of spray equipment, providing a multitude of solutions designed to meet the needs of both professionals and DIY enthusiasts. Five of their notable products include the Graco 307932R, 245186, 245187, 245185, and 253697. Each product boasts unique features, technologies, and characteristics designed to improve efficiency and deliver exceptional results.The Graco 307932R is renowned for its high-performance capabilities. This model is particularly suitable for large-scale projects, providing reliable power and consistent pressure. Its innovative design includes a robust durability that extends the service life, minimizing downtime. The user-friendly controls enhance precision and make it easy to master, catering to users of varying skill levels.
Next is the Graco 245186, which focuses on versatility. This model is particularly notable for its ability to handle a wide range of coatings. The emphasis on adaptability allows users to switch between different types of substances effortlessly. Additionally, it features a lightweight design that promotes easy maneuverability, making it a favorite among contractors who require transportability without compromising on performance.
Following closely is the Graco 245187. This unit is designed specifically for intricate detail work, featuring advanced spray technology that provides fine atomization. The precision tip allows for a controlled spray pattern, enabling operators to achieve detailed finishes on various projects, from furniture to detailed woodwork.
Another excellent option is the Graco 245185, which prioritizes user comfort and ergonomics. Designed with the operator in mind, it offers features such as a soft grip handle and an adjustable nozzle, allowing for prolonged usage without fatigue. This thoughtful design consideration translates into enhanced efficiency and a better overall user experience.
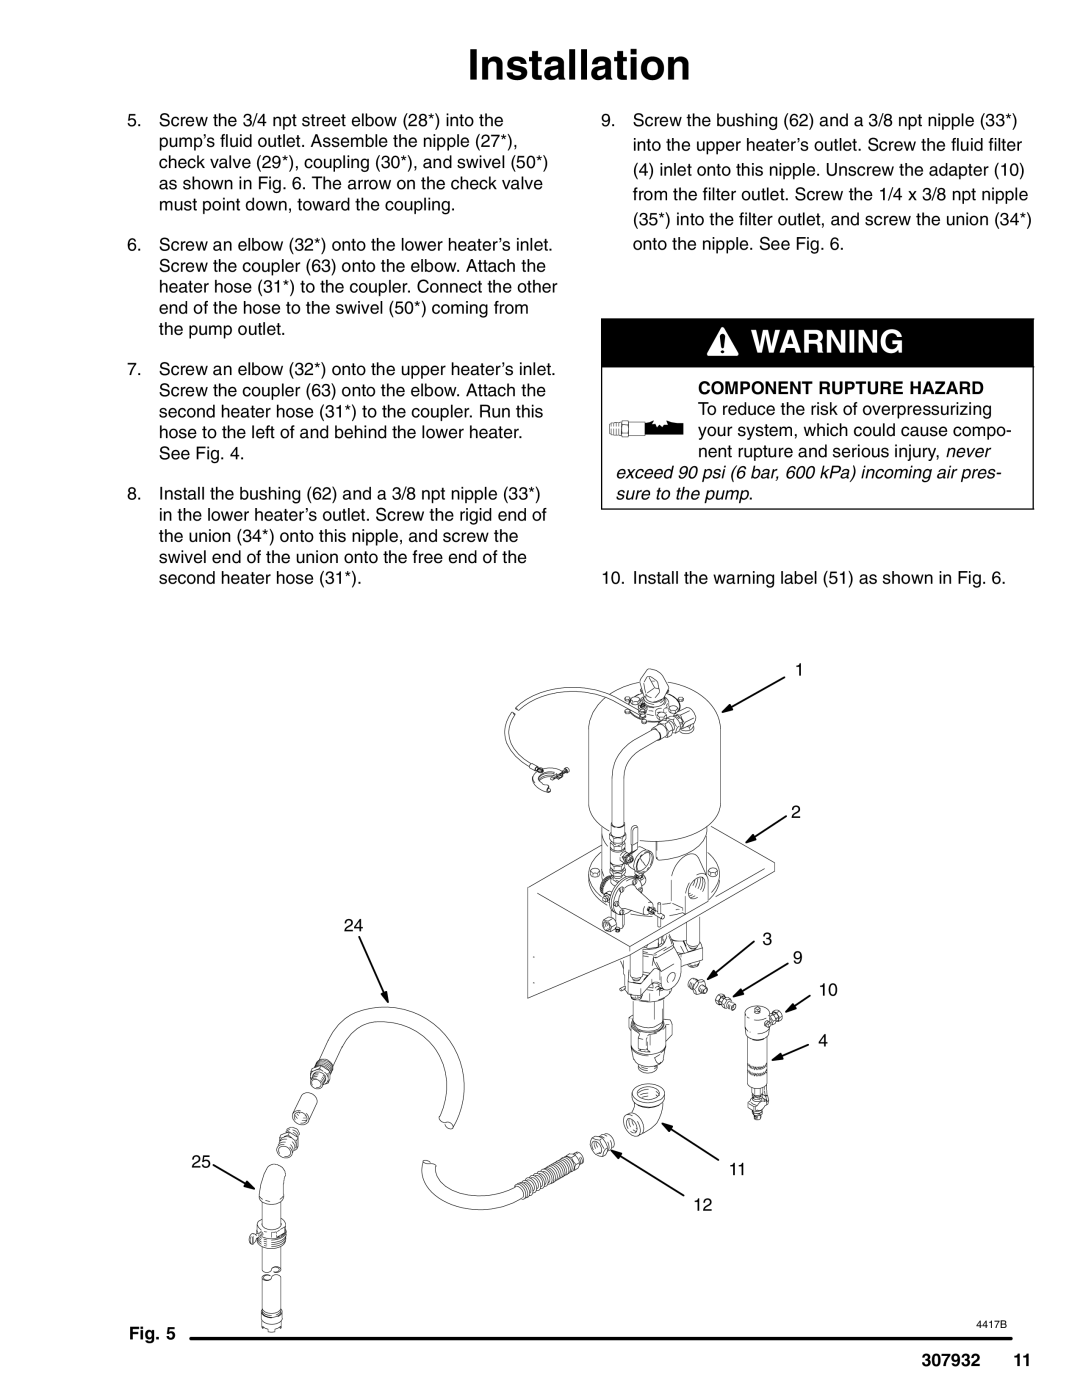
Lastly, the Graco 253697 is geared towards sustainability. This model integrates eco-friendly technologies that reduce overspray and material waste, ensuring a more responsible approach to application. It maintains high performance while being mindful of environmental impact, making it a top choice for those who prioritize green solutions.
In summary, Graco's range of products, including the 307932R, 245186, 245187, 245185, and 253697, showcases innovative technologies and features that cater to a variety of professional needs. From high-performance capabilities to user-centric designs, these models reflect Graco’s commitment to quality and excellence in the spray equipment industry.